How To Install Door Trim With Uneven Walls
When it comes to renovation projects, there are so many variables in play that any one of them could throw a project off balance. This is because most of them require precise measurements and even surfaces to pull off accurately. Sometimes, you’ll have to deal with uneven walls, but what if you’re installing door trim? How do you install door trim with uneven walls?
When replacing or installing trim on a door, there is a chance that the walls could be uneven. When the walls are uneven, using wood shims between the trim and the drywall is the surest bet. This can be a complicated process, though. However, it is highly doable and the best solution to the problem of wall unevenness.
In this article, we will walk you through how to install door trim when you’re dealing with an uneven wall problem. We’ll describe the process in steps and go through everything you need to know to do this project the right way.
Do You Need Interior Trim or Decorative Molding Installation?
Get free, zero-commitment quotes from pro contractors near you.

The Door Frame Should Protrude
You might not realize that when the frame of an interior door gets installed, it gets installed against what is known as the wall stud frame. When this happens, the door frame will generally stick out from that stud by around ½ inch or so.
The point of this protrusion is to allow for the drywall (also about ½ inch wide) to be installed and then sit flush to the door frame. But there are instances where that door frame sticks out more than the recommended ½ inch. This means that the trim won’t sit evenly on both the drywall and the door’s frame.
Using Wood Shims
If the walls are uneven, you will use wood shims to fill in those gaps between the trim and the drywall. By doing this, you are essentially creating that even surface that you should have had in the first place.
These wood shims are easily attainable and easy to use. The finished product should be a brand-new door trim and even walls to boot. That will create the aesthetic that you are looking for while providing an extra layer of stability thanks to the shims. However, it is essential to follow this step-by-step process to ensure that the shims have been installed correctly.
What You Will Need
Of course, no job can be done correctly without the right tools on hand. When installing door trim, you will need a handful of items to ensure that the process goes off without a hitch. Thankfully, even if you do not have these items on hand, you can find them at a local hardware store.
You will need to make sure that you have the following tools before proceeding:
- Pencil
- Tape measurer
- Miter box
- Miter saw
- 2-inch finishing nails
- Hammer
- Wood shims
- Hole punch
- Wood filler
The entire process is relatively quick and straightforward so long as caution is used.
Installing Door Trim
The good news is that you can still install your door trim even if the walls have uneven protrusion points. Keep in mind that it is always optimal to have the walls be even, but mistakes will be made when people are involved.
Following this step-by-step process, you will be able to install door trim even your walls are unevenly installed. It is essential to follow this process to avoid any potential issues and get the proper door frame installation that you want.
Step 1: Measure And Cut Carefully
The first step is to measure out and cut the corners of your trim. You will want to do this at 45-degree angles and use a saw and miter box to get the job done. Your angles are essential, so make sure to measure carefully before making any cuts.
Make steady, even cuts as you go. This will ensure that your cuts remain even and don’t fray at any point. When you have finished cutting your angles, make sure that you sand the ends of your cut. This is to remove any unevenness or splinters that may be there following the cut.
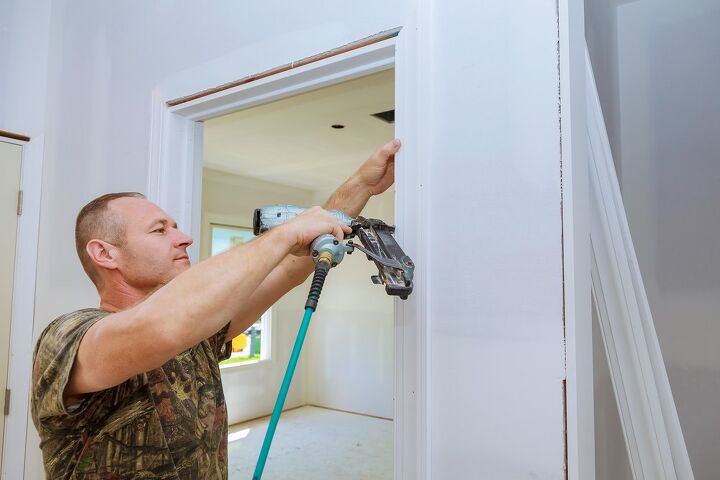
Step 2: Place The Trim Over The Frame
Now it is time to take one side piece of your door trim and position it appropriately. You do this over the drywall and the door frame itself. Push a wooden shim between both, starting at the top end of your door trim.
The shim should be pushed to the point where the door trim is lying parallel with the surface of your drywall. You may need to cut the end of the shim to lay parallel to the trim. From here, you will need a hammer. Use it to knock your 2-inch finish nails through both the trim and the shim all the way into the wall stud frame below.
Step 3: Install A Second Shim
Next, we need to install a second wood shim. This one will go 12 inches below the initial shim. This is to ensure that the door trim will be parallel to the drywall. You will continue installing these shims all the way down the entire length of the door frame. Keep the shims installed around 12 inches from one another and secure the trim. This can be done by finishing nails.
When you have completed one side of the trim, you can then move to the other side and the top piece on the opposite side in the same way that you did the first half. Be sure that you knock your nails until they are just below the trim surface. You can do this using a hole punch and then use a wood filler to fill in the holes.
Step 4: Cut The Excess
When you have applied the trim all the way around the door frame, there is a chance that there will be pieces of shim that will protrude along the edges of the trim. You can use a utility knife to cut them off. This is to make sure that the shims are flush with the edges of the trim.
Do this carefully. The last thing you want to do is install the shim and trim only to cut too much off and replace it. Make patient, accurate cuts whenever possible, and the project should turn out just fine.
Step 5: Apply The Caulk
The last thing that you need to do is apply what is known as paintable caulk to the gaps that will be there between the drywall and trim. Apply the caulk around your two side trim pieces and the top of the trim as well.
Give the caulk the requisite amount of time to dry properly before you attempt to paint. Not giving it enough time means that the paint can seep into the caulk, preventing it from hardening properly. You will then have to scrape away the caulk and start over again.
Using A Clear Caulk
If you decide that you want to use a transparent stain on your wood trim, you will need to do things just slightly different from the caulk. For starters, use a clear caulk instead of the paintable one mentioned above. This ensures that the caulk will not stand out against the clear stain since there will be no painting over it.
You will also want to be careful to ensure that none of the caulk sticks to the trim’s sides. Also, make sure that you only apply the caulk between the drywall and the trim. After you have laid out the caulk, do a quick once over to check for any excess or coverage in areas where there should be none.
Related Questions
How far should a door be from a wall?
A door should not be any closer than about 3″ if it is on a rough framed wall. If it is, you will lose about 1/2 inch for the drywall, and it will leave you with a little more than an inch after you install the jambs and the casing. That’s too close, and it will show up on any corn that is not level. However, 4 inches is a better suggestion.
What do you do when a door jamb sticks to the wall?
If your jamb sticks out past your wall, then you will need to either fill behind the casing, or you will need to nail the jamb side to the wall so that the casing can be pulled tight.
What is an out of plumb wall?
When a wall is out of plumb, it means that it’s not as straight up and down as it should be. For example, if you install a post in the ground, but it’s leaning one way, then it’s ‘out of plumb.” If it’s at a 90-degree angle on all sides compared to the ground, then it’s considered ‘plumb.’
Do You Need Interior Trim or Decorative Molding Installation?
Get free, zero-commitment quotes from pro contractors near you.
Wrapping It Up
When it comes to home renovations or installing door trim, uneven walls can be intimidating. However, there are ways around the unevenness to install the door trim with no problem still. By following the instructions in this guide, you can get around an uneven wall and make your door trim look perfect.

We are a team of passionate homeowners, home improvement pros, and DIY enthusiasts who enjoy sharing home improvement, housekeeping, decorating, and more with other homeowners! Whether you're looking for a step-by-step guide on fixing an appliance or the cost of installing a fence, we've here to help.
More by Upgraded Home Team