How To Hang Cabinet Doors With Exposed Hinges

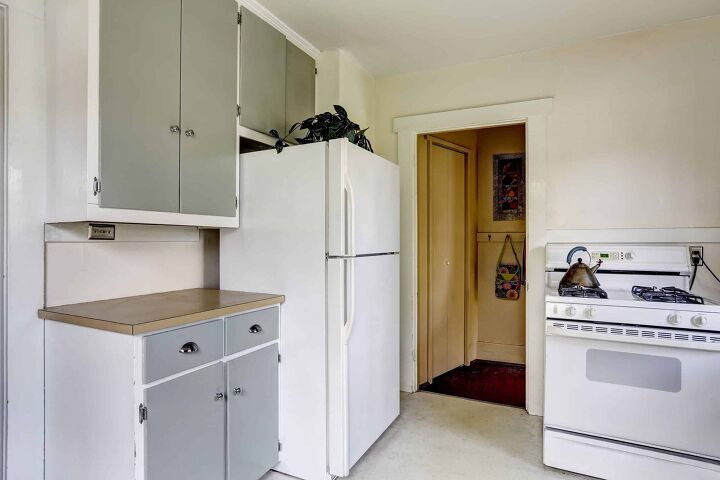
Is your kitchen in need of a face-lift? One of the most impactful ways to change the look of your kitchen is to change your cabinets. Luckily, some of the solutions are less daunting than you think.
Installing cabinet doors with exposed hinges is relatively simple. First, attach the hinges to the door while laying flat, then align it with the frame. Ensure it’s plumb and level, drill pilot holes, and drive in the screws to attach the hinges.
Since cabinets are such a large part of a kitchen, hanging the doors can feel like an overwhelming task! Fortunately, it just takes a few simple steps to get your doors opening and closing smoothly.
Do You Need to Hire Cabinet Installers?
Get free, zero-commitment quotes from pro contractors near you.

Types Of Cabinet Hinges
There are two types of cabinet hinges: exposed and hidden. The names are pretty self-explanatory: when the cabinet is closed, the exposed hinges are visible. Hidden hinges connect the inside of the door to the inside of the cabinet, invisible from the outside.
On typically exposed cabinet hinges, one part mounts to the inside of the cabinet door. The other part mounts to the outside of the cabinet where the door and cabinet meet. The installation process is almost identical for both types of hinges, so choose one based on your preference.
Another hinge feature you might see is a soft-close door. Soft-close doors and drawers prevent cabinets from slamming when closed forcefully.
This style of door is great for kids and angry spouses. They’re a high-end finish that’s now an essential part of any designer kitchen.
Making A Change
Many people choose to change out old hinges on cabinets. Usually, you might want to match the finish of other cabinet hardware (like doorknobs and drawer pulls). Or, maybe you’re changing the door altogether, or the old hinges have failed.
If you are replacing old, existing hinges, this process will be a step or two easier. If the hinges are the same size, you can likely use the same holes for new screws.
Tools And Materials
Level
A one-foot level (also known as a torpedo level) is sufficient for hanging single cabinet doors. For double cabinet doors, a longer level (2-3 feet long) will help to ensure levelness and symmetry throughout.
Plumb Bob
A plumb bob is a fancy name for a weight on a string. It helps you find a perfect vertical. Who knew gravity was a tool in your toolbox, too?
If you don’t have an “official” plumb bob, you can fake it. All you need to do is attach something small and heavy to a piece of sturdy string.
Pencil
You’ll need to mark where cabinet doors will sit and where to drill pilot holes for screws. Pencils are strongly recommended over pens or markers just in case you make a mistake. Nothing would ruin your pretty new cabinets like an errant Sharpie mark!
Drill
A cordless drill is sufficient and has plenty of power for this project. You’ll need this drill for both the pilot holes and the screws.
Screwdriver
If your door and cabinet already have pilot holes drilled, you can use a manual screwdriver instead of a drill. Pick a Phillips or flathead based on what type of screw you’re using.
Drill Bits
You’ll need two kinds of bits: one for making pilot holes and one to sink the screws. The pilot hole should generally be 1/16 less than the size of the screw. A Phillips head drill bit (shaped like an x) is most likely what you’ll need for the screws.
Hinges
Obviously, you can’t do this project without them! Pick some nice ones.
A Buddy
While it’s possible to do this project solo, having a buddy on hand to hold the door level while you drill (or vice versa) is really helpful.
Ladder
Necessary for those hard-to-reach upper cabinets. It’s much easier to drill straight when you’re at eye level.
Instructions
Step 1: Align the door with the frame
Make sure your doors are the right size. Hold them up to the cabinet opening and make sure they overhang the cabinet opening by about half an inch. Double doors should split the center exactly in the middle of the opening.
Step 2: Attach the hinges to the door
Lay the cabinet door face-down on a flat surface that won’t scratch it. Attach the hinge to the inside of the door. Position the hinge either in place of the old hinges or in a new location.
If you have two hinges, one should be an inch or two from the top. The remaining hinge should be an inch or two from the bottom. Based on your cabinet size, these measurements will vary.
With three hinges, one should be precisely in the middle. Don’t forget to factor in how much the door overhangs the opening. You don’t want to put your hinges at the very top of the door.
Pre-drill your pilot holes. Using the drill bit, make a pilot hole into the wood where the screw will go. This prevents the wood from splitting, especially if it’s thin or close to the edge. Drive in the screws. Change out the drill bit and use your Phillips head bit, the x that matches the top of your screws. Use the drill to make these screws 95% tight. You want a little wiggle room to adjust later, but not much.
Step 3: Plumb and level the doors
Hold up the doors to the cabinet and check out the alignment. “Plumb” refers to level on a vertical axis, while “level” refers to the horizontal axis.
Read the bubble in the middle of the level: if it’s squarely in the center, you’re good to go. If you don’t have a plumb bob, you can also hold the level vertically.
Step 4: Hold up the hinges and mark them with a pencil
While holding everything level, make a small dot in each hole. This dot marks where each screw will attach the hinge to the cabinet frame.
Make sure the hinge has enough room to operate without leaving a gap. Use a buddy for this step: it’s hard to hold and draw at the same time!
Step 5: Attach the door to the cabinet
Pre-drill your pilot holes. Just like above, this is an essential step, so the screws don’t go awry. If you’re installing new hinges where old ones used to be and the holes line up, skip this step.Drive-in your screws. Put one screw in each hinge to hold the door in place while you do the others (especially if you’re working solo). Sink your screws 90% of the way. Leave a little wiggle room for adjustments later.
Step 6: Check the swing
Once all screws are in, open and close the door a few times. Does it swing freely when you want it to open? Does it stay closed once you shut the cabinet?
If you notice any rubbing or the doors seem unlevel, start making small adjustments to the screws’ tightness. Tightening them will pull up or over on that part of the cabinet. Often these tiny adjustments are sufficient and may be maintained over time.
Step 7: Back to the drawing board
If, for some reason, your cabinet doors are not as functional as you’d like, rewind. Walk yourself back through the process step by step and see where things went awry. The chances are good that the plumb or level is a bit askew.
Related Questions
Can you change out kitchen cabinet doors without replacing the whole cabinet?
Yes! In fact, this is one of the best ways to give your kitchen an upgrade at an affordable cost.Major home improvement retailers like Home Depot and Ikea sell cabinet doors. You can choose a new style or cabinet color without the time-consuming and costly work of replacing the base cabinets. The skeleton of the kitchen remains the same, but gets a face-lift!
What size screws are best for installing cabinet doors?
Screw sizes feature two measurements: a number with a pound sign (#4, for example) and a measurement (like 2.5”). The first number references the girth and head size of the screw, while the second number indicates the length.Cabinet screws can be anywhere from a #5 to a #7, with #6 being the most common. Since the screws are going into relatively thin doors, a ¾” length screw is usually sufficient. Just make sure you measure the depth of your door first. Pick a screw length at least ¼” smaller than the door’s depth.
Do You Need to Hire Cabinet Installers?
Get free, zero-commitment quotes from pro contractors near you.

In The Swing Of Things
While kitchen renovation projects can seem daunting, starting with small projects can have a significant aesthetic pay-off. After you master one hardware swap, what’s stopping you from changing out the rest? Happy remodeling!
Related Guides

Stacy Randall is a wife, mother, and freelance writer from NOLA that has always had a love for DIY projects, home organization, and making spaces beautiful. Together with her husband, she has been spending the last several years lovingly renovating her grandparent's former home, making it their own and learning a lot about life along the way.
More by Stacy Randall


![How Much Weight Can a 4×4 Support Horizontally? [It Depends!]](https://cdn-fastly.upgradedhome.com/media/2023/07/31/9070333/how-much-weight-can-a-44-support-horizontally-it-depends.jpg?size=350x220)


