Sanded Vs. Unsanded Caulk: Which One to Use in Your Tiling Job?
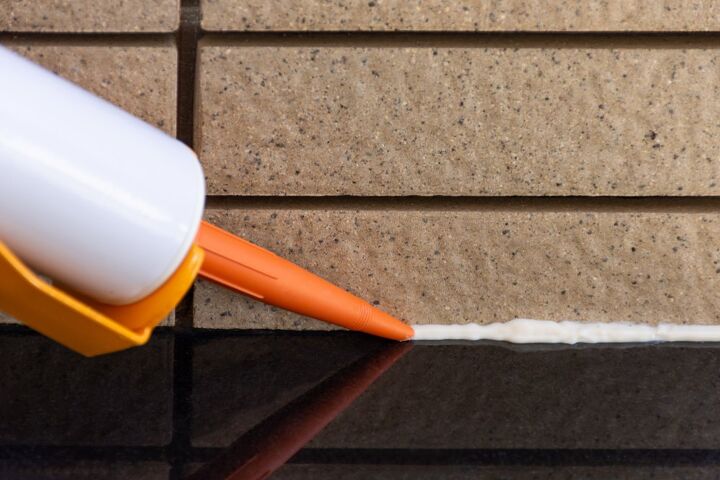
One of the biggest debates among flooring specialists is to decide between using a sanded caulk or unsanded caulk. Sanded Caulk vs. unsanded caulk is one of the most significant decisions you will have to go through once you start working on your next home improvement project. So, how do you know which one to use in your tiling job?
The main difference between sanded and unsanded caulk is that the latter is best for soft stones, smooth tiles, and vertical installations, while sanded caulk is best for flooring and high-traffic areas. Unsanded is also best for joints smaller than 1/8”. Sanded caulk tends to be more durable but harsher than unsanded caulk.
The majority of flooring experts are well acquainted with the distinction between sanded and unsanded caulk. Yet, even individual seasoned contractors, in general, are still uncertain about the variations between the two most popular caulk formulations. So, whether your next project is a residential one or a commercial one, you can easily take advantage of the knowledge from this guide and decide for yourself which one to use.
Sanded vs. Unsanded Caulk
When it comes to choosing between sanded caulk and unsanded caulk, the decision can be challenging. However, for your next tiling job, you need to know all the details. We will cover the pros and cons offered by these forms of caulk and settle the debate of sanded caulk vs. unsanded caulk.
We will also take a look at the following aspects of sanded and unsanded caulk materials:
- Durability and Resistance
- Vertical Adhesiveness
- Consequences
- The Size of Joints
Understanding the difference between the two types of caulk can make or break a project. For instance, if you use unsanded caulk in high traffic areas, it will break down quicker than sanded caulk. This is why it’s vital that you understand the differences and make the correct selection for your specific project.
The Best Durability
In simple terms, sanded caulk is sanded caulk. It’s just a typical caulk material mixed with sand material. Why add the sand to the existing caulk? Well, sand material is known to make the caulk much more durable than the ordinary caulk material. Sand adds more power, resistance, and resilience to the caulk and makes it last longer than before.
On the other hand, the unsanded caulk material comes without any addition of sand. How can sand help with durability? Well, when unsanded caulk material shrinks, it pulls away from the tiles and slowly starts breaking up. Due to the addition of sand, the caulk doesn’t shrink as much as it should and remains adhesive to the tiles. This makes sanded caulk more durable than unsanded caulk.
Providing The Most Resistance
In most interior flooring installs, sanded caulk is the go-to option for the majority of contractors. That is because it can last longer than unsanded caulk, can withstand severe foot movement, and can be easily applied with wider joints. Similarly, sanded caulk prevents scratching, rendering the tiles more robust. Unsanded caulk, however, can be vulnerable to extreme cracking when added to it by heat, rendering it unsuitable for most flooring and tiling jobs.
The next time you are planning to do a home improvement project, and a tiling job, you probably want to find some high-quality sanded caulk for durability and more resistance.
Vertical Adhesiveness
The next thing you need to know is the vertical adhesiveness when discussing sanded caulk vs. unsanded caulk. Whether you have mounted a shower before or installed vertical tiling, chances are, you used unsanded caulk. This product is incredibly rigid because it does not contain any extra sand or mortar-like its counterpart sanded caulk.
You can quickly scatter the unsanded caulk material across a vertical surface, and when you work on it to spread it around the lines, it will stay stuck to the vertical surface. This makes unsanded caulk better than sanded caulk in terms of vertical prowess.
The usage of unsanded caulk for vertical surfaces has a bonus. Working with it is better than with sanded caulk, and you can easily get a full and even distribution over the surface. All you have to do is place the tiles in the right place and apply the unsanded caulk.
Caulk Shrinkage On Vertical Surfaces
While unsanded caulk shrinks faster and more than the sanded caulk, on a vertical surface, this isn’t much of a problem. Tiles are normally laid down reasonably close to one another. This ensures that the shrinkage after the caulk dries and cures does not impact the tile’s longevity on a vertical surface.
Often, longevity is not much of a problem for vertical tiles. Although unsanded caulk is not usually recommended for tiles in a high foot traffic area, it will be sufficient for vertical tiles. Moreover, it won’t break because little to no strain is added to the vertical tiles.
Preventing Damage To The Tiles
The tile material that you are dealing with is another major factor when deciding between sanded caulk vs. unsanded caulk. The hard sand content in sanded caulk is known to harm fragile materials such as:
- Granite
- Marble
- Limestone
- Other tile materials
Sanded caulk acts pretty much like sandpaper. The ingredients that go into the creation of sanded caulk are often harder, more rigid, and coarser than tiles and can end up harming the overall quality and surface of these tiles.
However, if you are going to use soft and smooth tiles, you need to choose unsanded caulk for your project. The majority of flooring contractors use epoxy-based unsanded caulk for tiling projects, and it offers a shiny and polished look for the tiles.
Factoring In The Size Of The Joints
When you want to use sanded caulk with joints smaller than 1/8 of an inch for a tiling job, you will end up facing a lot of serious issues. It would be best to use unsanded caulk on small joints with less than 1/8 of an inch. Unsanded caulk is almost often a safer option for such jobs.
So, if you are thinking about using sanded caulk vs. unsanded caulk, you need to use unsanded caulk for projects with smaller joints for precision. The addition of sand material to make the caulk more durable also refrains you from squeezing it into tight holes less than 1/8th of an inch.
Sanded Caulk In Small Joints Causes A Pinholing Effect
Pinholing is another issue that is induced when using sanded caulk in tiny joints. When using sanded caulk for small joints, contractors will almost often need to use more water in the foundation. This makes it easy to disperse the caulk, but pinholes may also be created by excess moisture.
As sanded caulk absorbs vast quantities of water, pinholes develop and then evaporate over a long time period. The caulk over the now empty air cavity breaks as this occurs, creating a tiny pin-like void. These will destroy the overall look of your tiling project, and you will need to refill these holes in order to avoid any future problems.

What About Silicone?
While the sanded caulk is excellent to help produce a water-tight seal in your bathroom and kitchen, the downfall is that it’s not as flexible. So if you’re trying to seal around particular objects, it may not do the job efficiently. So, if you run into a situation like this, it’s best to purchase some silicone caulk instead.
When choosing silicone caulk, it’s not only great for all the plumbing fixtures in your home but also for weatherproofing your home. You can use it to seal around a variety of fixtures such as:
- Windows
- Tubs
- Toilets
- Sinks
- Doors
- Utility cable entry holes
However, the specialized silicone caulk is a lot more expensive than sanded or unsanded caulk. So, we suggest you don’t purchase this unless you absolutely need it so you can save yourself some money.
Related Questions
Does sanded caulk need to be sealed?
How long does sanded caulk take to cure?
Wrapping It Up
Now that you understand the significant differences between sanded caulk and unsanded caulk, you can make the best possible choice for your tiling job and project. Take a look at the job requirements, area of installation, the amount of foot traffic, and the size of joints. This will help you make a smart choice based on the points mentioned above. Sanded caulk can help with durability, but unsanded caulk can help with soft stones. Choose carefully.

We are a team of passionate homeowners, home improvement pros, and DIY enthusiasts who enjoy sharing home improvement, housekeeping, decorating, and more with other homeowners! Whether you're looking for a step-by-step guide on fixing an appliance or the cost of installing a fence, we've here to help.
More by Upgraded Home Team


![How Much Weight Can a 4×4 Support Horizontally? [It Depends!]](https://cdn-fastly.upgradedhome.com/media/2023/07/31/9070333/how-much-weight-can-a-44-support-horizontally-it-depends.jpg?size=350x220)