How To Fix A Flat Tire On A John Deere Riding Mower

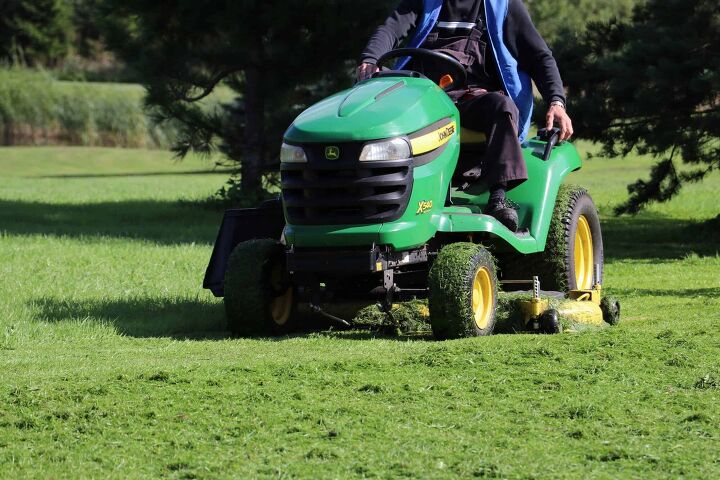
Because you drive your John Deere lawnmower on rough surfaces, its tires can take a lot of wear and abuse. Over time, they may become flat for various reasons, which means you will have to fix them.
To fix a flat tire on a John Deere riding mower, you will want to first identify the problem by taking the wheel off the axle and inspecting it. Depending on the issue, you may need to patch the tire, install an innertube, or replace the whole thing.
Because each of these options requires multiple steps, we’re going to outline them in more detail.
Do You Need a Mower Repair Service?
Get free, zero-commitment quotes from pro contractors near you.

What You’ll Need to Fix a Flat Tire
- Hydraulic Jack
- Needlenose Pliers
- Screwdriver or Pry Bar
- Soapy Water
- Tire Patch Spray (if applicable)
- Innertube (if applicable)
- New Tire (if applicable)
How to Remove a Flat Tire From a John Deere Mower
- Step One: Lift the Mower on a Hydraulic Jack – Be sure to place the jack on a strong part of the chassis.
- Step Two: Remove the Axle Cap – This is a soft rubber piece that protects the axle’s tip.
- Step Three: Remove the Binder Clip – There is a small clip that holds the washers in place. You can remove this with needlenose pliers.
- Step Four: Remove the Washers – There should be a couple of washers between the rim and the axle.
- Step Five: Pull the Tire Off – There are no bolts or other fasteners, so the wheel should come off easily.
How to Inspect a Tire for Damage
Usually, the cause of a flat tire is a puncture. However, if your mower is old, the rubber could be cracked, leading to slow leaks. The first step is to fill the tire with air. Then, visually inspect the rubber for any damage. Be thorough, as there could be multiple leak points, not just one.
If you can’t spot any issues, the next step is to cover the tire with soapy water. Doing this will allow you to see where air bubbles are forming. Again, be thorough when doing your inspection, and check the sidewalls, the bead, and the tread.
Depending on the extent of the damage, you have several options to fix the tire; patch it, install an innertube, or replace it. Here is a breakdown of each method.
How to Patch a John Deere Tire
If the leak is inside the tread, you can patch it. Because this wheel is tubeless, you can spray a tire sealant inside using the valve stem, following these steps.
- Step One: Determine How Much Sealant to Use – This product will tell you the proper amount based on the tire’s size. There should be a chart on the side of the bottle.
- Step Two: Remove the Valve Stem Core – There is a tool you can use to take this piece out. Make sure that it is at the five o’clock position so that the sealant will go inside the wheel more easily.
- Step Three: Attach the Sealant to the Valve – There should be a tube that connects the nozzle to the stem.
- Step Four: Inject the Sealant – Squeeze the bottle until there is enough inside the tire. Wipe off any excess from the stem.
- Step Five: Reinstall the Valve Stem Core – Make sure that it is secure.
- Step Six: Inflate the Tire – Don’t exceed the recommended maximum air pressure for the tire.
- Step Seven: Drive the Mower – You will need to drive for about five minutes to ensure that the sealant gets spread evenly throughout the tire.
How to Install an Innertube in a John Deere Tire
Because these are tubeless tires, one way to extend their lifespan is to install an innertube. Doing this will allow you to drive on the wheel, even if there are cracks in the rubber. Be sure to select a tube size that fits your tire. If there isn’t a precise match, opt for one that is a little smaller.
- Step One: Remove the Old Valve Stem – You can simply cut this off with a razor or knife.
- Step Two: Break the Bead – The easiest way to do this is with a screwdriver or pry bar. Stand on the sides of the rubber and wedge the tip between the rubber and the rim. You will have to do this on both sides.
- Step Three: Remove the Rubber – A simple method for doing this is to place the tire over a metal rod inside a bench vise. Then, wedge two pry bars on either side of the rod. Pull them together like a pair of scissors, and the rubber should pop off quickly. Lubricate the beads with soapy water to make it even easier.
- Step Four: Install the Tube – Place the tube inside the rubber and wrap it around the rim. Make sure that the new valve stem is oriented correctly so that it sticks out of the hole. We recommend placing a washer or something similar over the stem and then attaching the cap. Doing this will prevent it from sucking back into the tire.
- Step Five: Secure the Rubber Around the Rim – You can use your bench vise set up to get better leverage. Start from the back and work your way forward.
- Step Six: Inflate the Tube – Use needlenose pliers to hold the stem while inflating it with an air compressor. Otherwise, the valve will disappear into the tire, and you’ll have to start all over. As the air pressure increases, it will snap the beads into place.
How to Replace a John Deer Lawnmower Tire
If a patch or innertube doesn’t work, you will have to replace the whole thing. Since this wheel is tubeless, you can keep the original rim. Follow these steps to install a new tire.
- Step One: Break the Bead – You can use the method we mentioned in the previous section.
- Step Two: Remove the Rubber – It helps if you lubricate the beads before doing this.
- Step Three: Place the New Tire on a Flat Surface – Be sure to lubricate the new beads as well.
- Step Four: Insert the Rim – Start on one side and work your way around. Make sure that the rim is secure on both sides.
- Step Five: Attach Ratchet Straps – Wrap one or two around the tread. Doing this will prevent the tire from bowing out too much and detaching from the rim.
- Step Six: Inflate the Tire – Fill the rubber about halfway and then remove the straps. Then you can fill it the rest of the way.
- Step Seven: Reattach the Tire – Mount it to the axle, and you should be ready to go.
Tips and Tricks for Fixing a Flat Tire
Here are some ways to ensure that your project runs smoothly.
- Inspect All Tires – If the source of the problem is wear and tear, chances are that other tires will be damaged as well. If you’re going to fix one, you might as well patch or replace the others too.
- Find the Best Method to Break the Bead – While a screwdriver is a simple option, it’s not the only one. You can find out other ways to break the bead here.
- Avoid Damaging the Rim – If the rim gets bent, it can be difficult to repair. In some cases, you might have to replace the whole wheel.
- Wear Gloves – Gloves will not only keep your hands clean, but they can protect against potential hazards, such as gouging yourself with a screwdriver by accident.
Do You Need a Mower Repair Service?
Get free, zero-commitment quotes from pro contractors near you.

Related Questions
Should I replace all of my lawnmower tires at the same time?
It depends on how old they are. If your wheels are relatively new, then they should be fine. However, if they’re more than five or six years old, it might be time to replace them all.
Do I have to use John Deere tires?
We always recommend using original parts when doing any kind of repairs. However, since tires are mostly identical, you can probably get away with an OEM model. Just make sure that it has the same dimensions as the old tire.

We are a team of passionate homeowners, home improvement pros, and DIY enthusiasts who enjoy sharing home improvement, housekeeping, decorating, and more with other homeowners! Whether you're looking for a step-by-step guide on fixing an appliance or the cost of installing a fence, we've here to help.
More by Upgraded Home Team





![10 Best Cordless Leaf Blowers – [2022 Reviews & Ultimate Guide]](https://cdn-fastly.upgradedhome.com/media/2023/07/31/9070789/10-best-cordless-leaf-blowers-2022-reviews-ultimate-guide.jpg?size=350x220)


![Standard Dining Room Table Dimensions [for 4, 6, 8, 10 and 12 People]](https://cdn-fastly.upgradedhome.com/media/2023/07/31/9074335/standard-dining-room-table-dimensions-for-4-6-8-10-and-12-people.jpg?size=350x220)


