How To Connect Two Faucet Supply Lines

Faucet supply lines are often composed of a single line from your wall supply to your faucet. These lines are composed of several possible materials, and there are several ways to join them. Sometimes, you may find a single line is a wrong length or shape, and you need a second line. So, which method should you choose?
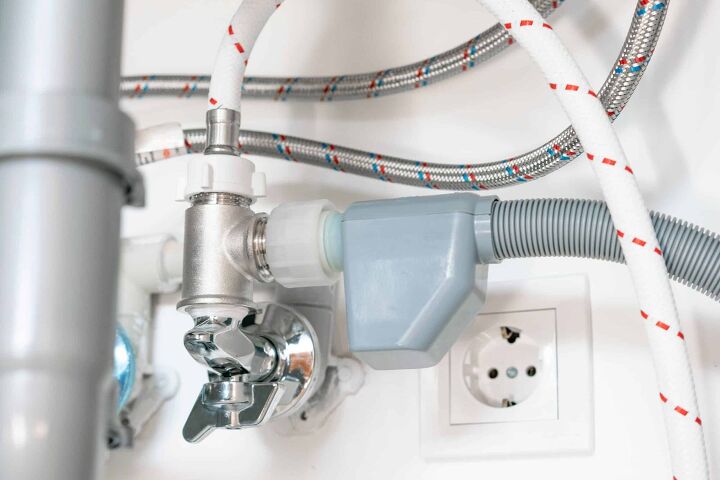
The easiest way for a homeowner to join two lines together themselves is a compression fitting. Simply measure the pipe to buy a matching fitting. The process of joining them together is often as easy as insert and twist. However, you will want to read your manufacturer’s instructions when you purchase them beforehand.
In this article, we will walk you through the right way to connect two faucet supply lines. We will also talk about compression fittings, the advantages of these, as well as how to solder a pipe. That way, you have all the information you need in one place to be able to finish your project.
Do You Need to Hire a Plumber?
Get free, zero-commitment quotes from pro contractors near you.

Compression Fittings
You attach supply lines to a Faucet using compression fittings. There are three types of compression fittings:
- Standard Fittings: These fittings are the most common type used for connecting a faucet. You will not need to modify this fitting.
- Flare Fittings: This type of fitting works well for gas and high-pressure lines. However, you would need to modify this fitting with a unique tool.
- Push-in Fittings: Push-in fitting are installed at the end of the pipe. Sometimes this fitting must be inserted into the pipe itself. But, this is unnecessary for some fittings and some pipes, such as copper pipes.
After finishing this step, if necessary, you install an exterior compression fitting. Then, it is simply pushed on by hand and twisted if necessary. This means you won’t need any other tools aside from your hand and the materials for the job!
Advantages Of Compression Fittings
Compression fittings are the simplest way to connect pipes, and here are some advantages to using them:
- Periodic maintenance. Compression fittings work well in situations where periodic maintenance is required.
- Moist pipes. They also work well where moist pipes prevent soldering.
- Easy to install. The fittings are simple to install with directions that are easy to find and follow.
Disadvantages Of Compression Fittings
Compression fittings are not always the best choice. Here are some disadvantages:
- Not durable or heat-resistant. Compression fittings are not as durable or heat resistant as soldering.
- Not resistant to stress. They are not very resistant to stress.
- Stationary. The fittings must be placed in a stationary position where they will not suffer frequent movement.
- Leaks. They suffer leaks far more quickly than adequately applied soldering.
- Must be careful. Compression fittings must be applied just as carefully as soldering.
Soldering A Pipe
Compression lines are great, but sometimes you have pipes such as radiator supply lines that need to be soldered.
If this is the case, here is the correct way to do it:
- Wear safety gear. Wear heat resistant gloves and goggles. Due to the fact that the pipes you are about to solder are going to be very hot, you want to protect your skin and eyes from this. If you don’t, you could sustain pretty significant injuries.
- Check the fitting. Make sure your fittings fit snugly around your new piping. If you reuse old fittings, measure the interior diameter to make sure you get the correct pipe. If not, you will need to take a quick trip to the store to make sure you have the correct materials to finish this job successfully.
- Sand the area to be soldered. Use sandpaper or emery cloth to prepare the end of the pipe you are going to solder. After this, use a tight-fitting wire brush to prepare the inside of the fitting.
- Brush both sides with flux. Then, thoroughly brush both the exterior of the pipe and the interior of the fitting with flux. If it is a supply line, use lead-free. Next, cover both the parts being soldered thoroughly, but don’t leave it dripping. A paintbrush can help with this.
- Place the pipe in the fitting. Make sure it fits snugly and is shoved into the depth you want it. Typically, you can go until it stops or connects two pipes, and you need to leave the room place it halfway through the fitting.
- Light your torch. A disposable lighter is okay to light with. Next, for the torch’s fuel source, propane such as for camping is okay, so is Map. Map burns at a higher temperature, but either can work for this, and propane is easy to find.
- Heat the metal. Starting at the bottom, you will need to heat the metal. Notably, you do this, so the heat rises to the top.
- Apply the soldering. While still maintaining heat apply a bead of solder along the joint created by the pipe and fitting. Then, watch the capillary action draw the solder into the crack.
- Work your way around the pipe. Make sure your bead is drawn into the crack around the entire pipe. Then, watch for cracks forming as it cools.
- Wait for the pipe to cool down. If after returning water there is a leak, you will need to re-solder.
Installing Sink Supply Lines
The most common type of plumbing assembly to do yourself is installing a sink faucet. To do this, you are going to have to install the sinks supply lines to do this; follow these steps:
- Turn off the water. If you haven’t already, turn your water supply off. Wear proper safety gear, including gloves and goggles. Namely, because you may have to interact with hot water and sharp pipe edges, so safety first.
- Drain your lines. Often turning off your water can be done to the faucet with a hot and cold stop valve underneath the sink. After doing this, turn your faucet on to drain the lines. This will encourage every drop of water to exit your pipes so that you don’t make a mess in the process.
- Identify your supply lines. Typically, the hot water will come from the left and cold from the right.
- Don’t remove your water hammer arrestor. If there is a water hammer arrestor from a previous install, do not remove it, or you may have to install another. The next step depends on what kind of line you have.
- For flexible lines: Install your faucet and wrap the threaded end in four layers of Teflon Tape. Screw the threaded end and use a compression fitting to connect it to the wall’s supply line.
- Rigid plastic and metal lines: These lines are connected using compression fittings. Just position and bend the pipes as needed to line them up. Insert the push fittings for plastic lines and connect with the compression fittings.
Different Types Of Water Supply Lines
Flexible Copper Supply Tubes
These supply lines consist of soft copper, which you can adjust slightly. These pipes can be used for hot or cold water. However, be careful to cut the lines to make them fit rather than twisting them. Copper tubing is easily damaged and, once damaged, will restrict water flow.
Braided Nylon Flex Tubes
These tubes are fabricated of a solid PVC core covered by braided nylon and purchasable in many different lengths. Furthermore, they are very flexible and can be looped, making them quite convenient. These pipes can be used for hot or cold water; however, check for damage when using these pipes for hot water.
PVC Flex Tubes
This type of line comprises an inner core of PVC and an outer core of PVC covered with braided-nylon. They can be used for hot or cold water and are flexible and very inexpensive. However, these tubes do not hold up well when exposed to sunlight.
Stainless Steel Braided Flexible Tubes
These tubes consist of a PVC inner core covered by braided stainless steel. They are flexible and very durable. Additionally, though expensive, the pipes look good, thus working well in exposed areas.
Related Questions
How tight should I make threaded fittings?
First, you should hand-tighten the threads and then tighten the fitting 1/3 to 1/2 turn more with a wrench. This will ensure that it’s stuck on the way that it should be.
Do supply lines work both ways?
The supply routes do indeed work both ways; however, you only need one settler in order to connect two settlements. If you have a supply route that is not broken, then it doesn’t matter how many settlements the line runs through.
How long do braided supply lines last?
Every ten years, your braided supply lines may need to be replaced by a qualified plumber. You should also make sure you check for signs of wear and tear, such as fraying metal or corrosion, at least twice a year, as they may need to be replaced beforehand.
Do You Need to Hire a Plumber?
Get free, zero-commitment quotes from pro contractors near you.
Our Takeaway
Connecting two faucet supply lines is a relatively simple task as long as you take the correct measurements and use the right equipment for the job. You will need to know how to solder a pipe, which we included the instructions for. However, if you’re not comfortable doing this, it may be a good idea to hire a professional or ask for help from a friend.
I am a writer who enjoys working on home improvement projects. My husband was in the navy, so we moved frequently. This gave me many opportunities to fix up new places. In my spare time, I enjoy reading mysteries and hiking.
More by Lisa Borga


![The 5 Best Angle Grinders – [2022 Reviews & Buyer's Guide]](https://cdn-fastly.upgradedhome.com/media/2023/07/31/9071326/the-5-best-angle-grinders-2022-reviews-buyer-s-guide.jpg?size=350x220)