How To Build A Clothesline Out Of Pipe (Quickly & Easily!)
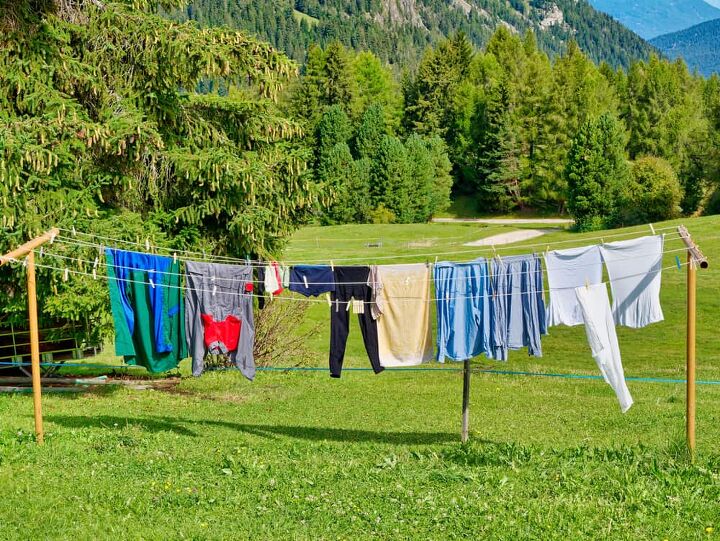
People have been hanging clothes outside to dry ever since they started washing clothing. In fact, hanging clothes out to dry on a clothesline in the sun is a wonderful way to save energy and achieve that fresh laundry scent without all the added chemicals. Not to mention, using a clothesline doesn’t only reduce the need for fossil fuels, it will also save you money, as it costs between 15 and 40 cents to dry a load of laundry.
There are a number of ways that you can install a clothesline. While some simply hang their clothes over a railing on their back porch, others build elaborate contraptions out of pipe. Whether you choose to make a clothesline using metal or PVC pipe, each procedure involves building two poles that the actual clothesline is going to hang from.
We’ll walk you through two different ways to build a clothesline out of pipe, along with providing you with an examination of the benefits and possible drawbacks to using clotheslines to dry your clothing.
Do You Need Handyman Services?
Get free, zero-commitment quotes from pro contractors near you.

How to Build a Clothesline Out of PVC Pipe
Clotheslines made from metal piping can cost quite a bit of money. Whereas, PVC pipe is a fraction of the price and much easier to work with. Crafting a clothesline structure from PVC is a great option for hanging your clothes out to dry on a warm, sunny day.
In fact, the procedure is a relatively simple DIY project that can be completed in a matter of days. Let’s dive into the step-by-step process for building a clothesline using PVC pipe.
Step One: Apply Rubber Cement
Begin by laying out four pieces of PVC pipe that measure 1 ½ feet. They should be positioned horizontally on a completely level surface. Then, adhere rubber cement to one end of each of the PVC pipe pieces. The bead of rubber cement should be roughly 1 inch thick.
Step Two: Connect the T Joints
Then, insert the glued ends of the PVC pipe into the top ends of two T joints. Continue this process until both T joints have two 1 ½-foot PVC pipes attached to them.
Step Three: Create the T-Shaped Pipe Pieces
Grab one piece of 8-foot PVC and apply a ring of rubber cement to one of its’ ends. Then, insert the glued part into the base of the T joint. Repeat this step for the other T joint and 8-foot pipe piece. One complete, you will be left with two T-shaped PVC pipe pieces.
Step Four: Attach Eye Screws
Once you have your T-shaped pieces created, lay them out flat. Starting at the ends of the top of the T structure, measure six inches inwards and mark these spots using a permanent marker. Then, make another mark in the direct center of the T structure. Repeat this for the other T-shaped piece.
You should have six marks in total. Using an electric drill, make holes in each at each of these marks and install one eye screw into each.
Step Five: Dig Holes
At this point, you’ll need to decide where on your property you want to install your clothesline. Once you do, mark two spots for the two posts that are approximately 18 feet apart. Then, dig holes in both of these areas that are 24 inches deep.
Step Six: Install the T Posts
Prep the cement by mixing it in a bucket. When it’s ready, pour it into each hole so that they are about 18 inches filled with cement. Carefully insert one post into each hole, making sure that the eye screws face toward each other.
Once the T posts are in position, fill up the rest of the hole with the concrete mixture. Allow at least 24 hours for the concrete to set properly.
Step Seven: Install the Laundry String
With the posts installed in the ground, it’s time to attach the laundry string you will hang your clothes from. For best results, use a high-quality cotton or poly rope for your clothesline. Avoid using any wire type rope that is wrapped in a plastic coating.
Starting at the outside end of one of the T posts, tightly tie the laundry string to the eye screw. Then, loop the string to another eye screw directly across from it. Continue by looping it over the adjacent center eye screw so that it displays an L-shape.
Extend the string across to the other T post on the opposite side, to the center hole. Loop it on the second center eye screw, then again through the adjacent remaining eye screw. Finish off by pulling the laundry string back over to the opposite T post. Pull as tightly as possible, securing the end to the last eye screw.
How to Build a Clothesline Out of Metal Pipe
While the process of building a clothesline using PVC pipe is relatively simple, you may find that you have more stability when you use metal piping. For this method, make sure that you first measure off a suitable distance on your property for the install. Then, dig two holes that are about two feet deep, one foot wide, and the appropriate distance apart.
Once those two preparation steps are complete, continue on with constructing the clothesline:
- Construct two T shaped poles using galvanized pipes that are at least 2 inches thick and 8 inches long. For the cross pipe on top, you’ll want to use 2 pieces that are about 18 inches long. Combine all three pieces to form a 2-inch galvanized T post.
- You may want to opt for square steel tubing, however, it must be welded, heavy gauge, and galvanized.
- Drill the cross pipe in six evenly spaced locations and place eyebolts with washers and nuts. Alternatively, you can simply tie the clothesline cord to the cross pipe.
- Position the T posts into the holes you dug in the ground. Make sure they are propped upright and plumb before you pour the cement. Also, ensure that the cross pipes are perfectly parallel.
- Once the cement has cured, tie one end of the laundry string to one end of the cross pipe, extend it to the opposite pole and loop the line around that pipe. Then, move the string over about an inch on the cross pipe and wrap it around the horizontal piece. Continue by extending it again to the first clothesline pole and repeat this process until you have as many clotheslines as you desire.
Do You Need Handyman Services?
Get free, zero-commitment quotes from pro contractors near you.
Pros and Cons of Installing a Clothesline
Now that you know how to easily construct your own DIY clothesline out of pipe, here are some pros and cons to putting one on your property.
- Pro: Lower Energy Costs. Your clothes dryer can be quite the energy hog. When you eliminate the need for your dryer, you save heat energy, therefore saving you money on energy bills in the process.
- Con: Maintenance. Over time, your clothesline will become worn, damaged, or even rusted from the elements. While this isn’t a huge concern, it can be cumbersome to have to replace the structure periodically.
- Pro: Carbon Footprint. Installing a clothesline is an excellent way to reduce your impact on the environment.
- Con: Leasing Agreements. If you’re renting, you may find that your lease is incredibly restrictive and does not permit you to install a clothesline on the property. This is typically the case for buildings that are more upscale or located in prominent areas of the city. Always check your lease agreement before you consider installing a clothesline.
- Pro: Backup Option. A clothesline can really come in handy during situations where your dryer is having issues, or even if your power goes out.
- Con: Aesthetics. If your leasing contract does allow clotheslines, they may be considered controversial in some communities due to their appearance. Many believe that the make the area appear disorganized. Consider talking to others in your household or even your community before you install a clothesline.
Like anything, there are some drawbacks to installing a clothesline on your property. However, the fact that they can reduce your energy costs, lower your carbon footprint, and can be a helpful backup in certain situations makes them very desirable. Not to mention, building one out of pipe is easy and cost-effective for the average DIYer.

Jessica considers herself a home improvement and design enthusiast. She grew up surrounded by constant home improvement projects and owes most of what she knows to helping her dad renovate her childhood home. Being a Los Angeles resident, Jessica spends a lot of her time looking for her next DIY project and sharing her love for home design.
More by Jessica Stone


![10 Best Zero Turn Mowers – [2022 Reviews & Ultimate Buyer's Guide]](https://cdn-fastly.upgradedhome.com/media/2023/07/31/9070522/10-best-zero-turn-mowers-2022-reviews-ultimate-buyer-s-guide.jpg?size=350x220)