


Can You Glue New Laminate Over Old Laminate Countertops?
Installing new countertops can be an expensive project. For this reason, many homeowners put off replacing their laminate countertops until it’s absolutely necessary.
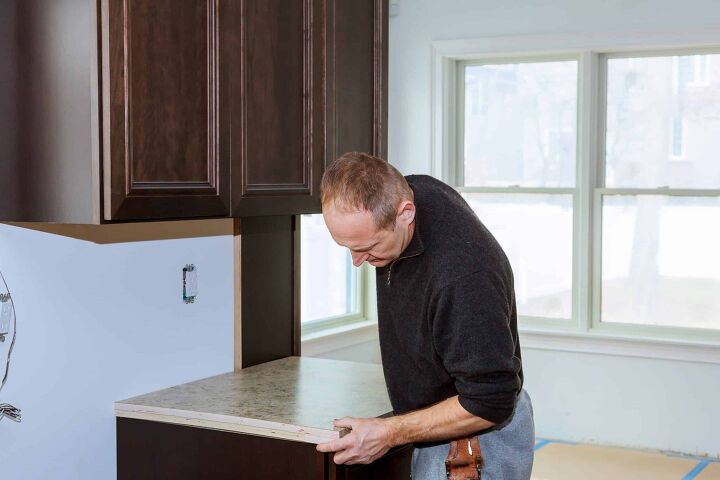
Yes, you can glue new laminate over old laminate countertops, as long as you prepare the space properly. You will need to remove the finish on the old material, and cut the new laminate to fit over the countertops. Then, use contact cement to bond the new surface to the old one.
Do You Need Laminate Countertop Installers?
Get free, zero-commitment quotes from pro contractors near you.

Before Installing New Laminate Over Old Laminate
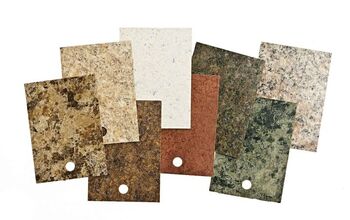
When purchasing your laminate, note how many sections of countertop you have. It’s also better to purchase sheets that are bigger than what you need, rather than having to seam two pieces together.
Materials Needed:
• Laminate sheets
• Belt sander
• Metal file
• Circular saw/jigsaw/utility knife
• Contact Cement
• J-Roller
• Router with a flush-trim bit
• About 10 long, thin strips of scrap wood
• Clamps
How to Glue New Laminate Over Old Laminate Countertops
Step 1: Prepping the Old Laminate
To prep the old laminate, you will need to sand it down to remove the glossy finish. The surface needs to be scratched and rough for the new laminate to adhere to it better. This step will require a fair amount of elbow grease and persistence.
Use a belt sander with coarse sandpaper – 36 grit should do the trick. If you’re having trouble getting the finish off, you can use a metal file to help you finish the job.
Step 2: Cleaning off Debris
Clean off the debris and surface remnants before proceeding.
Step 3: Make Room for the Laminate
Remove the sink and faucet along with any other obstacles.
Step 4: Take Measurements
Measure the countertop and sketch a picture of the shape you’ll need to cut out of the new laminate. Be sure to cut out at least an inch of extra laminate around the whole perimeter. This will be trimmed later.
Step 5: Cut the Laminate
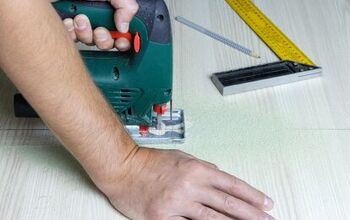
Transfer those dimensions to the new laminate before you start cutting. A circular saw is arguably the best tool to use for cutting laminate countertop. You can also use a jigsaw or a utility knife.
If you’re using a circular saw or a jigsaw, it might be safer to cut from the backside of the laminate. Because most of these blades cut on the upstroke, any chips would occur mostly on the top. It’s also helpful to have another person hold the laminate to keep it stable while you cut.
Step 6: Apply Contact Cement
Using a brush, apply contact cement onto both the countertop surface and the back of the new laminate. Make sure both surfaces are fully covered with an even layer.
Step 7: Let it Dry
Let the adhesive dry for around 5-10 minutes, or until it feels tacky.
Step 8: Put Down Wood Strips
Before you place the new laminate, line some thin strips of wood along the countertop, evenly spaced. They should hang over the edge of the countertop. The new laminate will rest on these temporarily so that you can press down the new material bit by bit. This ensures maximum accuracy and prevents crookedness.
Step 9: Place the Laminate
Place the new laminate on top of the wood strips. Make sure it’s positioned exactly on top of where it will sit permanently.
Step 10: Press the Laminate Down
Start at one end of the laminate, remove the closest wood strip, and press the material down slowly with a J-roller. Continue to work slowly, removing wood strips one at a time as you press down until you’ve reached the end.
Step 11: Trim the Excess Laminate
Now that the new laminate has been attached, next use the router to trim the extra laminate that’s hanging over the edge.
Step 12: Install Edge Strips
Install the edge strips in a similar fashion, minus the wood strips. Apply the contact cement to the old and new surfaces, then let it dry slightly and press down slowly. Next, place clamps on the edges to hold it in place as it dries.
Step 13: Trim the Edges
When the edge strips have completely adhered to the surface, remove the clamps. Afterward, trim the edges with the router.
Step 14: Replace the Sink
Finally, replace the sink and enjoy your beautiful new countertop.
Alternative Method for Removing Old Laminate Finish
Sometimes, even with a belt sander and coarse sandpaper, the old laminate may be stubborn and difficult to remove. Another option is to break down the old contact cement with acetone and remove the old laminate.
Here’s how to do it:
Step 1: Inject Acetone
After removing the sink and other obstacles, use a putty knife to get into any crack you can find. Then inject some acetone into the space and wait for it to work. The acetone should soften the glue within a few minutes.
Step 2: Remove the Old Laminate
Start removing the old laminate with your hands. Use more acetone to break down the adhesive as you go along.
Step 3: Scrape Off Glue
Once the laminate is gone, use a putty knife to scrape the excess glue. Apply more acetone to get it off if necessary.
How to Remove a Sink
Removing the sink and plumbing fixtures to make way for new laminate can be a process all on its own. If you’re not familiar with basic plumbing, it may be tricky.
Here’s how to remove a kitchen sink:
Step 1: Turn Off the Water
Turn off the water supply line. This is usually located either under the sink or in the basement.
Step 2: Put a Bucket Down
Put a bucket underneath the sink to catch any remaining water in the pipes that may come out.
Step 3: Loosen the Bolts
Use a screwdriver to loosen and remove the bolts that attach the sink to the laminate top.
Step 4: Remove the Nuts
Use a wrench to remove the nuts on the water supply lines that are under the sink.
Step 5: Remove Water Supply Lines
With your bucket in place, remove the water supply lines. Remove any other connections you may have as well, like from a garbage disposal or dishwasher.
Step 6: Take off Clips
Once all of the connections are disconnected, use a screwdriver to take off the metal clips that attach the sink to the countertop.
Step 7: Remove Caulk
Use a putty knife to remove any caulk around the edge of the sink.
Step 8: Remove the Sink
Lastly, pull the sink out.
Do You Need Laminate Countertop Installers?
Get free, zero-commitment quotes from pro contractors near you.
Related Questions
How much does it cost to install laminate countertops?
When using a professional, laminate countertop installation costs between about $800-$1200. To do it yourself, it depends on the amount of laminate you will need, and what tools you already have at home. For the laminate alone, the more inexpensive material will cost around $150-$200.
Can I install marble tile over laminate countertops?
Yes. Marble tile can be placed over laminate countertops using an adhesive tile mat and an epoxy-based grout. To do this, cut the tile mat with scissors and place it on the countertop. Then cut the marble tiles with a wet saw before placing them on the tile mat. Next, mix the grout and apply it to the tiles and countertop edges according to the manufacturer’s instructions.
What is the most durable countertop material?
While laminate is the cheapest material, it’s not the most durable since it’s prone to cracks and scratches. It will need to be replaced more often than other more expensive materials. The most durable material is most likely quartz. Quartz is extremely resistant to knife cuts, chips, and cracks. While it is more expensive, it will outlast cheaper materials, making it arguably worth the cost.
Related Guides

Kathryn is a craft aficionado who loves writing about DIY home improvement projects. When she's not writing, she loves reading, listening to musicals, and playing with her kids.
More by Kathryn Flegal


![10 Best Electric Pressure Washers – [2022 Reviews & Guide]](https://cdn-fastly.upgradedhome.com/media/2023/07/31/9070600/10-best-electric-pressure-washers-2022-reviews-guide.jpg?size=350x220)


![How To Reset A Whirlpool Cabrio Washer [In 5 Easy Steps!]](https://cdn-fastly.upgradedhome.com/media/2023/07/31/9076531/how-to-reset-a-whirlpool-cabrio-washer-in-5-easy-steps.jpg?size=350x220)
