How To Fix Laminate Countertops With Water Damage
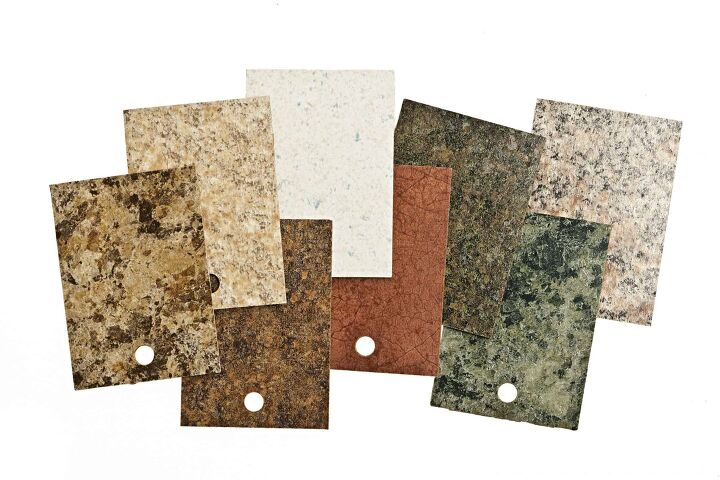
Laminate countertops are a great addition to any kitchen. They’re durable, look great, and are long-lasting. Just like anything else in your home, it can be affected by water damage.
If you’re wondering how to fix laminate countertops that have experienced water damage, there are a few options for you. You can repair it by using contact adhesive, or you can replace the area entirely.
We’ll go over both options and how to get the jobs done with ease. Countertop issues do take a bit more work, but it’s nothing you need to be an expert for. Keep on reading to learn how to quickly tackle water damage on laminate counters.
Don't want to do it yourself?
Get free, zero-commitment quotes from pro contractors near you.

What Causes Damage to Laminate?
Two main things can damage a laminate countertop: heat and moisture. For example, if you place a hot pot directly from the stove onto the counter, it can weaken the adhesive.
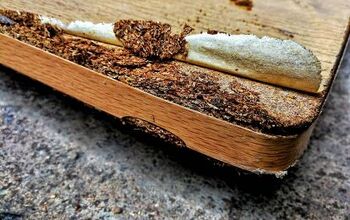
The substrate of most countertops is made of particleboard. It’s known for being susceptible to water damage. When the particleboard gets exposed to moisture, it quickly absorbs it and loses any ability to latch onto laminate.
When wanting to perform a repair on a countertop that’s been damaged by water, you’re on the clock. Successful repairs require reattaching the laminate as fast as possible. The longer you wait, the more damaged the particle board becomes from the water.
Repairing the Laminate
If you want a quick fix that is great for a small area of the counter, consider repairing the laminate. Here’s what you’ll need to get the job done.
- Putty knife
- Iron or heat gun
- Contact adhesive
- Books or flat weights
- Laminate roller or rolling pin
Tip for Repairing Laminate
If you’re looking to save some time, you may want to use aerosol contact adhesive. It applies a lot easier than liquid. It’s important to wear a respirator and eye goggles when using aerosol.
You’ll also want to cover nearby surfaces to prevent them from getting sprayed. It’s also crucial to know that laminate breaks easily due to how brittle it is. Be aware of this when lifting any loose edges.
Step 1
Start by lifting up the loose edge of the laminate. You can use a putty knife to remove any debris that’s stuck between the substrate and the laminate.
Step 2
Using an iron or heating gun, heat the surface of the laminate. If you choose to use an iron, put it on the “cotton” setting without using any steam. This step allows the glue to soften and can help the bond between the substrate and the laminate reform.
In the same way, a hot pan can cause the glue to lift; it can also repair issues that are solely glue-based. If you have water damage, you’ll need to do a bit more work. Apply heat to the underside until it’s tacky again.
Step 3
Apply the laminate over the affected area and use heavy books or flat weights to weigh it down. Allow the area to cool down before moving onto the next step. After it’s cool, check to see if the laminate is loose.
If it is, you need to apply a fresh coat of adhesive and repeat step three again.
Step 4
Apply contact adhesive to the underside of the laminate, as well as the top of the substrate. Then take a rolling device and use pressure to press the laminate against the substrate.
Step 5
Continue rolling until it’s evenly worked, and any trapped air bubbles are released. Again, take weights or heavy books and place them on top of the surface for at least 60 minutes. Look at the adhesive packaging to see the specific curing time before you can use the counter again.
Installing New Countertops
If the water damage is bad enough, you’ll have to replace the countertop completely. This option does take more work, but it gives you brand new counters that can last you up to three decades.
Tools Needed
- Jig Saw
- Drill and Drill Bit
- Block Plane
- Belt Sander
- Saw Horses
- Clamps
- Caulk Gun
- Rubber Mallet
- Hammer
- Handsaw
- Adjustable Wrench
- Screwdriver
- Sandpaper
- Tape Measure
- Level
- Compass
- Safety Glasses
Supplies Needed
- Laminate Countertop
- Smooth File
- Fastening Bolts
- Sealant
- Contact Adhesive
- Wood Glue
Directions
Step 1
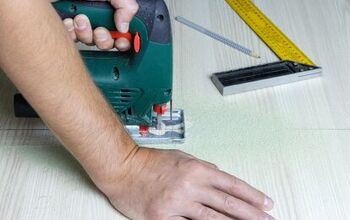
Remove any appliances like stoves, sinks, or refrigerators. It’s important to wear safety glasses and a mask during this step. Be sure to cut the cabinets to fit your dimensions on a steady surface.
You can use masking tape along the cutting area to prevent any chipping. After you’ve cut the piece, you can sand or file the edges down to get a smooth surface.
Step 2
Next, take the pieces you’ve cut and test to see if they’re the right sizes. There may be unwanted gaps that appear between the surface and the wall. If this happens, use a compass to measure the width of the gap.
Take a belt sander to sand down the edges to get it to fit perfectly. Once the countertops fit, you’re ready for step three.
Step 3
You’ll need to cut buildup strips to ensure the countertops can attach to the base cabinets. Make sure that the drawers and the top of the cabinets clear the edge of the new countertop. Cut buildup strips to install at every corner under the counter.
Screw down the buildup strips before pre-drilling holes. These holes will make it easy to attach the countertop in the upcoming step.
Step 4
Position the countertop pieces on the cabinets. Take a small bead of caulk or adhesive and apply it to the top edge of the cabinets. Slowly lower the pieces into place before using a power drill to attach the buildup strips to the countertop.
Step 5
Bring together the miters beneath the countertops by applying the recommended amount of adhesive. Install the bolts and tighten them, ensuring that the countertops are even.
Step 6
Once you’ve reached this step, use adhesive to attach splashes where the counter meets the wall. This will cover any exposed edges and can also be applied to the end trim. Then, seal the joint between the counters and the walks using a caulk gun.
After you’ve done all this, you can safely reinstall any appliances that were removed. That’s it! You’ve installed countertops and have earned yourself a relaxing rest of your day.
Cost of Installing a Laminate Countertop
Here’s what the average price for 30 linear feet of countertop is to install. If you opt to do this yourself, you can expect to pay up to $1,120 less.
| Product | Unit Cost | Quantity | Line Cost |
| Laminate material | $27-$35 per linear foot | 30 | $810-$1,140 |
| Counter edges | $27-$35 per linear foot | 30 | $150-$210 |
| Counter treatment | $50-$60 each | 3 | $150-$180 |
| Material cost | $37-$51 per linear foot | 30 | $1,110-$1,530 |
| Labor cost for installation | $500-$800 flat-rate | 1 | $500-$800 |
| Labor cost for removal | $30-$40 per hour | 8 | $240-$320 |
| Total price | $61.66-$88.33 per linear foot | 30 | $1,850-$2,650 |
Don't want to do it yourself?
Get free, zero-commitment quotes from pro contractors near you.
Related Questions
This all depends on what brand of laminate countertops you have. Formica is a popular brand that allows you to glue down new sheets of laminate over existing ones. Others will require you to remove the prior surface before installing it.
How long do laminate countertops last?One of the best things about laminate countertops is that they can last for up to 30 years. They’re incredibly inexpensive compared to alternatives. Thankfully, they’re easy to maintain, though they are prone to easily scratching.
What is the best cleaner for laminate countertops?To ensure your laminate countertops last as long as possible, maintenance is key. Simply clean the counters on a daily basis with a warm soapy water mixture and a microfiber cloth. Clean up any spills as soon as you can to avoid having to apply pressure when cleaning.

Kirstin is a passionate writer who loves helping people learn new things when it comes to home improvement. When she's not behind a keyboard, she enjoys DIY projects, crafts, spending time with her pets, and making videos. She hopes that with all she writes, someone is finding a solution to their home improvement needs.
More by Kirstin Harrington


![Cost To Drill A Well [Pricing Per Foot & Cost By State]](https://cdn-fastly.upgradedhome.com/media/2023/07/31/9074980/cost-to-drill-a-well-pricing-per-foot-cost-by-state.jpg?size=350x220)

![How To Reset A Whirlpool Cabrio Washer [In 5 Easy Steps!]](https://cdn-fastly.upgradedhome.com/media/2023/07/31/9076531/how-to-reset-a-whirlpool-cabrio-washer-in-5-easy-steps.jpg?size=350x220)