


Is Your Saddle Valve Leaking? (Possible Causes & Fixes)
You notice the drips coming from the small valve attached to a water line on your water heater. The culprit is a saddle valve installed to provide water to a humidifier or an ice maker in your refrigerator. A leaking saddle valve is not a monumental problem. However, you should repair the leaking valve before the leak becomes a bigger issue.
Saddle valves often leak with age. Repairing a leaking saddle valve can be as easy as tightening the compression nut under the shutoff handle. However, the recommended repair is to remove the saddle valve and replace it with a conventional water shutoff valve.
You can try tightening the compression nut or even replacing the entire saddle valve. In many jurisdictions, the building and plumbing codes do not allow saddle valve installations. Installing a standard water valve is more complicated and requires more expertise. However, making this repair to bring your water system up to code is not out of the range of most homeowners.
Do You Need a Faucet, Fixture, or Pipe Repair or Replacement?
Get free, zero-commitment quotes from pro contractors near you.

What is a Saddle Valve, and Why is it Used?
Saddle valves are a common solution when homeowners wish to add a feed line to serve an icemaker or humidifier. In older homes, where connections for these appliances were not usual, a saddle valve seems to offer a quick and easy solution.
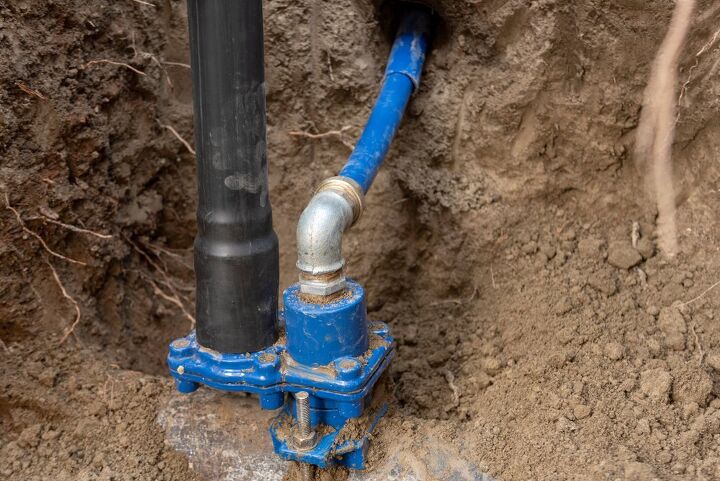
A saddle valve clamps on a piece of copper tubing, usually one-half inch in diameter. With the valve securely in place, the valve is closed. Closing the valve forces a steel piercing pin through the soft copper tubing, making an opening for water to flow through the valve.
Why Is This a Bad Solution?
In short, saddle valves tend to leak. There are several reasons for the problems.
- The piercing pin may dimple or bend the copper tubing enough that the rubber gasket can’t make a good seal.
- The saddle valve installation was done wrong and the pressure on the clamp bolts is uneven
- The packing nut at the top of the valve may eventually leak
- The saddle valve’s internal parts may corrode to the point you cannot turn the valve off or back on.
- Saddle valves are not acceptable under many building codes. If you put your house on the market and an inspector finds the saddle valve., you must make a proper replacement that meets code.
State Plumbing Codes
If you’re a new homeowner, you’ve likely recently dealt with your house being inspected. This is to make sure it’s up to code, including the plumbing. Something to take note of is that saddle valves aren’t legal in every state. In fact, most state and local codes prohibit the use of them.
Not only are they prone to leaking, but they can cause extensive property damage. They reduce water flow as well, which can cause clogging. It’s also important to mention that saddle valves are known to produce contamination in water lines. This means that any water that comes in contact with the line can have toxic and harmful bacteria.
How to Prevent Leaking Saddle Valves
The main thing you can do to prevent a leaky saddle valve is to leave it alone. Touching it can cause it to loosen, which results in leaking. Another thing you may want to do is keep an eye on it. Saddle valves are designed to be a temporary fix before you can put in the proper materials.
If you check on it regularly and look for leaks, a loose nut, or corrosion, it’ll help prevent any significant damage. Not only can saddle valves leak but pipes, in general, can start springing water into your home.
The Immediate Fix
If the saddle valve leaks around the nut below the shutoff handle, the fix may be quick and easy. Using a wrench, carefully try tightening the compression nut on the valve. Don’t overtighten and be careful not to twist the valve or kink the soft copper tubing.
If tightening the compression nut on the saddle valve doesn’t stop the leak, replacing the valve is your only option. The recommended method is to remove the saddle valve and install a standard water shutoff valve in its place.
Relacing a Saddle Valve with Another Saddle Valve
Installing another saddle valve is not a recommended solution for a leaking saddle valve. Saddle valves work by piercing the water line to which they are attached. Attempting to install a new saddle valve and lining up the old hole in the tubing with the new valve is difficult.
However, if you decide that this is the option you wish to pursue, there are some steps you can take to increase your probability of success.
Step 1 – Make Sure You Have Everything You Need.
Gather the tools and supplies you will need to complete the job. Generally, you will need
- A wrench that fits the nuts on the saddle valve
- A wrench that fits the waterline’s connection
- A piece of plumbers Emory cloth may also be needed to clean any corrosion or debris from the copper pipe.
- A Flashlight
Step 2 – Turn Off the Water and Drain the Water Lines
Before you go any further, you must turn off the main water valve to your home. Find the lowest faucet in your home and open both the hot and cold water. Opening the faucets allows the water to drain from your water system. Allowing the water to drain from the system means less spillage when you remove the old saddle valve.
Step 3 – Remove the Leaking Saddle Valve
Loosen the water line going to your ice maker or humidifier and remove the line.
Carefully loosen the nuts and bolts on each side of the saddle valve on the copper water line. If there is much corrosion on the nuts and bolts, this can be difficult. Work carefully. You don’t want to bend or kink the copper line. In some instances, cutting the bolt may be the only solution.
Step 4 – Examine the Copper Water Line
Examine the copper water line carefully. You should be able to see a tiny hole where the old saddle valve pierced the copper water line. If you find any evidence of dimpling, kinking, or dents in the copper water line, the line needs replacing. At this point, the services of a licensed plumber required.
If the copper water line appears in good condition, you can proceed. If there is any scale or corrosion present on the line, use the Emory cloth to remove the build-up. You should clean the copper water line until it is a shiny copper color.
Step 5 – Install the New Saddle Valve
Prepare the new saddle valve for installation. The key to replacing the saddle valve is the alignment. You must make sure the new saddle valve exactly lines up with the hole made by the old saddle valve.
The easiest way to make this alignment is to screw the piercing pin on the new saddle valve down. Use the piercing pin to align the hole with the new valve. With the piercing pin aligned in the old hole, hold the saddle clamp in place and hand tighten the bolts and nuts.
Use the wrench to tighten the bolts carefully. Alternate between the two bolts and nuts to make sure the pressure remains equal on both sides. Don’t tight too much, or you can crush the copper water line.
Step 6 – Re-attach the Feedline to your Ice Maker or Humidifier
Put the feed line that servers your ice maker or humidifier back in place and tighten the nut carefully. If there is corrosion on the connection, replace the ferrule and nut on the feed line with a new fitting. Your new saddle valve includes a new ferrule and nut.
Step 7 – Turn on the Water and Check for Leaks
Go back to the main water valve and slowly turn on the water. Don’t be in a hurry or you can damage the pipes in your home. The faucets that you opened earlier should still be open. Leaving the faucets open allows any air in the water lines to escape.
Give the air in the water lines a few minutes to escape, then turn off the hot and cold water faucets. Check the new saddle valves for leaks. If the valve is leaking, tighten the compression bolts carefully.
The Alternative and Better Solution
The alternative solution is to remove the saddle valve and install a copper T and a water shutoff valve to serve your icemaker or humidifier. Making this change meets most of the plumbing codes in the US. Saddle valves in most jurisdictions are not allowed.
The downside to this alternative is the need to cut the water line and solder new fittings in place. Most homeowners don’t have the tools or the expertise to make soldered water-tight joints on the copper pipe. These types of repairs require the services of a licensed plumber.
Do it Right is the Better Choice
Going to the added expense of installing a proper water valve to serve appliances is the better choice. Over the long run, it will save you money and frustration. Saddle valves are convenient and easy. They also have a much higher risk of leakage than a professionally installed water valve.
I hope that this article helps you solve the water leak problem around your saddle valve. Whichever path you decide to take, make sure you understand the process and steps. Consult with a plumber if you have any questions and always work safely.
Do You Need a Faucet, Fixture, or Pipe Repair or Replacement?
Get free, zero-commitment quotes from pro contractors near you.
Related Questions
Why does my saddle valve leak?
There are a myriad of reasons that can cause a saddle valve to leak. One of the main ones is clogging. When it becomes clogs, the water has nowhere to go but out. You can take steps to prevent clogging or follow the suggestions above to prevent leaking.
Are saddle valves bad?
In general, they’re a quick fix until you can install the proper equipment. They’re not inherently bad or good.What could make someone consider them to be bad is their legality. You can run into hefty fines or time-consuming delays when inspections come around. I think it’s safe to say they’re more inconvenient than bad per se. Just remember to check with your state plumbing code to see if they’re legal where you reside.
How do I know if my saddle valve is open?
Something to note about saddle valves is that they’re self-tapping devices. Once they’re installed, all you need to do is turn a valve clockwise until it pierces the waterline.If you’ve reached the point where the valve can’t be turned any further, it’s done tapping the pipe. To open the saddle valve, simply turn the handle counter-clockwise.

We are a team of passionate homeowners, home improvement pros, and DIY enthusiasts who enjoy sharing home improvement, housekeeping, decorating, and more with other homeowners! Whether you're looking for a step-by-step guide on fixing an appliance or the cost of installing a fence, we've here to help.
More by Upgraded Home Team


![10 Most Dangerous Neighborhoods in Baltimore [Updated]](https://cdn-fastly.upgradedhome.com/media/2023/07/31/9075655/10-most-dangerous-neighborhoods-in-baltimore-updated.jpg?size=350x220)


