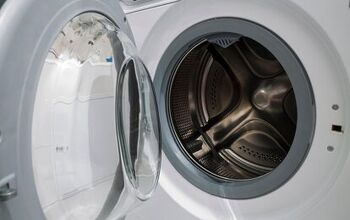
LG Portable AC Leaking Water? (Possible Causes & Fixes)

There is no doubt an air conditioner is one of the most luxurious appliances we have in our homes. We have grown so used to the feeling of cool air in our homes when the temperatures rise outdoors. The three types of units we have grown accustomed to are the central unit, window unit, and portable units.
One of the most common issues people bring up is their LG portable AC unit is leaking water. There are a few problems that cause this issue. The question is, what causes the leaking, and what do you do?
The leaks are caused mainly by dirty filters, blocked heat exchangers, clogged drainage, faulty vents, and low freon. Standard maintenance practices and minor repairs will solve most of these problems. If the system is low on freon and you tried everything else, a service technician is the only remaining answer.
Do You Need Your A/C Unit Serviced or Relocated?
Get free, zero-commitment quotes from pro contractors near you.

Checklist On Stopping the Leaks from an LG Portable AC
Before you go down the list of troubleshooting on any appliance, turn the unit off and unplug it. Begin with safety before you begin messing with anything electrical. Since the system is already leaking, we know electricity and water do not mix.
Follow these steps below in maintenance and minor repairs if you notice a water leak. If all of these steps are followed, and the problem still exists, it will take professional assistance.
Step 1: Dry the Floor and Put a Drain Pan in Place
You should wipe up all the water from the floor and place a drain pan to catch the dripping water. Water damage can be costly if it gets deep into the floors and walls. If a drain pan is already in place, check to make sure it is not overflowing.
Step 2: Check the Filter and Clean or Replace
Remove the faceplate where the air filter is and check the filter. If the filter is dirty, it will restrict the airflow and cause the temperatures to drop inside the coil. When this happens, everything ices up, and it blows out of the AC, causing a water leak.
Most of the time, all you have to do is clean the filter and put everything back together. An excellent tip in doing this is vacuuming it first, then wash it off with a showerhead. Add some bathroom or kitchen antiseptic spray and let it dry to kill mold and bacteria in the filter.
Step 3: Check the Coils Before Putting the Filter Back
Look at the aluminum coils and see if there are any pieces of dirt or lent. For a light clean up use the vacuum hose with a brush. If the coils need more caring, use a spray bottle with a grease remover kitchen cleaner.
Be sure not to spray anything electrical in the AC unit. Spray the coils and let them sit for five minutes. Come back with another spray bottle with water and rinse off the kitchen cleaner.
Doing this will remove all of the dirt and grime from the coils allowing for better airflow. Be sure to read the owner’s manual carefully before cleaning the air conditioner or heat pump.
Step 4: Unclogging the Drains
This step applies to a wall-mounted ductless air conditioner. You will need a step ladder to look inside the unit. The diagnosis is easily spotted by water dripping down the back of the unit on the wall.
Stand on the ladder and look down into the heat exchanger for the tray that catches the water. If it is full or overflowing, the drain is clogged. Find the drainpipe, blow into it, or use a metal coat hanger to clean out the drain.
Please note that if you cannot unclog the drain, it will take a professional HVAC service tech to unclog it.
Step 5: Check for Faulty Vents
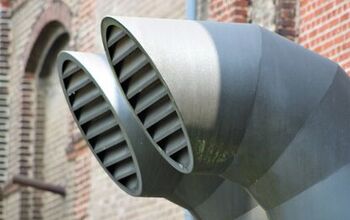
The vent that pushes out the heat may have a crack or leak in it. This causes heat from the unit to blow inside the home. Condensation occurs and may be the cause of the water leaking from the unit.
When hot air and cold air mix, it will cause moisture to form on everything, not just the AC. If the vent that pushes out the hot air is cracked, it needs to be replaced immediately. You can also check where the duct goes out of the home, so there are no open spaces.
If no openings are letting the heat back inside, you will need to replace the vent leading outdoors. Remove the clamps and pull the vent off. Replace the new vent and put the clamp back on.
You will need to place the outer part of the vent in the hole and seal it properly. Inspect it to make sure you cannot see the outdoors from inside the home.
Step 6: If You’ve Reached This Step Call a Professional
If you have reached this step, there is nothing more you can do in the DIY department. Chances are high you have a freon leak in the unit if water leakage persists. When freon is low, the unit struggles to keep the room cool.
You can see if the refrigerant is low, but you cannot add it to the unit or repair it yourself. Check it by setting the heat pump to the lowest setting. If the coils freeze up, that is a sure sign the refrigerant is low.
Other Suggestions In Maintenance For Your LG Unit
You can do other things to keep your LG portable AC unit in check to make it more efficient. These maintenance steps work for window units and portable units.
Step 1: Install a PVC Pipe for Drainage
Water will constantly pour out the back of a window unit. There is an option to install a drainage pipe to give the water a place to go. Find where the water drains from and attach a PVC pipe, and you can steer the water wherever is convenient.
As long as you keep up with making sure the drainage is flowing, there should be no problems. If there is no water coming out at the end of the pipe, you will have to clean it out. A metal coat hanger will be sufficient.
Step 2: Advice on How to Prevent Clogs
On all of the units, check the drain hole that the water drips into the drain pan. If it gets clogged, it will overflow and leak on the floor. To prevent the fungus from growing in the drain pan, put a tablespoon of bleach every six months.
Along with keeping the line flowing freely, you should also check for kinks. This will back up the water as it keeps it from flowing freely. If you are using a hose instead of a PVC pipe, this problem may happen quite often.
Step 3: Check and Seal all Cracks and Holes
If you notice leaks are coming from inside the AC, check for any cracks or seals that may have broken. Reseal anything that has come undone and check the drain pan. There may be cracks that the water is coming from as it is dripping out of the unit.
If everything freezes up inside the unit, the chances are high something is cracked. Resin poly sealant is what you should use to seal all holes and cracks. It needs to dry for no less than four hours before turning the AC back on.
Sometimes There is Nothing Wrong
We can follow all the steps listed and still come up with no reason why the LG portable AC is leaking. Sometimes it is the temperature difference from the outside to the inside. When people like the cold air inside their home in 60-degree weather, the air conditioner will leak.
The coils will freeze up in 60-degree weather. Sometimes if the icing up and the water may become too much for the unit. It may be a good idea to open up the windows if it is a beautiful day outside. Perhaps an open house would refresh your day.
Do You Need Your A/C Unit Serviced or Relocated?
Get free, zero-commitment quotes from pro contractors near you.
Related Questions
What is the difference between a portable unit and a window unit?
Both units work the same. The only difference is one is in the window, and the other is on the floor inside the home. Some also are mounted on the wall.
How do I keep bugs and leaves from getting into the exhaust vent and in my home?
When the AC unit is not in use, you can place caps over the vent. You can find them at any hardware store. Some screens can be placed over the openings to keep unwanted debris and bugs out.
How much does it cost on the electric bill if I buy a portable AC unit?
It is the same as a window unit. If you want to determine if it burns a lot of energy, look at the BTUs. However, it will burn a lot less than a central unit.
Related Guides

We are a team of passionate homeowners, home improvement pros, and DIY enthusiasts who enjoy sharing home improvement, housekeeping, decorating, and more with other homeowners! Whether you're looking for a step-by-step guide on fixing an appliance or the cost of installing a fence, we've here to help.
More by Upgraded Home Team