How To Unlock A DeWalt Miter Saw (Quickly & Easily!)
More and more home do-it-yourselfers and hobby woodworkers are turning to DeWalt power tools for their shops. One of the most popular DeWalt power tools found in home shops is the miter saw. DeWalt makes many styles and types of miter saws. However, the method for unlocking these saws for use is consistent across the model lines.
Unlocking a DeWalt miter saw requires several steps. In general, you must unlock the powerhead arm, unlock the slide arm if your saw has one, and unlock the table angle adjustment to set your cut angle. On some compound cut models, an additional lock allows setting the compound cut angle.
How to Unlock a DeWalt Miter Saw
You should understand these features to make the most of your DeWalt miter saw. These may seem complicated but unlocking your DeWalt miter saw only takes a few simple steps.
Step 1: Understanding Your Saw is Key
The very first step is to have a thorough understanding of your saw. The best way to gain this kind of understanding is to read the user’s manual included with the saw. The recommendations and directions provided by DeWalt are the best means of using your safely and effectively.
Pay particular attention to the sections dealing with preparing your saw for use and the safety precautions. Power tools such as the DeWalt miter saw can be dangerous if not assembled correctly or if you use them improperly.
Step 2: Be Safe in Your Shop
Working around any power tool is dangerous. Taking every possible precaution is the best way to prevent accidents. A few basic things to remember can be the difference between a successful project or a trip to the emergency room.
Never perform maintenance on a power tool plugged into the outlet. Don’t change blades on saws. Never change bits in a drill press or router when the tool has power. Unplug any tool that is not in use at the time.
Wear your safety gear. Protect your eyes with high-quality safety glasses. Where appropriate, wear gloves. Avoid loose or dangling clothing that can get caught in moving machinery. If you are creating sawdust, wear a respirator.
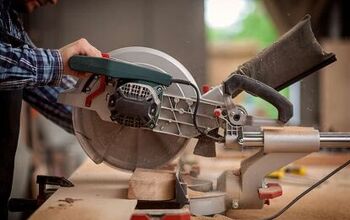
Step 3: Examine your DeWalt Miter Saw
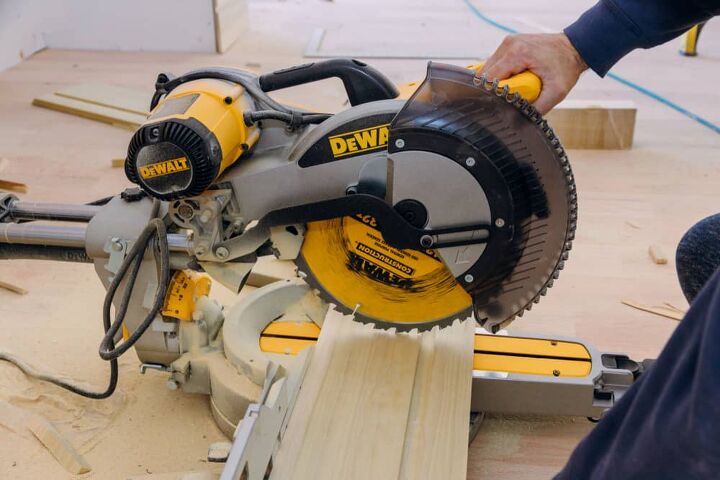
All miter saws share some common characteristics. The cutting head attaches to a pivoting arm that allows the blade to move up and down. You can make angled cuts using the adjustable table. Some models have a sliding head for cutting wider stock. Compound cut models feature a moveable motorhead to make compound angle cuts.
Before you begin working with your saw, you must be familiar with each of these features on your DeWalt saw. Each of them has a different locking mechanism.
Step 4: Unlock the Pivot Arm
The pivot arm allows the motorhead and blade to move up and down. In the stored position, the pivot arm is in its lowest position. Most DeWalt miter saws have a locking pin on the pivot arm near the back and close to the pivot hinge.
Unlock the pivot arm lock by pressing down slightly on the powerhead to relieve the locking pin’s tension. The locking pin should be easy to pull out and should stay out. Slowly raise the powerhead arm to its highest position. Make sure that the blade guard moves into place and everything moves freely.
Step 5: Unlock the Slider on Sliding Miter Saws
Some models of DeWalt miter saws mount the powerhead on a slider system. The slider system allows the powerhead to move in and out over the cuttable. You can cut much wider material with a sliding miter saw than otherwise possible.
There are several different styles of slider lock used on DeWalt miter saws. Some are part of the pivot lock. On these, you may need to twist the pivot lock to free the slider. Several models of DeWalt miter saws have a lock knob for the slider mechanism.
The best information about the slider lock system is in the user’s manual that came with your saw. If you don’t have the user’s manual, most of these booklets are available for download from the internet.
Step 6: The Compound Cut Adjustment
If your DeWalt miter saw has a compound swivel powerhead, you can make compound miter cuts. To prepare for making a compound miter cut, you must unlock the swivel on the powerhead.
Most DeWalt miter saws with a tilting powerhead have a lock knob you must turn to unlock the swivel feature. Loosening the locking knob allows you to set the bevel cut angle on the powerhead.
When the powerhead is at the proper angle for your cut, tighten the locking knob to keep the powerhead in place. You should hand tighten this knob. Using a tool such as pliers to tighten the locking knob can damage the mechanism and your saw.
Step 7: Moving the Cut Table
One great advantage the miter saw enjoys over other types of power saws is making angle cross cuts that are precise and repeatable. Setting the saw for making angle cross-cuts means moving the cutting table and changing the fence’s angle.
DeWalt miter saws use a different locking system on the table than most other manufacturers. The system consists of a lever and button. To unlock the table swivel, lift on the lever table arm. You can then push the button in front of the lever to release the lock and swivel the table.
Set the table to the appropriate angle and release the button. Pressing down on the lever locks the table into position. Your saw is now ready for use.
When Your Project is Finished
When you finish with your DeWalt miter saw, you should perform a few simple steps to store your saw. Performing these steps will ensure your saw is ready for the next job. A bit of preventive maintenance and care can lengthen the life of your saw. These tips can keep your saw cutting for years to come.
Unplug the Saw
Always unplug your power tools when you finish using them. Unplugging your tools and storing the power cord is a safety issue. Safely stored cords don’t become trip hazards. Unplugged tools prevent accidental starts.
Clean Your Saw Thoroughly
Before you store your saw, make sure it is clean. Remove the accumulated sawdust on the saw. Sawdust can be corrosive and build up harden, making it almost impossible to remove. Pay special attention to the inside of the blade guard and the dust port.
Clean and empty the dust bag. Sawdust left inside the dust collection bag can attack the material of the bag. The sawdust can also harden into a lump that can be difficult to remove later.
Check the blade for resin or sap buildup from the wood you are cutting. You can clean the blade using any good shop solvent. While you are cleaning the blade, check the teeth and the sharpness of the blade.
Return the Parts of the Saw to the Storage Positions
The best way to store your DeWalt miter saw is to put all the adjustable parts back to the starting positions.
- Return the table angle adjustment to the center position and lock it in place.
- Set the bevel angle adjustment on the powerhead to the zero position and engage the lock.
- Push the slider to the full-back position and engage the locking mechanism.
- Lastly, push the pivot arm down as far as it will go and push the locking pin back into place.
Cover Your Saw
It is a good idea to cover your power tools when they are stored. As you work on other projects in your shop, you will be creating sawdust and other contaminants that can drift and settle on your tools. Draping a cloth or tarp over your tools protects the surfaces from collecting this dust, which can cause corrosion and other problems.
Common DeWalt Miter Saw Problems
DeWalt miter saws are dependable and robust tools that usually perform up to specification for years. However, like any tool, DeWalt miter saws are subject to problems. These are a few of the most common.
Splintered Edges on Cuts
Splintering on the edges of the cuts indicates that the blade is out of true. The misalignment could be the cutting head or the blade bevel. Consult your owner’s manual for the proper procedure for returning your DeWalt miter saw to a true and square alignment.
Burning on the Edges of my Stock
There are two issues associated with burns or scorch marks on the ends of the material you cut. The most common problem is a dull blade. As your DeWalt miter saw blade becomes dull, the blade generates more heat while cutting. The temperature of the blade can rise to the point it will scorch the wood.
An out of alignment blade can cause similar problems. Consult your owner’s manual for the proper way to realign the blade.
The Blade Seems to Wobble Making Bad Cuts
A wobbly blade is a dangerous situation, and you should not use your DeWalt miter saw until you have diagnosed and corrected the problem. Blade saw wobble can be a symptom of several problems. Check the arbor flange that holds the blade on the spindle shaft. The arbor flange can wear down and will often develop a noticeable lip. A worn arbor flange can cause your blade to wobble. Replace the arbor flange if necessary.
The bearing on the blade spindle may be worn. Sawdust can invade the tightest spaces on a saw and cause excessive wear. If there is noticeable play in the spindle, the bearings are probably worn.
The drive gears inside the powerhead can also become worn and cause excessive play in the blade. If the saw makes excessive noise in the powerhead when running or noticeable play in the spindle, you may have gear problems. Take the saw to a DeWalt service center for a complete checkup.
Keep Your Saw Running and Performing
A little preventive maintenance can keep your DeWalt miter saw running for many years. Understanding the safety features of your saw will translate to safe and satisfactory operations. We hope that the tips and tricks in this article help you get the most from your DeWalt miter saw. Work hard and work safely.

Dennis is a retired firefighter with an extensive background in construction, home improvement, and remodeling. He worked in the trades part-time while serving as an active firefighter. On his retirement, he started a remodeling and home repair business, which he ran for several years.
More by Dennis Howard