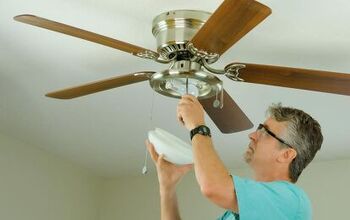
How To Take The Top Off A Maytag Washer (Quickly & Easily!)

Finding a washing machine that is dependable is at the top of the list when considering this home appliance. Maytag produces a line of some of the most trusted and beloved washing machines on the market today.
Despite their prevalence for reliability, issues can arise from time to time. For the DIYers out there, that means being able to get down into the guts of the machine to take a lift. So, how can you get the top off of a Maytag washing machine? The process is simple. There are a few screws and clips before you can carefully pry the top off.
Do You Need Appliance Repair Services?
Get free, zero-commitment quotes from pro contractors near you.

Why You Would Need to Take the Top Off of a Maytag Washer
If your Maytag washing machine malfunctions or stops working altogether, there is one of two choices to make. You can call in a service repair technician to take a look at the problem and fix it for you. Or you can take the DIY approach and do it yourself.
The one issue with doing it yourself is that you have to have access to the internal components of your washing machine. One such internal component may be a faulty door or lid lock. That facilitates the need to get under the cover on top of the washing machine and get into the guts of your washing machine.
How to Take the Top Off a Maytag Washer
Thankfully, the process is quite simple for getting the top off of a Maytag washing machine. Even if you only do so to visually identify the problem parts, it is still helpful to know how to take the top off and put it back on.
Step 1: Safety First
Remember that these appliances conduct electrical currents. So, put safety first and make sure that you cut the power to the machine. You can either unplug the machine from the outlet or go the extra mile and cut the power to the breaker.
Whatever route that you go will work fine. You just need to cut the power to the washing machine as you will dealing with internal components that could otherwise shock you.
Step 2: Lower-Front Screws
As you go through this process, you will see that it is largely about removing screws. For starters, look at the first-lower corners of your Maytag washing machine. Approximately four inches from the floor, you should see a pair of screws.
Remove the screws using a Phillip’s head screwdriver. Make sure that you keep the screws off to the side in a secure spot. You do not want to lose the screws. You may be able to find replacements at your local hardware store, but that is another step and a whole lot of hassle that can be avoided.
Step 3: Front Panel
With the screws removed and safely off to the side, it is time to pull on the bottom of the washing machine’s front panel. After pulling out the bottom of the front panel, you will see two plastic clips at the top portion of the panel.
Unsnap the two plastic clips and place them off to the side with your screws from the previous step. With the clips out of the way, take the front panel off entirely and set it off to the side where it will not be in the way.
Step 4: Lifting the Front Edge
At the top of the washing machine, begin to lift up the front edge. There are hinges in the back that hold it into place, so the front should actually come up pretty easily. You can use a flat edge to help pry it up just be careful not to exert too much force as you could damage the top of the washing machine.
Step 5: Machine Bolts
With the front edge of the top of the washing machine lifted up, looking for the two machine bolts. They are 3/8-inch big and are generally in the upper right-hand corners at the front of the washing machine. That is the case when the top of the washer won’t hinge upward.
Take out the bolts using your ratchet and keep them off safely to the side. You should now be able to lift up at the front edge of the washing machine top. If it is hinged at the back, it should lift up entirely and then back.
Step 6: Returning Everything
When you are done inspecting or repairing the problem, just follow the steps in reverse. Make sure that any portion with bolts or screws are tightened properly before closing everything up and calling it a day. Loose components can potentially become damaged or come out entirely under the worst-case scenario.
Do You Need Appliance Repair Services?
Get free, zero-commitment quotes from pro contractors near you.
How Do You Replace a Lid Lock on a Maytag Washing Machine
One of the primary reasons that you would need to get the top of your Maytag washing machine off is to access the door lock or switch assembly.
The locking mechanism on the lid of your Maytag washing machine plays an important role. It keeps the lid closed securely during the cycle. That is a safety measure to ensure that no one can open up the lid while the cycle is active.
That said, when the lock isn’t working properly, the machine may also not run. So, it is important to fix the locking mechanism so that you can run your cycles as normal. Here’s how to do it.
Step 1: Control panel
Remember, safety first. Unplug the machine before you do anything as there are electrical currents that could potentially cause harm to you. Then, pull the machine out so that you can access the rear of the machine.
Look for the three screws that are at the back of the unit’s control panel. Take them out, rotating the panel forward so that you can access the wiring. Then, find the wires at the back and trace them to the connector. Unplug the connector from the control board; this releases the control panel. Place it aside.
Step 2: Securing the Lid
Next, tape the lid of the machine shut. Start about 6 inches from each side of the washer and work to the middle. Use a pencil to mark the length so that you can measure the tap accurately before laying it down.
Then, use a putty knife at the top horizontal seam. Push the knife in so that the seam releases the tension clip that holds onto the top portion of the cabinet. Then, raise the top up so that you can access the lock.
Step 3: Remove the Screws, Clips, and Pull the Wires
There are two more screws from the lid lock. When you remove those two screws, the lid lock will release from the washer. Release the wires at the top of the washer by pushing your screwdriver into those metal retaining clips that you see.
Pry them open and pull the wires from the washing machine’s top. Take the plastic retainer that sits around the wires at the back of the machine using pliers and then pull the retainer from the washing machine top in order to release those lid lock wires.
Step 4: Following the Lid Lock Wires
Trace the lid lock wires to the rear of the washer. Look through the hole at the top of your washer, locating where the wires connect to the control board. When here, pull the lid lock wire connector completely from the board.
Move the replacement lid lock to the front of the cabinet, getting it into position. Then, secure the replacement lid lock with the screws from the beginning of the process. Follow up by snapping the lid lock wires beneath those metal retaining clips.
Step 5: Putting the Lid Lock Wires Back
Next, feed the lid lock wire connecter into the hole that you see at the top of the washing machine. On the other side of the hole, grab the connector and then plug it into the now-vacated slow on your washing machine’s control board.
Carefully put the top back on your washer. Push around the border of the top until you hear it snap back into place within the retaining clips.
Step 6: Plug the Touch Control in
Finally, take the wire connector for the touch control and plug it into the control board. You will have to put the control panel back over the control board, replacing the three screws that started everything. Just plug the machine back in and you can test it out to see if the locking mechanism works.
If it doesn’t, you may have done things fine but there is another issue at play. At that point, you may be better off calling a service technician to come out and inspect the problem. There may be another problem component at play. The tech will be able to troubleshoot the issue and come up with a fix far sooner than a DIYer would.

Ryan Womeldorf has more than a decade of experience writing. He loves to blog about construction, plumbing, and other home topics. Ryan also loves hockey and a lifelong Buffalo sports fan.
More by Ryan Womeldorf