How To Remove Sliding Closet Doors (Quickly & Easily!)

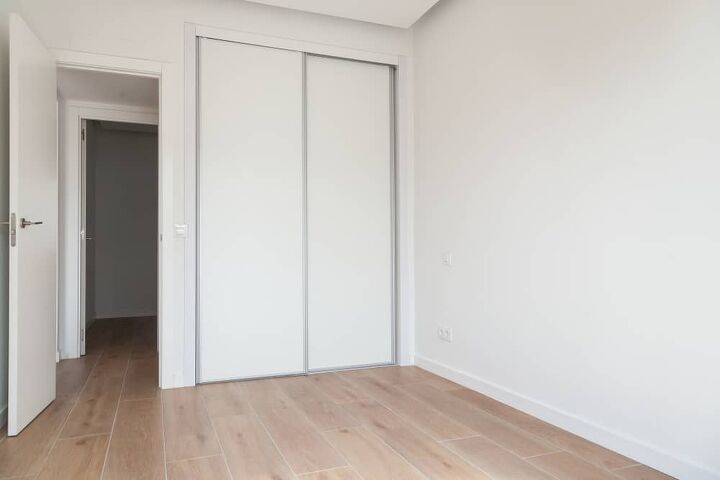
Sliding closet doors are a blessing to those looking for quick access to their wardrobe, and they’re easy to use. Sometimes, however, the time comes when you grow tired of them and want to replace or remove them. You can remove sliding closet doors without using too much elbow grease, but how is it done?
Start by pushing your sliding closet doors to one side so that you can access the tracks above and below them. From there, loosen the brackets above or below the doors without removing the screws fully. Now, you can remove the bottom track and pull out the doors, but don’t remove the top rail before pulling out the doors.
Do You Need Sliding Door or Tracks Repair?
Get free, zero-commitment quotes from pro contractors near you.

Safety First
Before you remove your sliding closet doors, enlist the help of a friend. The last thing that you want is to become overwhelmed and have two doors fall on you. Removing sliding closet doors is similar to fixing mirror sliding closet doors, and works well with extra hands.
Parts of a Sliding Closet Door
Part of safely removing sliding closet doors is simply having the proper tools for the job. Luckily, with sliding closet doors, all that you’ll need is a screwdriver. You’ll also want to know the parts of sliding closet doors and being familiar with them will help.
Floor Guide
The floor guide is the track or rail that goes beneath the sliding closet doors. Not all sliding closet doors have floor guides, but they are useful. Floor guides simply help keep the doors in place and glide over the flooring with more ease.
Top Track
Every sliding closet door has a top track or rail, and they’re critical to the structure. If you don’t have a floor guide, it’s important to limit how far you pull the sliding closet doors out. Pulling your sliding doors out too far can damage the top track, and ultimately, the doors themselves.
You will find screws on the inside and outside of the top track and bottom track. During the process, you’ll eventually need to remove them, so it’s important to know where they are before you begin.
Brackets
Not all sliding closet doors have brackets, but if yours does, you won’t be able to miss it. Brackets are often located at the top or bottom, if not both, of the doors themselves. If your doors don’t have brackets, that means that they have wheels and will be even easier to slide out when the time comes.
Doors
Last but not least are the doors themselves. Your doors should have a 2”-3” overlap in the center. Be sure to handle the doors with care even if you are removing them as you may want to reinstall them later.
How To Remove Sliding Closet Doors
You may not even have a bottom rail below your sliding closet doors, and that makes the process much easier. It’s a great idea to have a friend to help you remove the doors to ensure they don’t fall. Follow along as we explore how you can safely and correctly remove your sliding closet doors without any trouble.
Step 1. Move the Doors to the Side
Take both doors and push them to one side, right or left. That way, you will have access to the rail, or floor guide, that allows your doors to slide. When you slide the doors to one side, pay attention to the floor guide to make sure that it is in good shape.
If your sliding closet doors do not have a floor guide and only have a top rail, it’ll be easier. With that said, the lack of a floor guide can also make it easier for the sliding doors to bow. Be careful when you move them to one side to make sure that you don’t pull on either the top or bottom rail and do any damage.
Step 2. Loosen the Brackets
If your sliding closet doors have brackets at the top of them, you must remove them. This can be done easily by using a flathead screwdriver most often. Loosen each screw so that you can remove the brackets later and keep track of them in case you decide to reinstall the doors.
Not all sliding closet doors have brackets, and sometimes they are connected via the floor guide below. Sometimes, there are brackets at the bottom of the door, and loosening them will make it easier later on. It’s important to only loosen the brackets, and not remove them entirely which could cause the doors to fall.
Step 3. Unscrew the Floor Guide
Now, focus your attention on the floor guide that the doors slide on over your flooring. You can find your screws at the edges on the outside and interior of the sliding doors. Use a screwdriver to loosen them and ultimately remove them.
Once you’ve removed all of the screws, tug on the floor guide to see if it will move. You may feel resistance due to the weight of the doors, but that is completely normal. If your sliding closet door includes floor brackets, now is the time to fully remove them assuming they have been loosened.
Step 4. Remove the Tracks
This step is much easier if you have a partner to help you with this little project. If you have to help hands, have them hold the doors while you remove the floor guide so that they don’t fall. You should be able to simply pull the floor guide away from the sliding doors without any problem.
It should be noted that this step can slightly trickier if the floor guide is on top of the carpet. That’s not the end of the world, however, it just means that there’s more resistance than if it was over wood. You will also have to remove the track above the doors using the same method as the floor guide track.
However, it may be easier for you to remove the doors before the floor guide track which we will detail in the following step.
Step 5. Remove the Doors
Whether you remove the doors before or after removing the tracks, it is the most important step. You must be careful removing the sliding doors so that they don’t bow and snap. If your tracks are still in place, you must lift the door out of the top or bottom track and carefully pull it out.
Repeat the process with the other door while paying attention to the angle and pressure. Not all sliding closet doors will allow you to remove the tracks before removing the doors, and that can be a convenience. It’s important to have help when pulling the doors away to prevent snapping and to help carry the load.
If you must leave the bottom floor guide in and it gives you trouble, you can remove the top rail. Removing the bottom rail can give you enough leeway to pull the doors out and away from the top rail. Your sliding closet doors may not even have a bottom rail, and that’ll only make this step easier.
Related Questions
How do you shorten sliding closet doors?
You can shorten sliding closet doors by removing the floor guide and moving the doors to give room for cutting. It’s critical that you leave the door rail in and only remove the bottom rail or else the doors will fall while you trim them. Use a power tool, such as a circular saw, to trim the doors based on your preferred measurements to shorten them.
Do sliding closet doors need a bottom track?
No, sliding closet doors do not need a bottom track, and they’re easier to remove without one. You have to be careful when pulling the doors away without a bottom track as it can bow more easily. The bottom rail, or the floor guide, is only there to make the doors slide better, but it’s unnecessary.
How much should sliding closet doors overlap?
There should be between 2” and 3” of overlap in the middle of your sliding closet doors. You may need to remove the doors and re-measure if you don’t have the proper overlap because it reduces functionality. It’s important to measure properly and more than once before installing sliding closet doors to achieve proper overlap.
What is the difference between sliding closet doors and bifold doors?
Sliding closet doors and bifold doors are different in that bifold doors are two doors hinged together. They are quite similar as they both run along tracks often on the top and bottom of the doors. Bifold doors mostly differ in functionality as they work via hinges and can be pulled to where they fold in on one another.
Do You Need Sliding Door or Tracks Repair?
Get free, zero-commitment quotes from pro contractors near you.
Summing It Up
You must move the doors to the side and loosen the brackets to remove sliding closet doors. If you have a floor guide bottom rail, remove it so that you can pull the doors out. Avoid removing the top track before pulling the doors out as it is structurally critical.
Pull the doors out one by one, then remove the top track by unscrewing the screws. Once the doors and tracks are fully removed, you’ll be left with an open closet. Removing your sliding closet doors is a simple process, and you can do it in less than an hour.
Nick Durante is a professional writer with a primary focus on home improvement. When he is not writing about home improvement or taking on projects around the house, he likes to read and create art. He is always looking towards the newest trends in home improvement.
More by Nick Durante