


How To Replace Rotted Wood Around A Window

Windows are an integral part of our homes, allowing us fresh air and view of the outside world. It is therefore very important that you keep your windows in great shape, so that they will last for many years.
If you notice that the wood around your window has rotted, take care to address this as soon as possible. Replacing the wood isn’t terribly complicated, but the problem usually goes further than you might think.
To replace rotted wood around a window, pry off the apron and trip using a pry bar. Check for any damage, if there is any you will need to remove it. Replace the damaged parts. Cut everything to size and chose as many PVC replacement pieces to keep the area from rotting again.
Replacing wood around a window is a straightforward project that most homeowners can handle themselves. If you would rather leave it to the professionals, there are many companies who can tackle this project. Just make sure to call around and not let them try to up-sell you into replacing the whole window, if the damage is only to the wood around it.
Do You Need to Hire a Framing Contractor?
Get free, zero-commitment quotes from pro contractors near you.

Signs of Rotting Wood
Wood around the windowsill can rot for a number of reasons. If you have a gutter above that is clogged, the water will overflow and cascade down the wall. This is especially common in areas that get a high amount of rainfall.
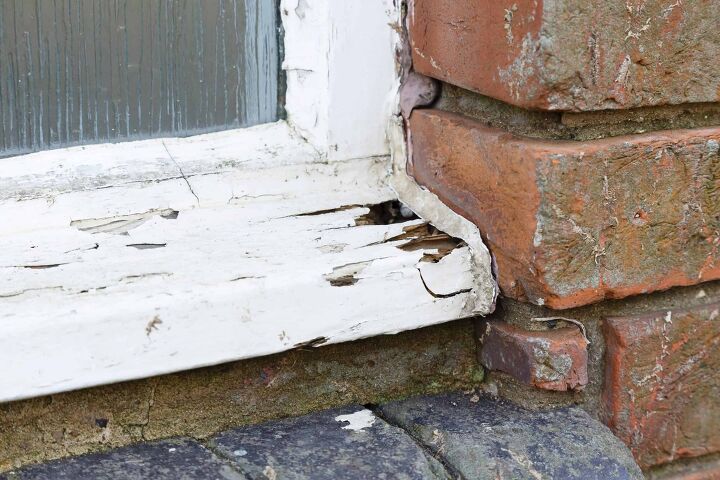
It’s not always easy to spot water damage along window frames. A common signal is when you notice a leak on the wall, underneath the frame, as this belies moisture saturation. Peeling paint and paint that is stripping off shows that water has gotten underneath and forcing it away from the wood.
Another sign that the wood is rotten is if the window will no longer open or close properly. Any gaps in the corner joints of a window frame will indicate a swelling and contracting, as water seeps in and then dries out.
The biggest issue with rotting wood, other than the hassle of replacing it, is mold. Certain molds are quite toxic to humans and need to be dealt with immediately. Mold grows best in a moist climate and with the wood acting as a home base, it can spread to your walls if not treated quickly enough.
Window Frame Replacement Options
When it comes time to deal with the rotting wood situation, you can handle this yourself over a weekend. If you find that the window itself is rotten, then you may need to replace that as well, which is a big job. In that case, there are two things you can do: get a full-frame replacements or a retrofit.
A full-frame replacement will involve taking out the window entirely, including all of the components. This removal is done down to the studs and headers that surround the window. You will then install a new window along with new jambs, casings, and brick molds.
In a retrofit, you will install a new window but keep the existing frame. If you have damage that goes beyond the windows, perhaps to the wood frame, then this solution would not be enough to solve the problem long term.
A full-frame replacement may be more expensive upfront, but it will save you the time and money in having to replace it in a few years.
Replacing the Window Frame
In the fortunate case of only the window frame having rot, with the right tools and some time you can tackle this project yourself.
When you start to take apart your window frame, you may find that the damage has permeated deeper than you thought. The only way to find out how bad things are is to start an investigative dismantling, so be prepared!
Tools Needed:
- Pry Bar
- Claw Hammer
- Utility Knife
- Tape Measure
- Circular Saw
- Chisel
- Table Saw (optional)
- Sand Paper
- Primer/Paint
- Paint Brush
Step 1: Learning the Extent of the Damage
Before you buy any supplies, you will need to start demoing, as you will not know what you need until you figure out the extent of the damage. Keep notes on how long the sill and apron are, as well as any other pieces that you are pulling off the side of your house. A list of everything you do is going to be helpful later.
Step 2: Protect the Window Siding
If the damage has not affected the siding and trim, you are going to want to do your best to protect the paint. Use your utility knife to score the paint and caulk where they meet the windowsill.
Step 3: Remove the Apron and Sill
Using your pry bar, tap it behind the apron and work your way from one end to the other. Pry the apron away carefully in order to protect your siding. Once you have removed that, do the same thing with the sill.
If there are any nails left behind, which is usually the case with rotten wood, pull them out. Matching the angle for the new sill will be easier if you save a piece of the old, so put that to the side for when its time to cut the new one.
If your rot damage is severe, it may have affected your vertical trim. If this is the case, remove that as well. The other option is to remove the part that is affected and when it comes time to install the missing piece, you can use an epoxy wood filler to fill in the gap.
Step 4: Checking the Siding and Framing
At this point, you will want to break out your chisel and start to work on any area of the siding and framing. Remove any areas of wood that are rotten and crumbling. If you find areas that are still solid and strong, but damp, leave these to dry in the sun for a few days. You can use a heat gun to speed this progress up, just be careful not to be close as it could start a fire.
Step 5: Shopping for Materials
At this point, you have a good idea of what the extent of the damage is and what you need to replace. With the notes you took, head to the hardware store to pick up your replacement pieces.
There are many sizes and styles of windows and its best to match what you previously had, as closely as possible. Many windowsills are 1-1/2” thick and can be made out of standard 2×4 or 2×6 lumber. For all other pieces, take the measurements from the old and make copies of those with the new replacements.
Any pieces that you can purchase that are made from PVC, should be a priority. They can be installed the same as their wood counterparts, the bonus being that they will not rot. The cost you will pay upfront (as they are a bit more expensive than wood) will pay itself off many times over.
Step 6: Installing the New Windowsill
Most sills are designed with a slope, as this will help with water runoff. Make sure that the slope you cut with your new windowsill matches, as closely as possible, the angle of the previous. This is why we saved a piece from the demo.
Cut all the other pieces to size, following the old adage: ‘measure twice and cut once’. Once finished, run sandpaper over all of the pieces. This will help them to take the paint better, giving it more to adhere to. Cover all the surfaces, even the ones that will not be exposed, with primer. This acts as a barrier between the wood and rain, helping to prolong its life.
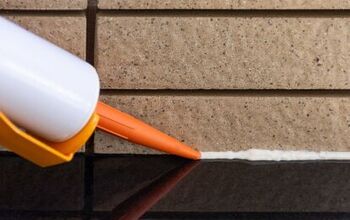
Making sure that everything is dry, start working from the inside out. Replace the sheathing and siding first, attaching these with galvanized nails. Make sure to caulk all the seams to prevent water from seeping in and damaging all the work you have done.
Next to be installed is the sill, which usually extends beyond the side casing trim on each side. Make sure this is centered and nail it into place with galvanized nails. Continue on with all the other pieces, finishing up with 2 coats of paint.
Do You Need to Hire a Framing Contractor?
Get free, zero-commitment quotes from pro contractors near you.
Related Questions
Can Bleach Stop Wood Rot?
Yes, bleach is effective in killing off the fungi that causes the rot. While this will stop the rot from continuing, it will do nothing for wood that has already been damaged.
How Much Does It Cost to Replace Wood Rot?
The average cost for supplies is between $175 and $300, depending on how extensive the damage is.
Sean Jarvis is an interior decorator, writer, and expert handyman. Well versed in everything home improvement, he is a savant at manipulating words and spaces and upgrading everything around him. Sean specializes in writing concise guides about appliance repair and installation, home and lifestyle, and other residential projects.
More by Sean Jarvis


![10 Best Scroll Saws for 2022 [Ultimate Reviews & Buyer's Guide]](https://cdn-fastly.upgradedhome.com/media/2023/07/31/9070684/10-best-scroll-saws-for-2022-ultimate-reviews-buyer-s-guide.jpg?size=350x220)
![The 10 Best Table Saws - [2022 Reviews & Buyer's Guide]](https://cdn-fastly.upgradedhome.com/media/2023/07/31/9070645/the-10-best-table-saws-2022-reviews-buyer-s-guide.jpg?size=350x220)


![How To Reset A Whirlpool Cabrio Washer [In 5 Easy Steps!]](https://cdn-fastly.upgradedhome.com/media/2023/07/31/9076531/how-to-reset-a-whirlpool-cabrio-washer-in-5-easy-steps.jpg?size=350x220)


