How To Keep Pipes From Freezing Under A Mobile Home
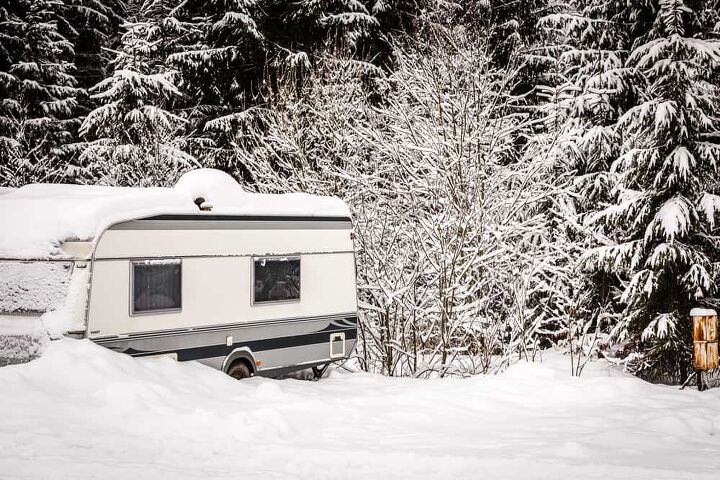
Manufactured housing is becoming a popular alternative for home buyers. Unless your manufactured home sits on a foundation, the space beneath the home can be problematic. Keeping the pipes from freezing under your mobile home is often challenging.
Keeping the piping under a mobile home during the winter months requires diligence and planning. To prevent the pipes from freezing, mobile homeowners should ensure that the home’s skirting is tight and secure. Adding heat tape to pipes in areas where prolonged hard freezes are common may also be necessary
Preparing your mobile home for winter is part of being a homeowner. Fortunately, you can easily accomplish the best means of preventing your pipes from freezing as a do it yourself project. Following a few simple steps can have your mobile home pipes secure and protected from freezing weather.
Do You Need a Faucet, Fixture, or Pipe Repair or Replacement?
Get free, zero-commitment quotes from pro contractors near you.

The First Defense: Your Mobile Home Skirting
The first defense for the pipes under your mobile home is your skirting. Skirting provides a barrier from the wind. Wind whistling under your mobile home can add to the chilling effect of the wind. Protecting your pipes from the wind is essential.
Do A Walk Around
Walk around your mobile home and do a visual inspection of the skirting. Look for any sagging or displaced skirting panels. Check the joints between the panels and be sure that the joints are tight. The bottom edge of the skirting should have no gaps. If possible, pull a bit of soil up around to the bottom edge of the skirting.
Add Insulation: The More Barriers the Better
Adding insulation behind the skirting on your mobile home is another way to help protect your pipes from freezing. There are several options for easily adding insulation to the back of your mobile home skirting
- Add bat insulation to the skirting – Bat insulation is easy to work with, especially in the confined space under your mobile home. Roll bat insulation may come in widths that allow you to unroll the bat and attach the insulation along the skirting’s length.
- Foam Insulation Panels – High-density foam panel insulation is generally available in 4’ x 8’ sheets. This material is easily cut to width and put behind the skirting on your mobile home.
- Spray on Foam Insulation – Spray-on foam is not usually considered a do it yourself project. However, there are kits for homeowners who want to apply spray foam insulation.
Adding insulation behind your mobile home skirting can make a tremendous difference in your heating and cooling bills as well. Preventing wind drafts and keeping the underside of your flooring warmer can make a more comfortable home.
Keeping Things Warm: Essential in Cold Climes
Adding heat tape to the pipes under your mobile home is a good idea, especially where long spells of sub-zero weather occur. Adding heat tape to pipes is not a difficult project. However, there are a few tricks to installing heat tape properly and safely.
The Advantages of Heat Tape
Adding heat tape to the pipes under your mobile has several advantages.
- Rapid and uniform heating applied directly to where the heat is needed most
- Wide ranges of styles and types for any application
- Controlled heating based on your needs
- Relatively easy to install and maintain
Step 1: Chose your Heat Tape
Heat tape is not all made equally. The cheapest is not the best. Remember that you are putting electrical equipment under your home where it may be subject to weather and other stresses. In the long run, buying the best heat tape possible is the best choice.
Make sure the heat tape has a quality thermostat. Your heat tape thermostat must be suitable for exterior use. Your heat tape may be under your mobile home and protected, but it can still be subject to weather.
Remember that heat tapes come in a variety of sizes and ratings. For the best results, the heat tape should match the job it must perform. Most manufacturers have information that helps determine the proper size and ratings of heat tape for any application.
Step 2: Gather the Tools and Supplies
The tools needed to install heat tape to the pipes beneath your mobile home are minimal. If you intend to install insulation over the heat tape, you will need something to trim the insulation. Be sure that the heat tape you are using specifically says it is suitable for use with insulation.
Keep yourself safe by wearing eye protection and gloves when working with heat tape and the pipes under your mobile home. Long sleeves are a good idea as well. Most mobile homes require you to snake yourself through spaces and low as 18 inches to access some of the plumbing.
A flashlight or lantern may be necessary for the further corners of your mobile home. A style of flashlight or lantern that can be set on the ground or hung and aimed at your work area can make things much easier.
Step 3: Familiarize Yourself with the Installation Instructions
Before you venture under your mobile home to begin installing your heat tape, take a few minutes to read through the manufacturer’s recommendations and instructions. Follow these directions carefully. Failure to install the heat tape properly can cause the heat tape to fail prematurely. In a worst-case scenario, improperly installed heat tape can cause a disastrous fire.
Step 4: Inspect the Pipes
Once under your mobile home, assess the pipes’ condition onto which you will install the heat tape. For the best results, the pipes should be clean and dry. Wipe the pipes to remove any accumulated dirt and debris.
Repair any leaks before installing the heat tape. In general, water and electricity are not a good combination. Any dirt or debris on the pipes may prevent the adhesive on the heat tape from sticking to the pipe. If the tape is not tight to the pipe, the heat tape’s efficiency is severely compromised.
Step 5: Install Your Heat Tape
Follow the manufacturer’s instructions closely when installing the heat tape on your pipes. Following the instructions that come with the heat tape will ensure that the heat tape functions properly and safely under your mobile home.
Step 6: Connect the Heat Tape to the Thermostat
Once you have the heat tape installed on the pipe, it is time to install the thermostat. Manufacturers use different types of thermostats. Follow the manufacturer’s instructions on where to place the thermostat and the thermocouple if the thermostat uses a remote sensing device.
Step 7: Powering It All – Getting Electricity to your Heat Tape
We suggest that you have a dedicated circuit from your electrical service panel installed to bring electricity to your heat tape installation. Heat tape can require significant amounts of electricity and having a dedicated circuit can forestall many problems.
Be sure that the outlet or outlets that serve your heat tape have ground fault interrupters. A short circuit of the heat tape and a metal water pipe can give someone who touches a faucet a nasty surprise.
The Dos and Don’ts of Heat Tape Installation
In summary, there are some dos and don’ts about installing heat tape under your mobile home.
The Dos
- Be sure the heat tape you chose matches the application. The heat tape you use should be laboratory tested, labeled, and be suitable for mobile home installations
- Unroll and check each length of heat tape before installing. There should be no breaks, nicks, tears, or other damage to the heat tape.
- Apply the heat tape to clean dry surfaces. The heat tape must make full contact with the pipe along its entire length.
- Always follow the manufacturer’s instructions.
- If your mobile home is plumbed with plastic pipe, only use heat tape intended for installation with plastic pipe products.
The Don’ts
- Never overlap or crisscross heat tape. Overlapping or crossing the heat tape can cause hotspots that may melt the insulation and cause electrical shorts.
- Each length of heat tape must have a thermostatic controller installed. Uncontrolled heat tape is a catastrophe in the making.
- Install heat tape directly on the pipe. Never install heat tape over pipe insulation.
- Avoid putting heat tape close to flammable materials
- Don’t submerge heat tape or put heat tape in areas where contact with water for long periods is possible.
- If you install pipe insulation, the heat tape must be rated for operating under pipe insulation.
- Never cut heat tape. Buy lengths of heat tape suitable for your application.
Heat Tape Maintenance: Keeping Things Warm
Heat tape, like anything else, is subject to wear and tear. A regular program of maintenance is required to keep your heat tape operating efficiently and safely. In general, you should:
- Inspect your heat tape at least once a year. Preferably, it would be best if you inspected the heat tape at the end of the cold weather season and again before the first cold weather hits in the fall.
- Check the GFCI serving each length of heat tape. Test the GFCI outlet using the test button.
- Keep a record of when your heat tape installation. The life expectancy of heat tape depends a lot on the usage. The insulation on heat tape may develop cracks as it is repeatedly heated and cooled. The manufacturer may have more information on the expected life of your heat tape.
- Test the thermostatic control device according to the manufacturer’s recommendations. A failure in a thermostat can have disastrous results.
Do You Need a Faucet, Fixture, or Pipe Repair or Replacement?
Get free, zero-commitment quotes from pro contractors near you.
Keeping Warm and Safe: The Ultimate Goal
Keeping things warm and the water flowing is the ultimate goal of winterizing your mobile home. The methods are straight forward and easy. Taking the time to prepare your mobile home for the winter season means keeping you, your family, and your mobile home comfortable and safe. Good luck and stay warm.

Dennis is a retired firefighter with an extensive background in construction, home improvement, and remodeling. He worked in the trades part-time while serving as an active firefighter. On his retirement, he started a remodeling and home repair business, which he ran for several years.
More by Dennis Howard


![10 Best Scroll Saws for 2022 [Ultimate Reviews & Buyer's Guide]](https://cdn-fastly.upgradedhome.com/media/2023/07/31/9070684/10-best-scroll-saws-for-2022-ultimate-reviews-buyer-s-guide.jpg?size=350x220)


![Finishing Basement Without Permit [Is It Really Illegal?]](https://cdn-fastly.upgradedhome.com/media/2023/07/31/9070078/finishing-basement-without-permit-is-it-really-illegal.jpg?size=350x220)

![Cost To Drill A Well [Pricing Per Foot & Cost By State]](https://cdn-fastly.upgradedhome.com/media/2023/07/31/9074980/cost-to-drill-a-well-pricing-per-foot-cost-by-state.jpg?size=350x220)