How To Install A Tongue And Groove Vaulted Ceiling
Vaulted ceilings are in right now. Like, super in. They’re considered to be one of the most frequently requested amenities in luxury apartments as well as in regular homes. Of course, there are different types of vaulted ceilings. One of the more popular is called a “tongue and groove” vaulted ceiling. If you’re debating installing this ceiling, it’s a good idea to know what you’re in for.
Tongue and groove ceilings can be installed on 1 x 2 battens, and will involve nailing down the tongues and then fitting neighboring panels’ grooves over them. Then, you’ll need to afford space for new cutouts, get rid of extra tongues that don’t fit your home, and also just clean up any areas that don’t fit appropriately.
Most people choose to get a tongue and groove vaulted ceiling installed by a professional, but it’s possible to do on your own. This article will help you figure out whether or not it’s the right move for you.
Do You Need Wall and Ceiling Contractors?
Get free, zero-commitment quotes from pro contractors near you.

What Is Required For A Tongue And Groove Ceiling?
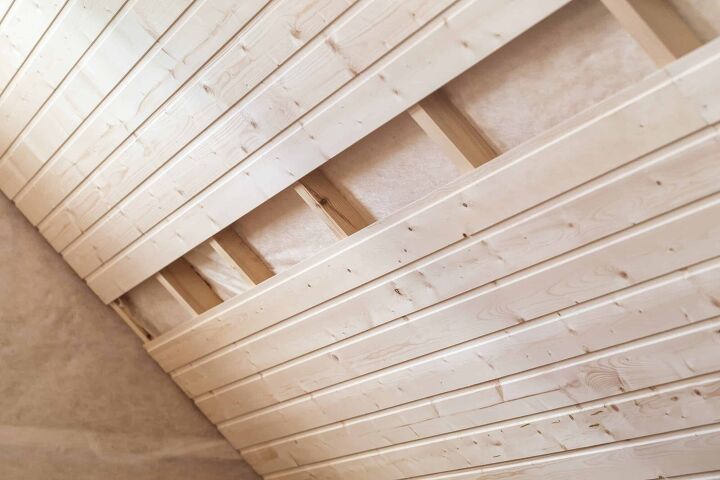
Tongue and groove (also known as T&G) ceilings are wooden ceilings that are made by inserting tiles (or planks) that have interlocking parts. When their grooves fit into their tongues, it’s considered to be a married piece. These types of ceilings are known for their sturdiness as well as their textured yet modern appearance.
If you want to install a T&G ceiling, then you will need the following:
- Panels. These can be actual planks or panels. Either way, you’re going to need something to install over your ceiling.
- Battens. These are 1 by 2-inch boards that will help keep the ceiling stable.
- Nails and a Nail Gun. Yep, you still need nails. We suggest two-inch nails with a 15-gauge nail gun.
- A Saw and Sander. This is for smoothing out any planks or panels that are uneven.
- A Ladder. You will need to get up there somehow.
How To Install Your Tongue And Groove Ceiling
Once you have all your supplies, it’s time to install that ol’ T&G. I’m not going to lie, it’s going to be a hassle. But, if you have the patience, it can turn into a relatively easy project.
- Finish with a wood stain of your choosing, if you want. It’s up to you. Though you can do this post-installation, most people find that it’s cleaner and easier to do before anything is nailed down.
- Start by nailing down your battens. You want to place battens evenly on a parallel line, either horizontally or vertically on the ceiling. Nail them into place. We suggest having at least one batten per plank space.
- Prep your panels. Yes, your panels should be cleaned. Yes, you should trim the edges off. Oh, and if you see any staples or plastic wrap? Remove that.
- Use a nail gun to “bind nail” the tongues of the boards down in the direction of the installation. You want the nails to be gunned at a 45-degree angle. When nailing the tongues, make sure that you’re nailing them through the batten.
- Then, fit the groove over the tongue and beat it in. A lot of ceiling installers use their nail gun for this, especially if they’re in a hurry. Others use hammers.
- Start working on your panels. To get a more authentic look, stagger the butt joints so you have a slightly randomized look to your ceiling. When working with your panels, make sure to hammer in any open joints you see.
How To Work With Difficult Panels
In construction, you’re going to have moments where you are going to have difficult panels or cutouts. Here’s how to navigate this issue:
- If you have a cutout you need to do, measure it, and mark it on the plank before you install that particular plank. You can use a jigsaw to make the cut.
- If you have twisted, warped, or otherwise bad boards, cut them short. It’s better to have short but quality boards than to have a nightmare installation.
- If you can’t fit the tongue over the last groove, just use a hammer to break off the groove flanges and nail them down. It’s not glamorous, but it happens with almost every tongue and groove ceiling install at least once. Sometimes, the two pieces just don’t want to marry. You just have to make do.
Are Tongue And Groove Ceilings Popular?
If you’re looking for a shiplap ceiling that has that crisp, clean look, you’re going to love having a tongue and groove ceiling. They’re rustic and fairly stylish. However, they’re not for everyone and aren’t a “breakout success” type of trend. People either like them or they don’t. So if you were hoping for a hyper-trendy ceiling, this wouldn’t be it.
Are Tongue And Groove Ceilings Easy To Install?
Honestly, they really aren’t. Most people find that hammering in planks at a high height is a fairly strenuous workout. It’s normal to need to take breaks and stretch during an installation job. Because of how tedious it can get and how much exertion you can put in for a single ceiling, you might want to rethink this if you were hoping for an easier job.
T&G ceilings, like other shiplap ceilings, are known for being difficult to install. In fact, many home improvement blogs advise you to stick to drywall if you are looking for a faster project–even though drywall is a two-person job.
How Much Does Installing A Tongue And Groove Ceiling Cost?
Want to hire someone to do it for you? Honestly, I can’t blame you. Unfortunately, it can get pricey fairly quickly. Typical shiplap ceilings can cost between $2 to $7 per square foot to install. This can lead to a per room cost between $500 and $1500, assuming that you’re using real wood. So it definitely remains an expensive option.
Do You Need Wall and Ceiling Contractors?
Get free, zero-commitment quotes from pro contractors near you.
Related Questions
Is tongue and groove cheaper to install than drywall?
When it comes to the actual materials, tongue and groove is considered to be cheaper than drywall. However, drywall is a two-person job. This means that you will naturally have to pay more in labor for any installation. Most would agree, though, that drywall is the cheaper choice. In fact, it’s considered to be one of the cheapest ceiling options available.
What type of wood is best for ceilings?
This all depends on the look that you want to accomplish, but durability will always remain an important part of the process. If you’re looking for durability, we strongly suggest ash, cedar, pine, cherry, oak, or walnut. All of these woods are known for being strong, with many of them also have insect-repelling tendencies.
Why would people get a drop ceiling?
Drop ceilings are considered to be the cheapest ceiling finishing method on the market. They are also known for being good for rooms with piping or HVAC equipment. As a result, it’s usually used as a bargain option in areas where you may need quick and easy access to piping.
What’s the difference between a drop ceiling and a suspended ceiling?
Though the two terms are generally used with different connotations, there is no difference between a drop ceiling and a suspended ceiling. It’s just a different term to use for the same ceiling.
Related Guides

Ossiana Tepfenhart is an expert writer, focusing on interior design and general home tips. Writing is her life, and it's what she does best. Her interests include art and real estate investments.
More by Ossiana Tepfenhart