How To Hang A Quilt On The Wall Without A Sleeve
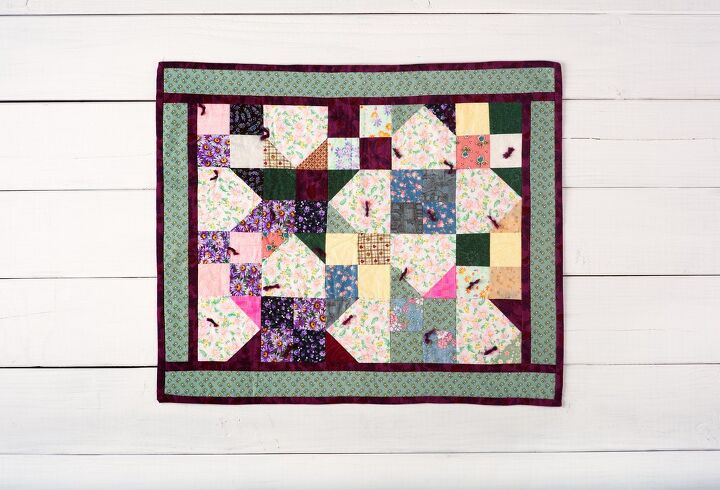
Using large quilts as décor can be a wonderful addition to your walls. These works of art help to pull together your home’s design and also add a warm and comforting feel to any space. The quilt you choose doesn’t need to be particularly fancy, either. In fact, whether it was sewn by your great grandmother, thrifted, or you made it yourself, any quilt can be hung.
The most common way to hang a quilt involves attaching a sleeve, or long tube of fabric, along the back width of the quilt. Then, a rod or dowel can be inserted into the sleeve and subsequently attached to the wall. However, if you do not know how to sew and your quilt doesn’t already have an attached sleeve, you’ll need to look for other options.
Thankfully, there are plenty of ways to hang a quilt on the wall without a sleeve. For example, you can use clips or clamps, nails or push pins, or a more DIY method with clothespins and command strips. Let’s explore all the ways that you can hang up your beloved quilt without the need for a sleeve.
Do You Need Handyman Services?
Get free, zero-commitment quotes from pro contractors near you.

Method #1: Hanging a Quilt With Clamps
Thanks to the creativity of quilters, there are a number of modern solutions to displaying quilts up on the wall. Although they are helpful, you do not need a sleeve on your quilt to hang it up. Instead, you can use quilt clamps. These devices are a great choice for those who like to swap out their quilts frequently.
Quilt clamps are mounted onto your wall, evenly spaced out across your quilt’s top edge, and then pinched in place. Depending on the type, the clamp may be secured with springs (similar to a chip clip) or by tightening and loosening it manually with a screw. Both clips and clamps can be found in a variety of wood finishes, and more decorative metal options are also available in various shapes to fit your décor.
You can find quilt clamps for sale at your local craft store, or from a variety of online retailers such as Amazon, eBay, and Etsy. Depending on your preference, you can mount them to the wall using screws or Command Strips, for a less abrasive option. They make it very easy to rotate your quilt, allowing you to enjoy both sides.
One of the disadvantages to quilt clamps is that, to be effective, they need to be lined up in a perfectly straight line, which may be difficult to achieve for some. Also, the clamps are visible when hung, a fact that may be undesirable for those who only want to see their quilt.
Method #2: Hanging a Quilt With Nails or Thumb Tacks
Many quilters nickname this the “lazy method.” However, we understand that sometimes you may need to hang a quilt in a child’s playroom, somewhere where it will go largely unappreciated, or you simply want a quick solution. In this case, you can grab some nails or thumbtacks and call it a day.
Place the tacks or nails in the top corners or along the width of the top edge for ample support. Although this option is effective, affordable, and easy, it is not always recommended. For exceptionally heavy or large quilts, the nails or thumbtacks may not offer enough support and you could risk ripping. Also, small tack holes in your quilt are unavoidable when you choose this method.
However, the eternal judgment from others, especially your grandmother, is a small price to pay for effectively hanging your quilt on the wall. In fact, if you match the color of the push pins to your quilt and use them sparingly, they won’t look all that bad and your visitors may not even notice.
Method #3: Hanging a Quilt With Clothespins and Command Strips
This method for hanging a quilt on the wall is a DIY variation of using quilt clamps. It allows you to display your quilt using common household materials. All you’ll need are some wooden clothespins, Command Picture Hanging Strips (the narrow width), a level, rubbing alcohol, and your quilt.
The major benefit of using Command Strips, as opposed to other methods, is that you can easily readjust if you have difficulty making things exactly level. You can repeatedly move the second piece of the strip (the one that will attach the clothespin) up or down on your wall until everything is aligned properly.
Additionally, each Command Strip is designed to hold up to 3 pounds, providing plenty of support for most quilt wall-hangings.
Follow these steps for hanging your quilt on the wall using a DIY method that involves clothespins and Command Strips:
- Start by separating your strips and pressing the two corresponding pieces together until they click.
- Remove the paper lining from one side of the Command Strip and stick it to one side of a clothespin. Press firmly for 30 seconds to ensure that adhesive has bonded to the pin.
- Clean the wall where the quilt will be hung using rubbing alcohol. This will allow the Command Strip to properly bond to the surface.
- Keep the two strips attached, remove the remaining liner from the other end of the strip, and press it firmly to the wall for at least 30 seconds.
- Repeat the above steps for the rest of the clothespins, spacing them out evenly along the wall. A good rule of thumb is to place one at each end of your quilt and 1-2 in the center, depending on how big the quilt is.
- Use your level as you go to make sure that the pins are completely straight, and adjust as needed.
- Allow at least an hour for the Command Strips to cure, both on the wall and on the clothespins. If you hang up your quilt right away you risk it falling down, and may have to start completely over with applying the clothespins to the wall.
- After an hour has passed, hang up your quilt and enjoy!
If you’re not particularly fond of the clothespin look, consider painting them to match your particular style. Avoid using plastic clothespins, as they are more prone to breakage under stress. Wooden clothespins are most recommended and are known to hold up much better with weight.
Method #4: Hanging a Quilt With a Frame
Another easy way to get your quilt onto your wall is by placing it in a frame, like a picture. Both mini quilts and quilt blocks look great when placed in frames and will look beautiful on your wall. You can even cluster several together to offer a pleasing display of your quilting skills. Framing your quilt is an excellent way to get it on display quickly, and requires very little time and effort.
Additionally, if your quilt is particularly old, damaged, falling apart, or no longer usable, putting it in a frame can help preserve it. Simply take your quilt to a local establishment that does custom framing, or measure your quilt and find a corresponding frame. You can choose to frame the quilt with or without glass.
However, glass will help to protect the fabrics from dust that may cause old fabric to age faster. On the other hand, foregoing glass could make it easier to enjoy your quilting stitches.
Once framed, your quilt can be easily hung up just like a picture frame. Whether you use a frame or not, always place your quilt in an area of your home that does not receive direct sunlight or other strong light. Harsh sunlight, as well as some indoor lighting, can cause the colors of the fabric to fade.
Do You Need Handyman Services?
Get free, zero-commitment quotes from pro contractors near you.
Wrapping It Up
Although using a sleeve along the width of a quilt, or in the corners, is the most common way to hang it on the wall, it is not the only option. If your quilt does not already have a sleeve and you are not comfortable in your sewing abilities enough to craft one, you can use quilt clamps, clothespins and command strips, nails or thumbtacks, or simply place your quilt in a frame.
However, for especially heavy quilts you may want to consider installing a sleeve, as this method is known to provide the most support of all.

Jessica considers herself a home improvement and design enthusiast. She grew up surrounded by constant home improvement projects and owes most of what she knows to helping her dad renovate her childhood home. Being a Los Angeles resident, Jessica spends a lot of her time looking for her next DIY project and sharing her love for home design.
More by Jessica Stone


![10 Best Scroll Saws for 2022 [Ultimate Reviews & Buyer's Guide]](https://cdn-fastly.upgradedhome.com/media/2023/07/31/9070684/10-best-scroll-saws-for-2022-ultimate-reviews-buyer-s-guide.jpg?size=350x220)


![Finishing Basement Without Permit [Is It Really Illegal?]](https://cdn-fastly.upgradedhome.com/media/2023/07/31/9070078/finishing-basement-without-permit-is-it-really-illegal.jpg?size=350x220)