How To Drain Gas From A Snowblower (Step-by-Step Guide)

As winter begins to wind down, the need for snowblowing winds down along with it. This time is perfect for draining the gas from your snowblower and storing it away until next season. If this describes your current situation, you’ve come to the right place. However, there are a number of other reasons why you may need to drain the rank.
Regardless of the purpose, if you need to drain the gas from a snowblower, it must be done safely and correctly. We’ve provided you with a quick and easy guide to tell you how it’s done and how to ensure that your blower functions as it should when winter rolls around again.
Why Drain the Gas From Snowblower Before Storage?
Your snowblower is a very helpful piece of equipment during the winter months. However, when the snowy season has ended, they must undergo proper maintenance in order to ensure that they start up correctly next winter. More specifically, you want to remove the gas from the tank of your snowblower before storing it.
Gas that is left in the engine for a long period of time could cause failure when you go to start it up in the winter. The reason for this has to do with what happens to the fuel while it is being stored. Although you’ve probably never noticed this with your motor vehicle, gasoline evaporates at a particularly rapid rate. This evaporation rate occurs even faster when ethanol is added into the picture.
Even if your tank is nearly empty, the gas will escape and leave behind some additives. Major issues arise due to the mixture of ethanol and water, which can develop into a corrosive substance. These parts of the fuel blend are left behind and can wreak havoc on your snowblower. It can clog up various parts of the engine, but primarily the carburetor.
While emptying the tank in your snowblower may seem like an irritating chore, it is crucial to ensure that your snowblower lasts long and starts up each time.
How to Drain Gas From Snowblower
Before we begin the step-by-step process for draining gas from your snowblower, let’s examine the materials and conditions that are needed. You will need a running engine, bowl or cup, siphon pump, snowblower manual, and an open workspace that is away from flames and flammable materials.
As always, equipment with gasoline tanks should be drained outdoors and gasoline itself should be handled with care.
Step One: Consult the Instruction Manual
Although siphoning gasoline from a snowblower can be relatively easy with a pump, it’s always wise to check the manufacturer’s manual first. Before you continue, consult the instructions to check if there are any specific maintenance requirements for your particular model. Then, proceed accordingly.
Step Two: Add Fuel Stabilizer
Each time you fill gas cans with fresh gasoline, you should first add in a fuel stabilizer. The purpose of a fuel stabilizer is to prevent gas from breaking down into a varnish-like muck that can clog your tank, fuel lines, injectors, and more. Damage to your internal components occurs when the ethanol in the gas absorbs water and oxidizes.
Adding fuel stabilizer to your gasoline offers an extra level of assurance, allowing the fuel to be safely reused in your blower after off-season is over.
Step Three: Prepare the Siphon Pump
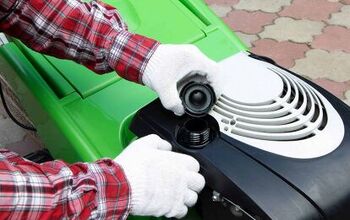
Most siphon pumps are relatively easy to operate, as they typically use a hand pump with two tubes coming out of it. To set up the pump, remove the fuel cap and feed one of the tubes into your snowblower’s fuel tank and the other into your cup, bowl, or container. Choose your vessel based on how much gasoline remains in your tank. However, it’s best to use a tall container or a jerrycan to prevent spillage.
Step Four: Pump the Fuel Out
Once your siphon pump is properly set up, you can start pumping. This process will depend on the particular pump that you have so be sure to refer to the instructions for specifics. Begin pumping accordingly and the siphon will start to suck up the liquid that remains in the tank. Once you get it started, the air pressure does most of the rest of the work. The fuel will be filtered through the other tube and into your container.
For best results, move the tube around the bottom of the tank afterward to ensure that you siphoned out as much of the liquid as possible.
Step Five: Run the Engine
Although you may have drained the majority of the gasoline in the tank, there’s likely a small amount left in the blower. To expel the rest, replace the fuel cap and start up the engine. The goal here is to allow the engine to run until it stops on its own. This will indicate that the fuel tank is completely free of gasoline. Since you’ve already siphoned out the majority, this step should not take very long.
Additional Snowblower Maintenance Steps
In addition to draining the gas, there are a number of other maintenance steps that should be completed prior to storing a snowblower for off-season. Although these apply to the majority of snowblower models, refer to your owner’s manual to make sure you aren’t missing any key steps.
- Seal and protect your engine. To do this, remove your spark plug, which is generally very easy to access. Then, pour a drop of oil into the combustion chamber and pull on the cord several times to lubricate the piston and cylinder wall. Replace the spark plug and proceed with pulling until you feel resistance in the cord. This indicates that the piston has sealed the chamber to block moisture from the air from entering.
- Spark plugs. The spark plugs themselves should be given a quick check. If dirty, clean them with a wire brush and secure them back in place. Consider replacing the spark plug if you notice any significant damage or wear and tear.
- Clean and lubricate. This step is often overlooked, but is vital to ensure proper operation of your blower. Thoroughly clean and lubricate all the essential parts. Tighten and replace screws, bolts, and nuts as needed. Also, spray lubricant on the bolts and nuts to prevent corrosion during the off-season.
- Gear shaft maintenance. To inspect your gear shaft, you’ll need to move the pivot upwards and then shift the lower cover. Apply oil to the hex shaft, but make sure that you do not get any oil on any other internal parts.
- Perform any and all repairs. Give your blower a good inspection to check for damage. All repairs including damaged, broken, or worn-down parts, should be taken care of prior to storage. The auger, skid shoes, muffler, and belt are key parts that should get special attention.
- Repaint where necessary. In areas where paint has come off, remove rust and chipping with sandpaper. Then, select the appropriate paint color and repaint your blower to give it a fresh look. Consider using a rust preventative product on metallic components, especially where the impeller and auger are located.
Once all of the required maintenance steps are performed, look for a clean area in your garage to store your snowblower for the off-season. Snowblower covers are very inexpensive and can help preserve the life of the machine. Unlike garbage bags or plastic tarps, covers are designed to breathe and prevent “sweating” and moisture buildup during temperature shifts throughout the year.
Should your blower need to be stored outdoors, use a heavy tarpaulin to completely block it from dust, rain, sunlight, and other external elements. However, even when properly covered, storing your snowblower outside is never the best idea.
Wrapping It Up
When in use, snowblowers are exposed to some pretty rough conditions. As a result, proper maintenance must be performed in order to keep the blower in good working order. Although it may seem tedious to drain out the gas in the tank, it is absolutely essential to ensure that your snowblower starts up properly when winter comes around again. Also, by using a siphon pump this task can be relatively easy to complete.

Jessica considers herself a home improvement and design enthusiast. She grew up surrounded by constant home improvement projects and owes most of what she knows to helping her dad renovate her childhood home. Being a Los Angeles resident, Jessica spends a lot of her time looking for her next DIY project and sharing her love for home design.
More by Jessica Stone


