How To Remove Thinset From A Tile Face (Step-by-Step Guide)
Home remodeling or renovation can be an expensive endeavor. You could end up spending somewhere in the neighborhood of $40,000 to have your home remodeled. Saving money whenever possible would be ideal.
You can do so by recycling some of your old tiles. By handling and cleaning them up properly, the tiles can be fit to use again inside your remodeled home.
Remove thinset mortar on tiles by using water, a sponge, and a good amount of pressure to scrub the thinner layers away. If the layers of mortar are on the thicker side, use white vinegar instead of water and scrub again. For quicker removal of the thinset mortar, you’ll have to soak the tiles in a container full of muriatic acid.
The process of removing thinset mortar is one you cannot take lightly. At the same time, it’s an important one to engage in if you want to save money. Read on to see how you should tackle this particular task.
Do You Need Handyman Services?
Get free, zero-commitment quotes from pro contractors near you.

What Is Thinset Mortar?
Thinset mortar is used in homes across the country, but there’s a chance you may not know much about it. According to The Spruce, thinset mortar is made from Portland cement, silica sand, and a variety of moisture-retaining agents.
One of the main reasons why this type of mortar is used so often is because of its moisture resistance. You can use it to hold shower floor tiles with no issue whatsoever. It will even prevent the growth of unsightly mold because of how well it handles moisture.
Feel free to use thinset mortar in locations where it will be exposed to water often. Even warm water will not weaken the hold of thinset mortar so go ahead and take those hot showers.
Homeowners can also purchase thinset mortar pre-mixed if they so desire. Doing so will cut down on the time they’ll need to spend applying tiles to their bathroom or kitchen.
As you can see, there are many reasons why thinset mortar is a preferred household adhesive. Don’t be surprised if it’s also present inside your home. It’s also why learning about how to remove it properly is so important.
Why Should You Reuse Your Old Tiles?
Before we get to the conversation about removing thinset mortar, it’s worth discussing why that task is worth your time. Let’s dive deeper into that topic by highlighting the reasons why it’s smart to reuse your tiles.
You Can Save Money by Reusing Tiles
Probably the number one reason why many homeowners want to reuse tiles is because it’s a good way to save money. We touched on it earlier, but home renovation projects really can be pricey.
On top of that, remember that surprise repairs may also be needed. In the process of renovating your home, you or your contractor may spot a problem that wasn’t visible before. If enough of those pop-up, the budget you prepared may not be enough to cover everything.
The cost of retiling a shower or bathroom alone can cost around $2,000 on average, according to Home Advisor. You can cut down on that expense by reusing your old tiles.
You’re Reducing Your Waste Output
Home renovation projects tend to produce a lot of waste. You can reduce the amount of waste produced by reusing whatever materials are still in good condition.
Since tiles are pretty durable, they can often stay in your home for a long time. Instead of disposing of your old tiles needlessly, you can just clean them up and have them re-installed. Every little bit matters when it comes to waste reduction and reusing tiles is helpful in that regard.
You Can Keep Using Tiles You Like
Just because you’re remodeling your home, doesn’t necessarily mean you have to use new tiles. If you like the floor or wall tiles you’re currently using, go ahead and keep them. Removing the thinset mortar from the tiles and cleaning them up thoroughly can even make them look good as new.
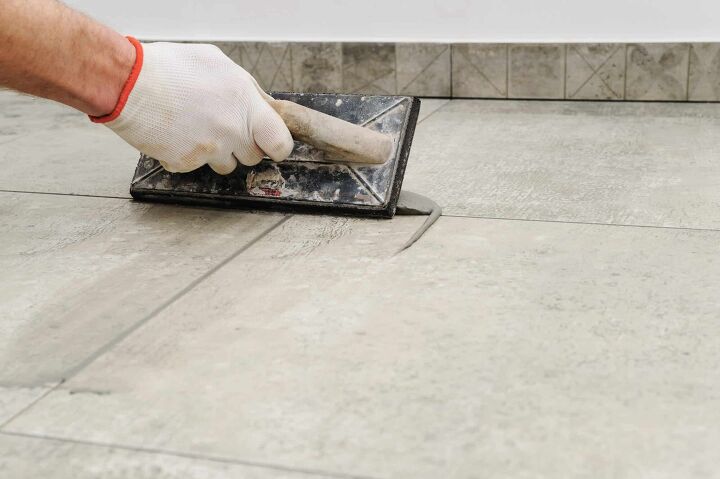
The Process of Removing Thinset Mortar from Tiles
There are different ways to remove thinset mortar from old tiles. The method and items you’ll need to use will depend on how thick the mortar is. Follow the steps below to remove the thinset mortar from your tiles as cleanly as possible.
Step 1: Prepare Your Cleaning and Safety Equipment
To get started, you’ll need to prepare the cleaning equipment. You’ll need some water, white vinegar, muriatic acid, and a sponge. A plastic container that can hold the muriatic acid, a stick for stirring, and a brush will be required too.
Since you’ll likely have to use muriatic acid, it’s important to get your hands on some safety gear. Pick up a respirator, some safety gloves, and goggles at a minimum. To be extra safe, you can also buy some boots and overalls.
Step 2: Remove the Thinnest Layers of Thinset Mortar
The thinnest layers of thinset mortar are the easiest to remove. According to Hunker, all you’ll need for this task are water, a sponge, and some patience.
Start by dampening the thinset with water and allow the liquid to seep into the mortar. Once the water has been given the chance to soak the mortar, you can start scrubbing it away with your sponge. Put some elbow grease into your scrubbing to remove as much of the mortar as you can.
Step 3: Use Vinegar to Remove Thicker Layers of Thinset Mortar
Now that you’ve removed the thinner layers of mortar, you can move on to using the vinegar. You’re basically repeating what you did in step two, but replacing the water with vinegar. The acidity of the vinegar will do a better job of breaking down the mortar than the water did.
Step 4: Wear Your Protective Gear
Before going to the last steps, you should put on your protective gear. Muriatic acid can cause nasty chemical burns if it hits exposed skin. Even inhaling it can lead to your respiratory tract getting irritated.
Wear the protective gear you have and keep them on as long as you’re using the muriatic acid. It’s also a good idea to make sure no one’s nearby when you’re working with that hazardous substance.
Step 5: Soak the Mortar-Covered Tiles in Muriatic Acid and Water
Fill the plastic container with around five gallons of water and then carefully pour a cup of muriatic acid in there. Stir the mixture carefully with a stick.
Now, grab the tiles and place them into the muriatic acid and water mixture. Allow them to soak for at least five minutes, according to SFGate.
Once the five minutes are up, remove the tiles from the water. You should now be able to remove the remaining mortar by scrubbing them away.
Step 6: Apply the Muriatic Acid Directly to the Tiles
If there are tiles still covered in thinset mortar, you’ll have to apply the muriatic acid directly to them. Grab your brush and dab it with some of the muriatic acid. Use that to coat the tiles and then scrub away the mortar when it comes loose.
Do You Need Handyman Services?
Get free, zero-commitment quotes from pro contractors near you.
Related Questions
How Do You Remove Thinset Mortar from Concrete?
In order to remove thinset mortar from concrete, you’ll need some heavy-duty tools. A hammer drill equipped with a tile chisel can work. You can also rent machines that specialize in removing mortar from concrete floors that are usually available at hardware stores.
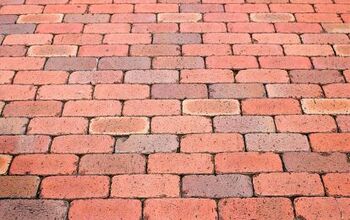
How Do You Remove Thinset Mortar from Brick?
Removing thinset mortar from brick surfaces will require using a chisel. You’ll have to be careful while chipping away at the mortar so as to minimize the damage done to the brick surface.
How Do You Remove Thinset Mortar from Wood?
The process of detaching thinset mortar from wooden surfaces will also require the usage of tools. More specifically, you’ll need a chisel and a sharp-edged scraper.The chisel should be enough to take out the softer pieces of mortar. The scraper will come in handy when the time comes to remove the thicker pieces.

We are a team of passionate homeowners, home improvement pros, and DIY enthusiasts who enjoy sharing home improvement, housekeeping, decorating, and more with other homeowners! Whether you're looking for a step-by-step guide on fixing an appliance or the cost of installing a fence, we've here to help.
More by Upgraded Home Team