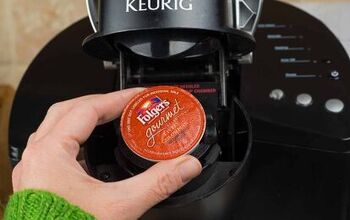
How To Clean A Keurig Needle Without A Tool

Keurig’s have become a common household appliance. They are a great way to make a cup of coffee or other hot beverage with minimal time and effort involved. And like any other household appliance, it needs to be cleaned thoroughly from time to time.
Most Keurig’s will come with a tool that helps you to clean out the smaller components in the machine. So, what do you do without that tool? Here are a few things that you can do to clean out your Keurig without the accompanying tool.
How Often to Clean the Keurig?
It is a good idea to clean out the Keurig once a month or so. Cleaning your Keurig is a great way to ensure that the integrity of the flavors is proper. A machine that isn’t cleaned well can impact the flavors of your beverages at best and can even contain bacteria and other nasty things at worst.
Spot cleanings may give a surface appearance of cleanliness, but it isn’t the same as a deep clean. You will need to clean the exit needs, the holder, and the water tank thoroughly to get rid of any buildup or bacteria that may have festered in the machine.
Properly cleaning the Keurig will take around 10 or 15 minutes, though you should probably clean out the tank at least once a week. For the best-tasting coffee, rinse out the tank and fill it with some fresh water.
Step 1: Unplug the Machine and Remove the Components
As is the case with any appliance, the very first thing that you should do is to unplug it. Whenever electricity is involved, remove the risk of shock or other damage by removing the plug from the wall completely.
After that, take out the drip tray and the water tank. Wash them using some mild dish detergent and then rinse them out thoroughly. There is a valve at the bottom of the tank as well as on the machine where the tank goes. Make sure that the valve is as clean looking as it can be before proceeding to the next step.
Step 2: Clean the Holder
Take out the k-cup holder as well as the diffuser so that you can clean both properly. To do this, you’ll need to turn off the brewer and remove both the holder and the tray that sits underneath the k-cup holder. Depending on the Keurig that you have, you may need to press the buttons on the holder to separate it from the housing.
Wipeout and rinse the holder thoroughly. This should only take a minute or so. You can then set aside the holder until you’re ready to put it back onto the machine.
Step 3: Clean the Exit Needles
Normally, you can use the tool that comes with the Keurig to clean the exit needles. In the event that you don’t have it anymore, all you need is a paper clip. The paper clip actually works better because it will clean the inside of the exit needle.
Use the paper clip to remove any leftover grounds or debris from the bottom portion of the exit needle before rinsing it out with water. Exercise caution here because both the paper clip and the exit needle are sharp, and you may find yourself with an unwanted pinprick in your finger if you’re not careful.
Lastly, wash out the diffuser and the housing. There could be grounds leftover here, as well as any oils. If you need it, there are videos that can show you how to thoroughly clean this portion but basically just use your best judgment and it will be fine.
Step 4: Wipe the Keurig
Now that all of the components have been removed and cleaned completely, it is time to clean the Keurig unit itself. Wipe off any dust, dirt, or leftover grounds that may be in the unit. They will be particularly prevalent near the handle and the top exit needle, so you might want to use something small like a toothbrush or a wet paper towel.
Use a damp cloth to wipe down the rest of the unit before putting all of the removable parts back into the machine. Ensure that they are secure and then plug the machine back in once again.
Step 5: Add Water and Rinse Out the Components
The final step is to add water into the tank once again. Run one or two rinse cycles to finish the cleaning process and you should be left with a totally clean Keurig that won’t interfere with the flavor of your drink.
Performing Descaling
It is a good idea to descale your Keurig from time to time. Depending on the hardness of the water in your area, there can be a buildup of minerals over time. This is when the water is considered to be “hard” and the minerals can build a film over the surfaces of the Keurig.
It doesn’t matter what you use for the descaling process. You can use either vinegar (since it’s more readily available) or a descaling solution that is specifically created for cleaning the Keurig. Descaling fluid tends to be a bit more costly, but it has been formulated for descaling coffee pots. Not only that, but it will also make sure that your Keurig remains running reliably.
Why Does the Keurig Spit Out Coffee Grounds?
From time to time, you may notice that the Keurig is spitting out coffee grounds. Generally speaking, this is due to the k-cup being unable to push water through. When this happens, it will back up out of the top and spit out the coffee grounds.
The holder will need to come out and be cleaned using running water to push it through. If it is particularly plugged up, you can use the aforementioned paper clip to clear out the jam.
Why Does the K-Cup Explode?
Every now and again, you may be the victim of an exploding k-cup. While it is definitely annoying, it also isn’t the end of the world. There are quite a few different factors that can come into play, causing the k-cup to explode.
The first is that there is too much air in the k-cup. This is entirely on the manufacturer. For whatever reason, air can become trapped when they manufacture the k-cup. If you notice that the lid of the k-cup is rounded, there is likely too much air trapped inside. When the needle of the Keurig punctures the k-cup, it can explode. Try relieving some of the pressure by poking the lid with a small needle. If not, push down so that the bottom brew needle does the puncturing. In any event, an explosion isn’t a major deal but it will require a little bit of impromptu cleanup time.
It could also be the result of a weak seal. Unfortunately, there isn’t much to be done to either detect or resolve a weak seal on your k-cups. There’s also a pretty good chance that if one lid in your box is faulty, others will be too. If it becomes a problem, you might be able to get your money back from the establishment but that’s hit or miss.

Ryan Womeldorf has more than a decade of experience writing. He loves to blog about construction, plumbing, and other home topics. Ryan also loves hockey and a lifelong Buffalo sports fan.
More by Ryan Womeldorf


![How To Reset A Whirlpool Cabrio Washer [In 5 Easy Steps!]](https://cdn-fastly.upgradedhome.com/media/2023/07/31/9076531/how-to-reset-a-whirlpool-cabrio-washer-in-5-easy-steps.jpg?size=350x220)