How Far Below The Drain Should A P-Trap Be?

A plumbing trap, or P-trap, is a portion of a plumbing pipe that looks like a loop, “J,” or “C.” P-traps are extremely important as they keep gas sewer odors from escaping plumbing fixtures such as sinks, toilets, and drains. When designing a house, it can be hard to determine how far below the drain a P-trap should be.
The P-trap should be located no more than 24” below the drain. There is no minimum distance for how far below the drain a P-trap should be. As long as the attached trap arm that is running between the P-trap and vent pipe has a ¼” slope directed towards the drain, you are not constricted with how close the drain is to the P-trap itself.
Odors from the sewer and your plumbing drain can work their way through your pipes, cause your house to smell bad, and even pose a safety risk. That is where P-traps come in, and without one, harmful fumes could fill the air. Let’s dive into P-traps and see what some of the requirements that they come with entail.
Do You Need to Hire a Plumber?
Get free, zero-commitment quotes from pro contractors near you.

What Is A P-Trap?
The P-trap is the section of the pipes below a sink that is C or J-shaped. P-traps are extremely important as they are responsible for keeping sewer gas out of your home. If you are continually getting a sewer smell in your house, it could indicate a clogged or damaged P-trap.
P-traps sit beneath plumbing fixtures, and each time that the fixture, such as a sink, that it is connected to, gets used, the P-trap forms a seal. This seal is formed by the P-trap retaining some of the water. Without the seal caused by the P-trap holding onto water, sewer gases would work their way through the pipes and out of the plumbing fixtures.
In today’s world, there is a variety of shapes for P-traps, including:
- C-shape
- J-shape
- U-shape
- U-bend
- P-shape
It is easy to identify the P-trap beneath your plumbing fixture because it looks like one of the letter shapes listed above. There are no advantages to one P-trap shape over another. The P-trap shape you have is solely based on the shape of the piping and trap arms beneath the plumbing fixture.
How Far Below The Drain Should It Go?
The maximum distance that a P-trap can sit below a drain is 24”, or 2 ft. That does not mean that every plumbing fixture will need the P-trap to sit 24” below, but if your fixture calls for it, it is okay. The Universal Plumbing Code dictates that the total length of each of the arms connected to the P-trap must be 24” or less as well.
More than anything, the fixture or sink connection is what determines where your P-trap will be. Often, your plumbing fixture’s vent pipe is already fixed with a connection. The P-trap itself has “arms” that connects it between the vent and the drain.
The arm on your P-trap leading from the drain to the vent pipe needs to have a ¼” slope. This ¼” slope is required to extend upwards towards the drain. As long as your P-trap arm is within that slope range, there is no minimum distance in relation to the drain.
How Much Do P-traps Cost?
Buying a P-trap yourself only costs between $5 and $30 depending on the size, quality, and materials. However, if you are enlisting the help of a professional to install or replace a P-trap for you, it can cost between $200 and $300 or even more due to labor.
If you want to spend less on a P-trap, consider a plastic one. Plastic P-traps, such as the Keeney 1-1/2-In Plastic Sink Trap only cost $7.98 and are durable despite the low cost. Brass P-traps, however, are pricier due to the cost of metals.
The Westbrass 1 ½” Tubular P-trap is an excellent example of a high quality brass P-trap and it runs at $28.71. Ultimately, there is no consensus on which is better: brass or PVC. Many plumbers do recommend PVC P-traps because they run more quietly.
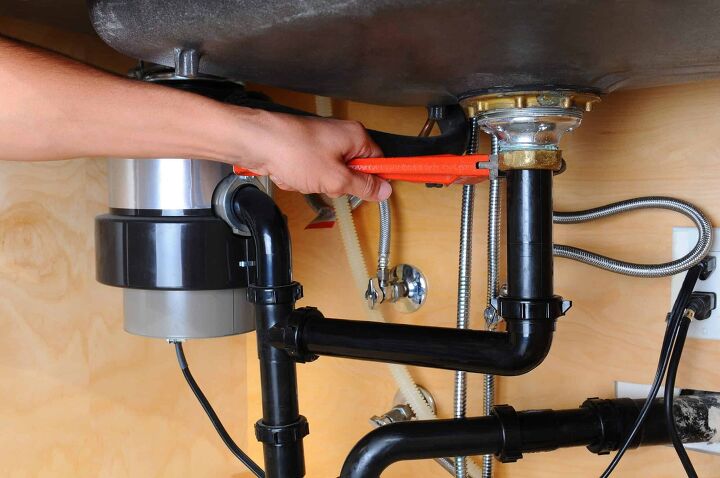
Installing A P-trap
P-trap Installation Instructions
Installing a P-trap is not difficult and doing it yourself could save you $170 or more in labor costs of hiring out. Before you can get started, familiarize yourself with the pipes beneath your plumbing fixture. Consider choosing a PVC P-trap because you’ll get less “plip-plop” water sounds than with a brass alternative.
Make sure that you know what the tail piece is because the P-trap attaches to it. The tailpiece is the pipe that connects to and hangs down from the sink drain.
Step 1: Attach The P-trap To The Tailpiece
Attach the P-trap’s short side to the tailpiece that runs out from the sink drain. How far below the drain the P-trap will sit can depend on the length of the tailpiece. If the tailpiece happens to hang more than 24”, then regulations require that you shorten the tailpiece, so that is within the requirements.
If you need to shorten the tailpiece, all you need to do is use a hacksaw. Do this carefully, though, and in smaller increments. For example, it’s better to cut it too long than too short. So take little bits off at a time until you reach your desired length.
Step 2: Connect The Trap Arm To The Wall Drain
The trap arm is the part that connects to the wall. Unlike the P-trap, the trap arm is not curved. Connect the trap arm to the wall drain opening and push it in as far as you can. This is how you will know if the trap arm will fit, or if cuts will need to be made.
If it fits, slide the trap arm back out of the wall drain fitting and line it up perfectly with the P-trap. The two pieces should slide together perfectly. If not, cut the trap arm with a hacksaw so it lines up with the P-trap for a perfect fit.
Step 3: Connect The Trap Arm Fitted With The P-trap To The Wall Drain
Now that the P-trap is connected to the trap arm, you must connect the trap arm back to the wall drain. Make sure that the trap arm, P-trap, and tailpiece are all aligned with the drain and connected evenly. Attach slip nuts at the joints where the parts of the trap arms and P-trap connect. Tighten the slip nuts to create a proper seal, and you are done!
When you are tightening, you want to make sure that you don’t over tighten the nuts. This will end up causing damage, and they may end up being impossible to remove later on. However, you do need to ensure that the connection is secure so, find an adequate level of tightness.
P-Trap Requirements
There are a few mandated requirements applied to P-traps. These requirements are related to safety and function and are as follows:
- P-trap can be no more than 24” below the drain
- A P-trap cannot be any smaller than 1.25” in diameter
- If your trap has mechanical joints, they must be in the open for maintenance purposes
- The piping between P-trap and the waste line must have a ¼” slope angled down towards the drain
The above P-trap stipulations are federally mandated in the U.S., however, specific zones in the U.S. may have their own additional requirements for P-trap installation.
Related Questions
Does P-trap need to be below drain?
Which is better, P trap or bottle trap?
Why are bottle traps illegal?
Do You Need to Hire a Plumber?
Get free, zero-commitment quotes from pro contractors near you.
Summing It Up
Your P-trap can be no more than 24” below the drain to the sink or plumbing fixture it is attached to. P-traps are a lifesaver as the alternative, i.e. sewer odors filling the air, is not desirable to anybody.
Be sure to refer to the regulations and requirements that are detailed above when installing your own P-trap. P-traps are cheap to purchase with low end PVC P-traps costing $5, and higher-end brass P-traps costing $30.
If you choose to hire a plumbing service to install your P-trap for you, it could cost up to $300 due to labor costs. Ultimately, inexpensive PVC P-traps are just as effective as a costly brass alternative. Good luck with installing your P-trap.
Related Guides
Nick Durante is a professional writer with a primary focus on home improvement. When he is not writing about home improvement or taking on projects around the house, he likes to read and create art. He is always looking towards the newest trends in home improvement.
More by Nick Durante


![10 Best Electric Pressure Washers – [2022 Reviews & Guide]](https://cdn-fastly.upgradedhome.com/media/2023/07/31/9070600/10-best-electric-pressure-washers-2022-reviews-guide.jpg?size=350x220)


![How Much Weight Can a 4×4 Support Horizontally? [It Depends!]](https://cdn-fastly.upgradedhome.com/media/2023/07/31/9070333/how-much-weight-can-a-44-support-horizontally-it-depends.jpg?size=350x220)