


Frigidaire Gallery Dishwasher Leaking? (Possible Causes & Fixes)

When any appliance goes bad and starts leaking, it is critical to repair it as soon as possible. Water damage can get costly if not tended to in a hurry. We will cover the different leaks of a Frigidaire Gallery Dishwasher and fix them in this article.
There are six of the most common leaks when you find water where it should not be. Some of these leaks you can fix yourself with the listed steps, while others need a service technician. The first question people ask is, what do I do now that my Frigidaire Gallery Dishwasher is leaking.
If your Frigidaire Gallery Dishwasher is leaking this is commonly due to overloading of the dishwasher or possibly a faulty inlet valve. Make sure that you did not pack the dishwasher over its maximum capacity. If that is not the issue, check the inlet valve and replace it if necessary.
Do You Need Appliance Repair Services?
Get free, zero-commitment quotes from pro contractors near you.

Why Is My Frigidaire Gallery Dishwasher Leaking?
Believe it or not, there is an issue that may be the problem. Check to make sure you are using the right detergent. If the suds overflow, it will show up as a water leak outside the dishwasher.
Sometimes you may have also overloaded your dishwasher. We like to get the most out of a load, but this can cause water leaks. Mixing that situation with the wrong detergent can be your problem.
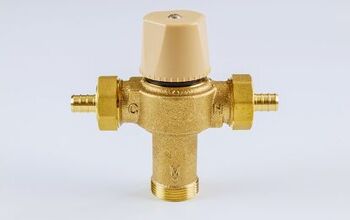
The Water Inlet Valve
This one tops the charts when it comes to the most infamous problems of water leaking. The inlet valve’s purpose is to let the water into the dishwasher to fill it up. If the valve breaks or stays open, it will fill up with water nonstop until it overflows.
There is no repairing the water inlet valve. The only option is to replace it. Always unplug and turn off the water when repairing the dishwasher.
How To Check Your Water Inlet Valve
These are the checkpoints to follow when checking and replacing the valve.
- Take the plate at the bottom of the dishwasher to gain access to the water inlet valve.
- If it is leaking, you will find a slow drip at the top.
- Look for corrosion as this is also a sign of leakage.
- Remove the old valve and replace it with the new one by undoing the bolts and the connections.
The Center Wash Arm Assembly
The center wash arm assembly is another item that requires replacement if damaged or cracked. Inspect for cracks and do not attempt to repair them with glue or seals. Check for loose screws on the support system.
If you find that the wash arm is loose, you have found the cause of the leak. If the wash arm is flexible, water will shoot out, causing waves to leak out the bottom of the door. Tightening the screws should fix the problem.
It would be advised to call a service technician if the wash arms are cracked or damaged. Everyone loves to save money, but some things are best left to the professionals. As we go along, those without steps listed are suggesting professional assistance.
The Lower Wash Arm Assembly
If the lower wash arm assembly is cracked, water will shoot out to the bottom of the door. As the water continues to spray out, it will leak onto the floor. It calls for inspection for cracks and replacement if it is damaged.
The same rules apply for checking the screws and tightening them if needed. Also, do not use seals or glue to repair the cracks. Replacing it is a must with a new lower wash arm assembly.
Next, move onto the upper wash arm assembly. Follow the instructions for the center and the lower wash arm assembly. The same rules apply.
The Door Gasket
As the dishwasher runs, the water should always remain inside. If the door gasket has any cuts, gaps, or tears, water will flow out of the door.
Repairing The Door Gasket
These are some steps to follow to determine if the door is the problem and how to repair it.
- Check for good contact between the gasket and the dishwasher. The best advice is to take a dollar bill and see if it slides through the door’s gasket. If it moves, then the door gasket is no more good.
- Remove the door gasket. In this step, you can use a scraper or a flathead screwdriver. Be careful not to scrape too deep into the door while removing the gasket.
- Put the new door gasket on the door. Check to make sure all of the old gaskets are removed before installing the new one. Put the adhesive or glue in place, then firmly press the gasket to the door. Be sure to let everything dry before running the dishwasher.
- Check for leaks. Once everything is dry, run the dishwasher and make sure there are no more leaks around the gasket. If there is still leakage, move on to step 5.
- Check the door hinges. If you notice there are still water leaks around the door, check the hinges. It may be out of place or bent. Replace the hinges, and this will solve the problem.
Check For Leaks Around The Door Seal
The door seal is like the gasket and keeps the water inside the dishwasher. All the steps listed above for the gasket are the same for the door seal as well. The seal is thicker and has more of a spring-like effect that seals with the gasket.
Other Issues That May Cause Your Dishwasher to Leak
The above is the most common, but there are still some other things to check if the water leak persists. Some dishwashers have an air vent. Please note that you will not be able to see the air vent but notice the steam rising.
Water can also escape through this vent, and if that is the case, you have a problem. The vent may need to be bigger, or it signifies the waste disposal pipes are clogged. Repairing the vent now will save a lot of future problems.
Fixing A Leaky Dishwasher Vent
If you have an issue with the vent, these are the steps you need to take to fix the leak.
- Inspect the air vent for water leaks. A simple fix can be placing a coffee cup over the vent while the dishwasher is in use. This will force the water to drain down the sink instead of through the vent. If the coffee cup is dry, move on to step 2.
- Clean out the pipes to and from the dishwasher. Since there are no water signs in the coffee cup, it means the pipes are clogged and need cleaning. When the lines get clogged, water is forced through any exit made available.
- Open the drain pipe. Open the dishwasher and use the owner’s manual to locate the waste pipe. Remove the drain cover with a screwdriver. Take a wire coat hanger, pass it down the drain, and remove all debris until the line is clean.
- Run the dishwasher. Replace the drain pipe cover and run the dishwasher. If the problem continues, you will need to remove the old water pipe and replace it with a new one. This step will also help the dishwasher run more efficiently.
Removing The Dishwasher
Sometimes, you just can’t fix an issue and that’s okay! Therefore, it’s time to remove the dishwasher. Here are some easy steps for dishwasher removal. Or, you can hire a professional for assistance.
- Unplug the dishwasher from the outlet.
- Cut off the water to the dishwasher from underneath the sink.
- Unscrew all the screws holding the dishwasher to the counter.
- Pull the dishwasher out from the counter and inspect for leaks.
- Repair any parts as needed and replace the dishwasher.
- Test run the dishwasher for further leaks.
Do You Need Appliance Repair Services?
Get free, zero-commitment quotes from pro contractors near you.
Related Questions
How much does a technician or plumber cost?
The average price of labor is $65 to $100 per hour. A 15 to 20 percent markup is added on all parts.
Should I fix my dishwasher or purchase a new one?
The answer is solely up to the owner. Two things that can help with the decision-making are how old the dishwasher is. The second is will the cost of the repairs be more than a new dishwasher.
Can the air gap cause the dishwasher to leak water?
If the lines or the garbage disposal is clogged, yes, there will be a leak. Water will back up either from the sink area or the dishwasher.

We are a team of passionate homeowners, home improvement pros, and DIY enthusiasts who enjoy sharing home improvement, housekeeping, decorating, and more with other homeowners! Whether you're looking for a step-by-step guide on fixing an appliance or the cost of installing a fence, we've here to help.
More by Upgraded Home Team


![Cost To Drill A Well [Pricing Per Foot & Cost By State]](https://cdn-fastly.upgradedhome.com/media/2023/07/31/9074980/cost-to-drill-a-well-pricing-per-foot-cost-by-state.jpg?size=350x220)

