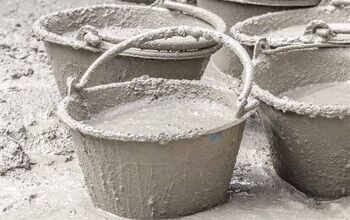
Do Liquid Nails Work On Concrete? (Find Out Now!)

Liquid nails can help us out at times when a hammer and nails could potentially damage our material. By using liquid nails you can get a stronger bond than you would with more traditional fasteners. We love the ease and versatility of liquid nails, but do they work on concrete?
Traditional fasteners such as a hammer and nails can cause your concrete to chip or crack. When you want to affix a material to existing concrete, liquid nails can come in handy. You will want to be sure, though, that the liquid nails you use are specifically designed for both the concrete and the material you want to apply.
Let’s look at how to use liquid nails effectively on concrete in order to form a strong and lasting bond.
Do You Need Concrete, Brick, or Stone Pros?
Get free, zero-commitment quotes from pro contractors near you.

What Can Liquid Nails Do for Concrete?
Form bonds between existing concrete and new material
When you want to join a new piece of material to your existing concrete, you will need to use bonding adhesive to get the job done. Spread the liquid nails onto the old piece of concrete and then adhere the new piece to it for a successful bond. Make sure you choose liquid nails that are geared specifically towards your materials.
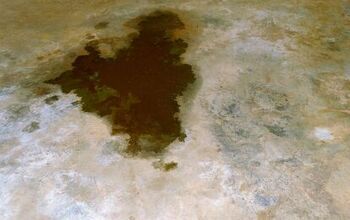
Repair cracks and seal joints
If you notice your concrete is beginning to crack, you will want to repair it to keep the situation from aggravating. Also, liquid nails can be used to seal off joints between materials to keep weather and water out.
Create the look you want
When you need to join two items together without forming holes, liquid nails is the perfect solution. This bonding adhesive will make sure you won’t leave unsightly nail holes behind or indentions from hammer strikes. Especially when working with concrete, a hammer strike could end up breaking the concrete, which could end your construction project before you get started.
Save on time and effort
Liquid nails can also save you time and effort. Instead of painstakingly driving individual nails, you can simply run a line of liquid nails and be done. Also, some types of liquid nails can form a bond that is two times stronger than your traditional hammer and nails.
Using Liquid Nails on Different Surfaces
When you are trying to adhere different types of material to concrete, you will want to choose the best liquid nails for the job. Let’s look at how to use liquid nails to affix concrete to concrete, concrete to wood, and concrete to metal.
Concrete to Concrete
Liquid Nails Concrete & Mortar Repair (CR-805) can be used for repairing cracks in concrete and adjoining 2 pieces of concrete. This version of liquid nails is resistant to both indoor and outdoor environments. Also, concrete and mortar repair will dry in a gray color to match your concrete. You can also paint it as desired.
Wood to Concrete
You can use Liquid Nails Extreme Heavy Duty Construction Adhesive (LN-907) to glue wood to concrete. This version of liquid nails is designed to withstand extreme temperatures. Both your wood and concrete surfaces should be clean and dry before applying liquid nails. Also, the ideal temperature for applying Liquid Nails Extreme Heavy Duty Construction Adhesive LN-907 will be between 40–90° F.
Metal to Concrete
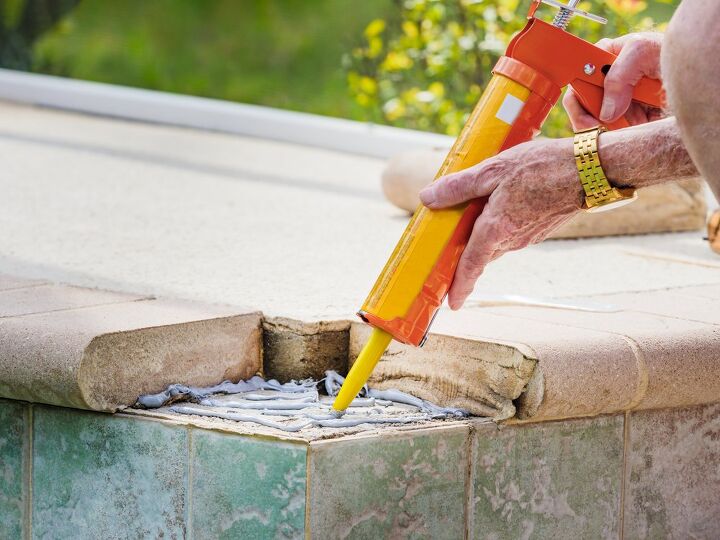
If you wish to apply metal to concrete, you should first strip the concrete of any paint. Then, you will want to use Liquid Nails Metal Projects Repair Adhesive (LN-203) on both the metal and concrete surfaces. Use C-clamps to hold the materials in place while the liquid nails bond forms.
How to Use Liquid Nails on Concrete
Step 1: Put on a mask and gloves.
This mask will protect you from breathing in harmful fumes, while the gloves will protect you from getting liquid nails on your hands. If you do get liquid nails on your hands, you can use petroleum jelly or vegetable oil to aid in its removal.
Step 2: Make sure your liquid nails are designed for concrete.
There are different types of liquid nails on the market that are designed for different purposes. Liquid nails that are specifically designed for concrete will give you the strongest bond, as well as drying in a color that will match your slab.
Step 3: Apply steady pressure.
By applying steady pressure on your caulk gun, you will get a uniform line of liquid nails. This will prevent unsightly globs of adhesive and will form an even bond.
Step 4: Use a zigzag pattern.
As you apply the liquid nails to your surface, you will want to use a zigzag pattern for the strongest bond.
Step 5: Affix your material.
Affix your material to your concrete making sure that it is exactly where you want it. It will be difficult to remove liquid nails later if you need to adjust your material’s placement.
Step 6: Use a brace.
After you have applied liquid nails, use a brace or clamp for at least the first 24 hours while your two materials attach.
Step 7: Let the liquid nails cure and dry.
Your liquid nails will start to bond after the first 15 minutes, but it can take up to 1 week for the bond to completely cure and harden. During this time, you will need to keep the area well-ventilated.
Do You Need Concrete, Brick, or Stone Pros?
Get free, zero-commitment quotes from pro contractors near you.
Related Questions
Which is better, wood glue or liquid nails?
When working with non-porous surfaces, liquid nails will make a stronger bond than wood glue will. Also, if your materials are not the right size for clamping, liquid nails will be the superior choice as its bonding time is faster than wood glue.
Can liquid nails be removed?
Although heat can be applied to liquid nails to try to soften the adhesive, liquid nails is highly heat-resistant to heat, so it will be difficult to dissolve this way. In general, liquid nails can only be removed by applying physical force.
Will liquid nails work instead of mortar?
Liquid Nails Concrete & Mortar Repair is designed to repair mortar. However, if you are retiling an entire floor, it can be difficult to get the tiles even with liquid nails. For large areas of tile, mortar will be easier to apply.
Alex Praytor is a native Texan who got her degree in English Literature and decided to travel the globe. She finds the architecture and design of homes across cultures fascinating. In her spare time, she visits coffee shops with her family and creates projects for their own home. Alex enjoys sharing tips on how to keep repairs up to date while turning a house into a home.
More by Alex Praytor