Can You Put Backsplash Over Wallpaper? (Find Out Now!)
In most homes, the kitchen is used more than any other room. For this reason, individuals do whatever they can to ensure their kitchen decor is uniform and attractive. One way to ensure you have an attractive kitchen decor is to construct tile backsplashes.
Backsplashes that are made of tile add visual appeal and an element of uniqueness to the kitchen, and these can be constructed behind sinks, stoves, and several other fixtures and appliances.
But what about when there’s wallpaper occupying the spot where you want to install tiles? Should the wallpaper be removed first or can the tiles be installed over it? Answers to these questions and other important points on backsplashes will be the focus of this article.
No, you shouldn’t put a tile backsplash over wallpaper. The tiles won’t be able to adhere to the wallpaper, and eventually they’ll crack and look awful because of this. It’s best to install tiles directly on drywall, as drywall can be prepped to firmly hold tiles in place. If you can’t remove all the wallpaper, get a professional to help.
Do You Need to Hire Tile Installers?
Get free, zero-commitment quotes from pro contractors near you.

Why Tiles Shouldn’t Go Over Wallpaper
While it’s possible to install tiles over wallpaper, the vast majority of tile experts and home decorating centers say that wallpaper should be removed before tiles are put up. There are a few key reasons which justify this general recommendation, with the main one being that tiles will not stay in place if they’re mounted to old wallpaper.
One of the main reasons why homeowners opt for tiles is because they want a surface that’s attractive yet durable and long-lasting. The vast majority of tiles possess all these qualities, but the last quality is largely influenced by how and where the tiles are placed.
Moreover, if you don’t remove wallpaper before putting up tiles, the tile adhesion will not be able to set properly, and such will lead to cracks in the future. And if your wall has multiple layers of wallpaper, every layer must go, as the tiles need to be mounted to drywall.
How Tiles Should Be Installed: Preparation
Now that you’re aware of what to avoid, let’s get into a procedure for how you install tiles to create a luxurious backsplash. And if you don’t feel comfortable installing the tiles on your own, call an expert tile installer, as they’ll happily help you bring your backsplash dreams to life.
Preparation: Removing Old Wallpaper
Since step one is going to be removing the wallpaper, you need to grab the tools that’ll allow you to do this. Grab a putty knife, a paint scraper, sandpaper, a utility knife, a sponge, and a bucket.
You should remove as much wallpaper as you can, but keep in mind that wallpaper may be hard to get off, especially if it’s very old and virtually part of the wall at this point. If you encounter a patch that just doesn’t want to budge, you can try getting the wallpaper off with warm water.
To remove caked-on wallpaper, begin by scuffing the wallpaper’s surface so its protective finish gets compromised. Now apply warm water to the wallpaper and give it time to soak in.
You could also use a steamer at this point, and some experts claim that a steamer will go deep into the drywall and save you from having to wipe water all over it. But others say that using a steamer will cause drywall adhesion issues. Use the method which seems best for you. Once the water has had its effect, use the scraper to remove any remaining wallpaper.
Get a Professional to Remove the Wallpaper for You
If you don’t feel comfortable removing the wallpaper on your own, it’s at this point that you should hire a professional tile installer. Most DIYers don’t have the tools, know-how, and experience that professional tile installers possess, and even caked-on wallpaper is no match for an expert tile installer.
Preparation: Cleaning the Wall’s Surface
Once the wallpaper has been removed, you need to wash the wall with TSP and then give it time to dry naturally. Once the wall is dry, you should fill in any holes and cracks with spackle, as doing so will smooth-out the surface.
When the wall is dry, it’s time to sand. When sanding is over, grab a vacuum and vacuum up all the fine particles that were created by the sanding. Wipe the wall down for the last time and then give it ample time to dry. Once the wall is dry, you should prime it so the tile mortar can stick easily.
How Tiles Should Be Installed: Installing the Tiles
Use a Visual Aid
When the wall is ready to be tiled, put your plan into action. Before you start tiling, you should have a clear visual guide to follow, and this guide can be created on a piece of paper.
Draw squares and color-code them so you know how your tiles will be arranged in real life. With a detailed guide to follow, installing the tiles will be easier. You don’t want to be figuring out things as you go, as once you put a tile down, removing it will be a pain.
Do You Need to Hire Tile Installers?
Get free, zero-commitment quotes from pro contractors near you.
Installing the Tiles
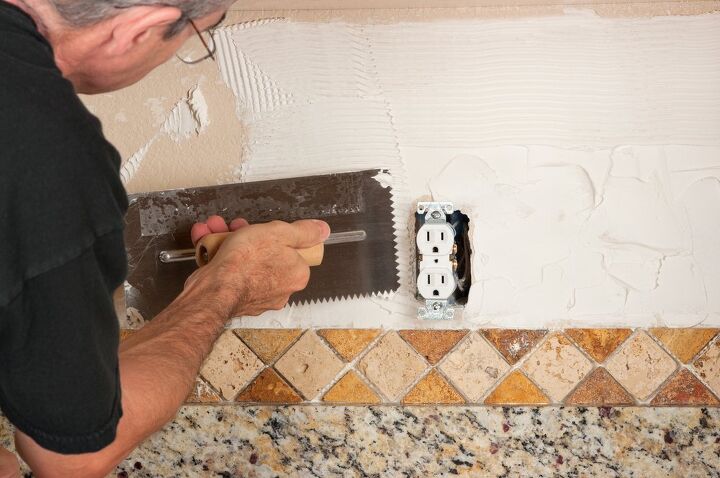
When your plan is ready to go, grab some thin mortar and a trowel. Now start applying the tiles. You should use spacers so the grout channels are uniform, and make sure the tiles are straight at all times.
After you’re done laying the tiles, let them sit for about 24 hours. Once they’re done drying, you can fill in the spots where grout should be.
When it comes to grout, you should keep sanded grout away from glass, polished marble, ceramic, and metal tiles. Once the grout has been applied, it’ll require about 10 minutes to dry. When it’s dry, grab a warm sponge and wipe the tiles down gently.
When the grout is completely dry, it’s time to clean the tiles. You’ll need grout haze to do this. Once cleaning is over, give the tiles a few days before you apply silicone sealant to seal the grout. Then you’re done and it’s time to start enjoying the tile backsplash!

Matt loves everything DIY. He has been learning and practicing different trades since he was a kid, and he's often the first one called when a friend or family member needs a helping hand at home. Matt loves to work with wood and stone, and landscaping is by far his most favorite pastime.
More by Matthew Mountain