How to Add an Extra Layer of Plywood Over a Subfloor (Just 5 Steps!)

Your subfloor provides an excellent, level foundation for the flooring of your home. However, many subfloors might not be the ideal surface on which to lay your finished floors. Therefore, adding an extra layer of flooring on top of your subfloor can help create the floor of your dreams!
To add an extra layer of plywood over a subfloor, you will need to clean the floor to ensure there is no dirt and grime. After cleaning, you will install the plywood over the subfloor one sheet at a time. However, you need to make sure the plywood seams are over the subfloor so that it provides adequate stability.
In this article, we will take you through the anatomy of your floor to help give you a better idea of the importance of the plywood placement. Also, we will provide you with the necessary steps to add the plywood to your subfloor.
Related Content: How Much Weight Can Plywood Support? | What Is Underlayment Plywood? | Types Of Plywood | How To Replace Subfloor Under Your Wall
Do You Need to Hire a Framing Contractor?
Get free, zero-commitment quotes from pro contractors near you.

The Anatomy Of Your Floor
Before embarking on your DIY flooring journey, it’s essential to understand the different components of flooring. There are four parts to your floor: Joists, subfloor, underlayment, and floor coverings.
Joists
The joists aren’t the flat floor layers you’re accustomed to seeing inside your home. Joists act more like beams, supporting the weight of the floor, and they are integral structural pieces of your home.
Joists are usually made from dimensional lumber and carefully placed to maximize support. If your home’s floor is a concrete slab, you won’t require any joists.
Subfloor
Resting on top of the joists comes the subfloor, the flat surface on which you install all other layers. The subfloor is responsible for holding up all of the things in your home, from people to furniture to the different layers of the floor. If your house has a concrete slab and no joists, then the slab is considered your subfloor.
Subfloors come in various materials, including plywood, oriented strand board (OSB), or planks. The desired thickness of your subfloor depends on what the floor will be supporting and the spacing of the joists.
Rooms with more substantial furniture will need a thicker subfloor. If your joists are spaced between 16 and 19.2 inches apart, you should utilize ¾ inch plywood and OSB. If you space the joists farther apart than that, you will want ⅞ inch plywood and 1 inch OSB.
Underlayment
Underlayment goes on top of the subfloor, and you don’t necessarily need it for structural integrity. However, using the proper underlayment provides a smoother surface for top layer installation. If you are installing a hardwood floor covering, you should utilize a plywood underlayment. Tile and stone require a cement backer board, while laminate needs a thin layer of foam.
Underlayment can reduce the noise of footsteps, provide extra cushion to the floor, and act as a moisture barrier.
Floor Covering
Finally, the floor covering goes on top of all other layers and is what you walk on every day. Your floor covering is what is visible to you and your guests. Therefore, there are many styles available to cater to a variety of design preferences.
Floor covering comes in several materials, such as hardwood, tile, carpet, or vinyl. Since this final layer is all about aesthetic appeal, it doesn’t usually add structural support.
Plywood Underlayment
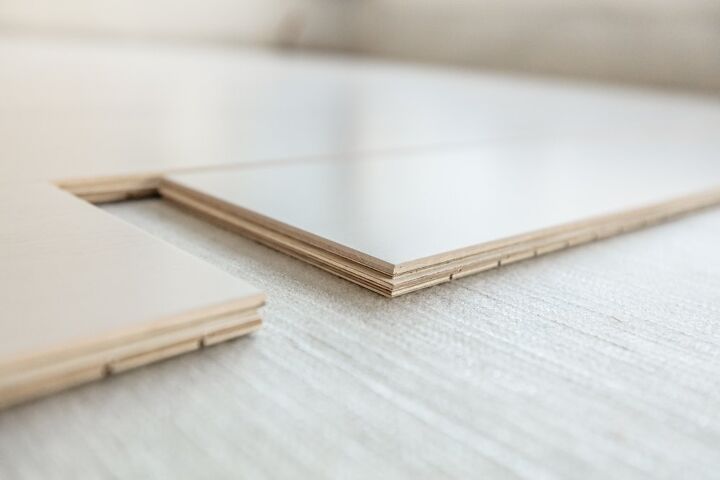
Plywood underlayment is a favorite of many people due to its strength and durability. Plywood is highly recommended as an underlayment when your floor requires a smooth and flat surface for installation.
The plywood underlayment helps cover up any dings or imperfections in the subfloor, allowing you to install floor coverings with ease. Plywood underlayment is usually knot-free and comes in lightweight 4×8 sheets with right-angle edges that make it particularly easy to lay.
NOTE: Some plywood consists of one rough side and one smooth side. Always install the smooth side facing upward.
Installation Of Plywood Underlayment
Installing plywood underlayment is a relatively straightforward undertaking. You can handle the job yourself if you’re a DIY fan, as long as you have the right tools.
Tools You Will Need
You will need:
- A circular saw a hand saw, or any other saw that is suitable for cutting wood
(Because of its size uniformity, plywood underlayment is easy to install and simple to cut). - A pneumatic stapler and galvanized staples
(Galvanized screws or nails will work fine, but the pneumatic stapler will shave time off installation). - A tape measure
(Remember to measure twice and cut once!) - Safety goggles
(Remember, any time you work with tools, “safety first!”)
Instructions For Installing Another Layer Of Plywood
- Acclimate the underlayment. Store underlayment in the room it will be installed in for 72 hours before the actual installation. This process acclimates the underlayment to the climate of the room and prevents any unexpected expansion after installation. All measurements should be taken after the underlayment has had the time to acclimate as well.
- Clean the subfloor. Thoroughly clean the subfloor of dust and grime. A shop vac is an excellent tool for this job, or you can also just a broom and dustpan. However, this may kick dust around, so it would be wise to go over the area with a mop.
- Start installing the plywood. Install the plywood underlayment sheets one at a time, perpendicular to the placement of the subfloor sheets. The plywood seams should meet over subfloor joints to ensure proper support.
- Staple the boards in place. Staples should be placed every two inches around the edge of the sheet and every four inches in the interior. If using nails or screws, space them farther apart and ensure they are slightly below the top of the plywood.
- Fill the seams. You can also leave ⅛ inch gaps between sheets, but you must fill the spaces with a seam filler before installing the top layer.
NOTE: When placing sheets, they should rest comfortably next to one another. Do not force them to fit. If you need to trim the edges according to the room, do so with a saw. Check out our guide: Can You Use A Router To Cut Plywood?
Do I Need To Hire A Professional For This Project?
Installing plywood to the existing subfloor is a straightforward job that you can do on your own. In fact, this is a perfect job for anyone who’s looking to get their foot into the door for DIY projects. It’s hard to mess up a project like this. Unless your original subfloor is rotting, then you may want to call a friend to assist you and teach you how to replace the subfloor.
Additionally, you will save hundreds, if not thousands of dollars on paying a carpenter high labor fees by doing this project yourself. The only cost you will have is the cost of the materials as well as any tools you need that you don’t have. Or, of course, there’s always the choice of renting tools too.
If it makes you feel more comfortable, you can always have a specialist come in to check your subfloor first. If it looks sturdy and you’re satisfied, you can take this project on. If not, then perhaps you can pay the contractor to fix the subfloor before venturing on your own to add another layer of plyboard.
Related Questions
Is it better to have a thick or thin underlayment?
Generally, it is better to have a thin but sturdy underlayment. If the underlayment is too thick, it can shorten the room, especially if you have low ceilings.
Thick underlayment can also pose an issue if you’re looking to transition flooring from one room into another. A thick subfloor can make one room’s floor higher than the next, making it virtually impossible to create a smooth transition.
Can I use the old floor covering as underlayment?
You can use the old floor covering as underlayment as long as it is level and smooth. A good rule of thumb is to avoid carpet underlayment.
Underlayment is supposed to act as a moisture barrier to protect your floor covering from water damage. Carpets will only absorb the moisture and ultimately harm the floor covering.
Can you install a second layer of subfloor?
If you want to install a second layer of the subfloor, you should install it like an underlayment. Do not install the second layer until the first layer has been installed and has dried completely.
To install the second layer like a subfloor, lay it perpendicular to the first layer.
Note: Do not use adhesives to attach the two; use wood screws instead.
Can you use plywood underlayment on tile and stone?
It would help if you avoided plywood underlayment on tile and stone. Plywood underlayment isn’t water-resistant. When installing tile flooring, you need mortar and grout, which will likely soak into the plywood. Use a cement board underlayment instead.
Do You Need to Hire a Framing Contractor?
Get free, zero-commitment quotes from pro contractors near you.

Wrapping Up
You can add a layer between your subfloor and your floor covering, known as an underlayment. This extra layer provides additional support as well as a smooth surface for floor covering installation. Your floor consists of joists, subfloor, underlayment, and floor covering. The first three provide structural support for your house, and the floor covering is purely for aesthetic appeal.
Plywood underlayment is the most common kind of underlayment because it is strong, durable, and you can sand it down to a smooth finish. If you’re looking to install new floors, installing a plywood underlayment can be an easy and fun DIY project!
Related Guides

Stacy Randall is a wife, mother, and freelance writer from NOLA that has always had a love for DIY projects, home organization, and making spaces beautiful. Together with her husband, she has been spending the last several years lovingly renovating her grandparent's former home, making it their own and learning a lot about life along the way.
More by Stacy Randall


