Tub Spout Copper Pipe Too Short? (Here's What You Can Do)

Copper pipe has been the go-to for plumbing because of its many great qualities. Copper pipes conduct heat well, allowing hot water to stay warm, and that makes them ideal for tub spouts. However, it can be frustrating when your tub spot’s copper pipe is too short and won’t reach.
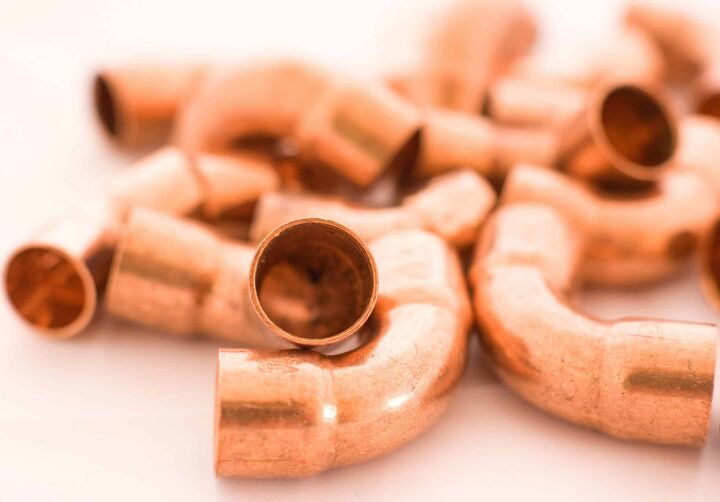
Install a copper coupling piece with a short piece of copper pipe to extend the tub spout to the perfect length. You can solder the coupling piece with the extension pipe to the wall pipe using a welding torch. Push fittings allow you to attach the coupling piece to the extension pipe without using soldering tools.
Modern brands like SharkBite produce fittings that use pressure and you can remove them at any time. However, fittings are generally a temporary solution, and you’ll need to weld the extension if you want it to stay there forever. Follow along as we explore what you should do when your tub spout’s copper pipe is too short.
Do You Need to Hire a Plumber?
Get free, zero-commitment quotes from pro contractors near you.

Tub Spout Copper Pipe Too Short
The easiest fix for a copper pipe tub spout that is too short is to install a copper coupling piece. Until recently, you could only install a copper coupling pipe with a welding tool which limited who could extend their tub spout. Now you can luckily find copper coupling pieces that don’t require you to use tricky, expensive, and potentially dangerous welding tools.
Push-Fit Fittings
Push-fit fittings along you to connect two pipes without a soldering tool, and they are a great solution if your tub spout’s copper pipe is too short. You can’t use push fittings as a permanent solution, but the strong pressure and easy installation make them the perfect temporary option. They apply pressure that forms a strong connection, and you can remove push fittings at any time.
One example of the push-fit fitting is the SharkBite Connection System. The SharkBite works not only with copper pipes but also plastic, like CPVC and PEX.
There is no need to use a welding torch or glue with SharkBite. The fitting is made with steel teeth that grip the pipe and allow the O-ring to make a tight seal. Push-fit fittings help prevent leaks and are a great way to connect one pipe to another.
1. Cut Your Pipes
Cut your copper pipe extension to the desired length, taking into account the length of the Push-fit adapter as well as how much copper pipe is coming from the wall. Clean up the ends of both copper pipes, the one from the wall and the new extension piece, to make sure they are both even and smooth. This is important for a tight seal and to prevent any water leaks.
Check inside the pipe as well for any copper burrs and fragments that may have come from cutting and use a file to get rid of these.
2. Install the Push-fit adapter
Push the copper pipe extension into one end of the Push-fit adapter until it is snug and locked in. Press the other side of the Push-fit adapter against the copper pipe coming out of the wall until it is secured within.
Using a Push-fit adapter means that you can adjust the length if needed and easily remove the pipe if you need to in the future.
Attach Copper Coupling Piece With Soldering Tool
The basic soldering tool is a propane torch. This is a regulator and a tip combination that you screw onto the top of a small propane tank.
For ease, it is recommended that you use a regulator that has a built-in igniter. This lights the gas at a push of a button and is much easier to use than trying to light the torch with a striker.
Tools Needed:
- Small Propane Tank
- Regulator with built-in ignitor
- Striker (if the regulator does not have a built-in ignitor)
- Tube Cutter
- Tinning flux or paste flux
- Emery cloth
- Solder
- Protective Items: Heavy-duty gloves, goggles, flame protector cloth
Flux acid cleans the copper surface as you heat the joint, enabling the solder to flow freely.
Purchase lead-free solder that is designed for use with copper water pipes. DO NOT use lead solder as this can leach into your water supply.
1. Cut the Copper Pipe with a Tube Cutter
Clamp the pipe between the cutting wheel and the guide wheel of the tube cutter. Rotate the cutter to score the pipe all the way around. Make sure to rotate the cutter evenly to avoid inconsistencies and lumps around the pipe.
Tighten the cutter knob a quarter turn and rotate around the pipe again to create a deep score. Repeat this process until you cut through the copper pipe completely. Clean up the end and make sure there are no jagged pieces of copper inside the pipe.
You can cut the copper pipe with a hacksaw, but this will leave a rough edge on the pipe that you will need to file off to smooth out. It also takes longer to use a hacksaw and the blade may dull before you are even done.
2. Clean it With Emery Cloth
Clean the outside of the pipe end that is coming from the wall as well as the extension piece, with the emery cloth until the copper shines. This will ensure a solid, leak-proof joint that can adhere to the adapter piece. Clean the inside of both pipes with the emery cloth.
3. Flux the Surfaces
Apply an even layer of flux paste all around the surface of the pipe and extension that you will join together. Cover each end of the fittings you are going to solder together. Push the extension copper pipe into the coupling piece.
Carefully push the other end of the coupling piece into the copper pipe that extends from the wall. Don’t rush this step because you want to make sure that there are no bare spots in the flux paste.
Once done, push the extension copper pipe into the coupling piece. Then push the other end of the coupling piece onto the copper pipe coming from the wall.
4. Solder the Pipe
Light your propane torch until the blue cone in the center is about 1 ¼ inches long. The hottest part of the flame is at the end, so hold the flame so that the tip is what touches the copper coupling.
Holding the solder against the joint opposite the flame, heat until the solder melts and makes a seal around the coupling piece. The copper fitting will quickly conduct heat to the pipe inside the joint, so it is not necessary to heat the pipe itself.
It will take 30 to 45 seconds for the solder to cool and harden, so do not apply pressure to the pipe before then. The copper pipe will be hot so take care to not touch with bare hands.
Do You Need to Hire a Plumber?
Get free, zero-commitment quotes from pro contractors near you.
Related Questions
How Do You Fill Gap Between Tub Spout and Wall?
The best way to fill this gap is with a flexible, waterproof caulk. Match the color of your grout as best as possible and make sure the gap is clean and dry.For deep gaps, you can use a backer rod before applying caulk. This is a flexible foam tube that comes in a variety of sizes and helps reduce the gap so the caulk can be applied evenly.
Should Tub Spout Be Caulked?
Yes, you should caulk around your bathtub faucet. This will keep any water from going behind the faucet and into the wall, causing mold and damage.Make sure to clean and dry the area before applying any caulk. You can use a waterproof caulk that matches the color of the area around it or you can use a clear caulk.
What Causes a Tub Spout to Leak?
This is generally the problem of faulty washers. As washers age, they can crack and become too depressed to cause a proper seal. Replacing washers is simple, just make sure to purchase a high-quality washer of the correct size.
Related Guides
Sean Jarvis is an interior decorator, writer, and expert handyman. Well versed in everything home improvement, he is a savant at manipulating words and spaces and upgrading everything around him. Sean specializes in writing concise guides about appliance repair and installation, home and lifestyle, and other residential projects.
More by Sean Jarvis