


Mansfield Toilet Leaking From Bottom Of The Tank? (Fix It Now!)
One of the worst nightmares in home repairs is when the toilet is leaking. It is not the most fun project in the world, but repairing it is a must. This article will cover all the leaks coming from the tank area and how to fix them.
Some of the problems people face with the tanks are leaks, constant running, and damaged float valves. Finding the problem can be tricky, but it is not difficult to repair when the trouble is spotted. So, what do you do when the tank is leaking on your Mansfield toilet?
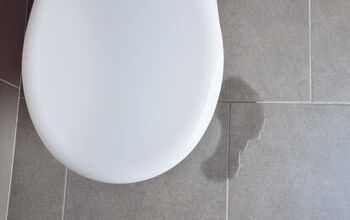
If your Mansfield toilet is leaking from the bottom of the tank, this is because you more than likely have a damaged valve seal. This seal is meant to stop any leaks from the tank to the bowl. You will need to replace this valve seal to stop the leak.
Do You Need to Install or Repair a Toilet?
Get free, zero-commitment quotes from pro contractors near you.

Checking the Water Level to Stop Prevent Leaks
If you keep hearing noises of running or leaking water, check the water level. There will not be any damage to the floors around the toilet, but your water bill may suffer a bit. Here is what you do if you have this problem after flushing.
- If the water level continues to overflow the water level line, adjust the screw for the float ball by tightening.
- There is an overflow tube that the water will continue to go over until the water level is adjusted correctly.
- It may take a couple of times to get it right below the top of the pipe. The more you tighten the screw, the lower the level will go. Be careful not to overtighten.
- If you went too far, you could loosen the screw after the flush cycle is completed.
Checking the Flush Valve Seal
After you have set the water’s proper level and is still leaking, check the flush valve seal. It is a common leak in the Mansfield toilets.
Tools Needed
- Screwdriver (Phillips and flathead)
- Sponge
- An empty bucket
- Pliers
- Butter knife
- Latex gloves
These are the steps to checking and changing a flush valve seal:
Step 1: Turn Off the Water at the Valve Below the Toilet
There is a valve on the water line closer to the floor that needs to be turned off. Turn it to the off position to cut the water flow off.
Step 2: Flush the Toilet
Flush the toilet, so the water goes down in the tank. There will still be water at the bottom that will need to be removed before you continue.
Step 3: Use the Sponge to Remove Excess Water
Grab a bucket and take the sponge to soak up all of the water at the bottom of the tank. Be sure every drop is taken out to prevent water from going on the floor.
Step 4: Take Apart the Flush Valve Float
Now that the water is removed, you can begin to take apart the flush valve float. When it is taken apart, you will see the red seal that needs to be replaced.
Step 5: Remove the Red Seal
The purpose of the seal is to stop leakage from the tank to the toilet bowl. Take the flathead screwdriver to remove the seal. The seal may fall apart, but there is nothing to worry about replacing it with a new one.
Step 6: Replacing the Seal
Ensure all of the old seal is removed, and you can place the new one in place. It has to fit in the two bottom and top grooves and is not hard to place. Use a butter knife to find the grooves.
Step 7: Put Everything Back Together
Check the flush valve for any cracks by running your fingers through it. If it is cracked, you will notice it. You may need a new one, if not replace the old one.
These steps should fix the problem if the water is leaking from the tank into the toilet bowl. The above steps are only if there are no leaks on the floor or on the toilet itself. If there are leaks on the back of the toilet or the floor, continue to follow the below process.
Water Leaking From the Tank Bolts or Tank Seal
We have covered leaking from the tank from the inside. Now we have the best advice for leaks on the outside of the tank. If you find the water is leaking from the tank screws or the seal, follow steps one through three.
From step three, continue with the below steps to fix the leaks from the tank’s outside. You will need to purchase the toilet tank bowl kit. The price for the parts ranges from $7 to $23.
Step 1: Inspecting Where the Leak is Coming From
Inspect where the leak is happening. You have to replace all of the kit parts and know for sure where the water is leaking.
Step 2: Remove the Water Supply Line
Now that you have located the leak, disconnect the water line from the tank. Be warned; water may still come from the connection as you remove the line. You will need a towel or sponge to soak up any excess water from the floor.
Step 3: Remove the Tank Bolts
Use a wrench to remove the toilet tank bolts. You may need a screwdriver to hold the bolts inside the tank while removing the nuts at the bottom. If the bolts are too rusty, use a pair of pliers.
Step 4: Remove the Tank from the Bowl
Take the tank off of the bowl and set it aside to where you can work with ease.
Step 5: Remove the Seal and Replace
It would be wise to replace the seal even though there is no leakage between the tank and bowl. This way, you do not have to come back and do it again, especially if it has not been changed. Remove the old seal, make sure all residue is removed and put the new seal on.
Step 6: Put the Tank Back Into Place
Put the tank back in place, making sure the seal is not moved from the grooves. Put the nuts and bolts back on and tighten hand tight. Do not overtighten as it can break the porcelain causing more issues with leaks.
Step 7: Reconnect the Water Line
Put the water line back in place and tighten it hand tight. Be sure not to overtighten this one, too, as you can break the threads, causing more leakage problems.
Step 8: Turn the Water Back On
Once everything is back in place, turn the water back on and check for leaks. Check around the valve, connections, and all of the seals and screws. Make adjustments as needed, and if there are no leaks, you are done.
When the Project is Completed
Water can always find its way to the floor when the toilet leaks. Be sure to clean up excess water spilled on the floor to prevent damage or mold issues. There may not be a lot, but a substantial amount can and will damage the floor around the toilet.
Tips and Advice
There are always sure signs of taking note of when there is a problem with the toilet. The sounds a toilet makes will always let you know there is something in need of repair. Hissing sounds are one of those moments that spell out valve issues.
When you hear noises coming from the toilet, it does not always mean there is a leak. There are reports some people have their toilet flush by themselves. This is not uncommon.
All that is mentioned is DIY projects, and all you will have to pay for is the parts. Everything costs under $50 for the worst repairs in funny noises and leakage. This will leave your mind at ease, knowing it will not cost you an arm and a leg.
Do You Need to Install or Repair a Toilet?
Get free, zero-commitment quotes from pro contractors near you.
Related Questions
What do I do if the toilet makes a high pitch squeal every time I flush it?
When there is a high pitch squeal, it usually means the float valve is damaged or out of place. You may need to readjust or replace it. These are easy projects, and there should be no need for a plumber.
What do I do if my toilet gurgles after flushing?
There may be a clogged toilet, sewage line, or vent stack. If this occurs, it is best to call a plumber because it can be a significant problem. The sound will be annoying at first, but it will lead to a substantial problem if not sought overtime.
Why is my toilet flushing on its own?
This is a problem that will make you believe you have a ghost in your home. A bad flapper is the cause of this situation. You will need to replace the flapper.

We are a team of passionate homeowners, home improvement pros, and DIY enthusiasts who enjoy sharing home improvement, housekeeping, decorating, and more with other homeowners! Whether you're looking for a step-by-step guide on fixing an appliance or the cost of installing a fence, we've here to help.
More by Upgraded Home Team


![Cost To Drill A Well [Pricing Per Foot & Cost By State]](https://cdn-fastly.upgradedhome.com/media/2023/07/31/9074980/cost-to-drill-a-well-pricing-per-foot-cost-by-state.jpg?size=350x220)