


Kitchen Sink Clogged Both Sides? (Step-by-Step Guide To Unclog It)
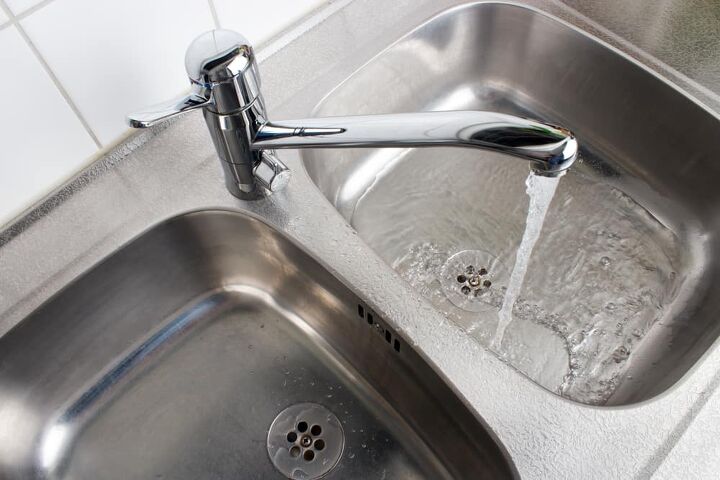
You suddenly see the water rising in your double kitchen sink. Nothing seems to be draining. When water accumulates on both sides of a double kitchen sink, what should you do?
Pour boiling water down the drain to break down the blockage and allow the sink to drain. Mix ½ cup of baking soda with ½ cup of salt, pour the mixture down the drain and let it sit for 2-4 hours. Flush the baking soda and salt down the drain with hot water so that both sides of the sink unclog.
Don’t despair, and don’t call the plumber just yet. With a little diligence, you can soon have your drain running smoothly. Here are a few steps to unclog your drain and some ideas on keeping your drains running freely.
Do You Need to Hire a Plumber?
Get free, zero-commitment quotes from pro contractors near you.

Step 1 – Remove the Standing Water
Before you go any further or try any of our other suggestions, you should remove as much of the standing water in the sinks as possible. Bale the sinks into pots or buckets and dispose of the water. You must get as much of the water from the sinks as possible, so you don’t have a large amount of water between you and the clog.
Step 2 – Examine the Sink Strainer
Most double kitchen sinks have sink strainers over the drain. These sink strainers keep large debris from going down the drain. Make sure that the sink strainers are clean. Many times the sinks backup simply because the sink strainers fill with food debris.
Step 3 – Try Some Boiling Water
Often, clogs in kitchen sinks are the accumulation of food debris in the drain lines and p-trap. The main culprit in these types of clogs is grease and oils. A good dose of boiling water will often soften these types of clogs. Once softened, the clog will pass on into the main drain line and away.
Bring a pot of water to a boil on the stove. Pour the entire pot of boiling water into one side of the sink. The best choice is the drain without a garbage disposal. You want as much of the hot water to get to the clog as possible.
You may need to try this several times to loosen the clog completely. Remember to remove as much of the water as possible between each hot water treatment. Take care to let the water cool sufficiently before bailing.
Step 4 – Add Some Salt to the Drain
If boiling water alone doesn’t solve the problem, repeat the process but add about ½ cup of table salt to the drain before pouring the boiling water. Let the mixture sit for a few minutes. If you see the water to drain, immediately turn on the hot water on the faucet and continue to flush the drain until it runs freely.
Step 5 – Make your Own Drain Cleaner
We recommend that you never use chemical drain cleaners in your kitchen sink. Chemical drain cleaners often rely on acids or lye to remove the clog. These harsh chemicals can damage the internal parts of your garbage disposal.
A safer and more environmentally sound drainer cleaner is as close as your kitchen cupboard and pantry. Remove as much of the water as possible from the sink. Mix a cup of baking soda with a cup of white vinegar and pour the mixture into the drain.
Put the stopper into the drain and let the mixture work. You may need to let the vinegar mixture sit in the drain for an hour or more. If the drain opens, open the hot water tap and run plenty of hot water through the drain.
Step 6 – Another Home Remedy
You can also try another home recipe for drain cleaners. Mixing a cup of baking soda with a half cup of salt and pouring the dry mixture into the drain will often solve the problem. Let the drain sit undisturbed for several hours. Check the sink periodically to see if the standing water has begun to drain.
When the sink starts to drain, run hot water into the sink to flush away the clog. Let the hot water run until the sink drains freely.
Step 7 – Attack with the Plunger
If the clog in the drain on your double kitchen sink proves stubborn, a tried and true method of moving the clog is the drain plunger. The problem with a plunger on a double sink is the open drain on the second basin.
To effectively use a plunger on a double sink requires a second person. The open-drain on the second sink must be stoppered to allow the force of the plunger to act on the clog. Having a second set of hands to plug the second drain using a rag or the stopper is the only way to make a plunger effective.
Once the second sink drain is plugged and secure, work the plunger vigorously on the clogged drain. The plunger’s force on the material in the drain will often force the clog into the main drain line and away.
Step 8 – Send the Snake In
A plumbing snake can be an effective way to break up a clog below a double kitchen sink. These tools are available for a reasonable cost at most hardware and home improvement stores.
Some of the smaller versions of the plumber’s snake can fit down the open drain of your double kitchen sink. You should carefully work the snake down the drain to the p-trap. Some plumbers snakes turn in an auger like fashion to help clean the drain and break up clogs.
As soon as the sinks’ standing water begins to flow, remove the snake and flow hot water through the drain to flush the clogged material into the main drain system.
The P-Trap Challenge
If none of these methods work to unclog your double kitchen sink, you may have more serious drain problems. Clogs in double kitchen sinks are usually in the P-trap. Food and other debris tend to collect in the P-trap. Some clogs of this type will even resist a plumbers snake. Often, the entire P-trap assembly must be removed and cleaned.
Step 1 – Gather your Tools
You will need the following to remove the P-trap from your sink easily. Get all your tools and equipment ready before you begin. Having everything in reach means less time on the job, and fewer times you need to get and back down under the sink. Some things we suggest you have:
- A bucket or dishpan
- A drain wrench or a large pair of pliers
- A large bottle brush or smaller toilet brush
- Rags or towels
- Flashlight
Step 2 – Bail, Bail, Bail
Bail as much of the standing water in the sinks as possible. That water will want to go somewhere when you start to remove the P-trap. The less water you must deal with under the sink the better.
Step 3 – Clean out the Cabinet
Remove everything from under the sink. You will need room to work. Removing everything can also prevent destroying or damaging anything store under the sink.
Step 4 – Unplug the Disposal
You may not work on the disposal, but you will be working on the drain. You don’t want to risk any type of injury. Practice safe work habits and unplug the disposal first.
Step 5 – Look at the P-Trap
You may need the flashlight to see the parts of the P-trap. The P-trap connects the sink to the main drain through a J Bend. This J bend is the key to the P-trap. This bend in the pipe keeps a small amount of water in the drain to keep sewer gases from escaping through the drain into your home.
At the top of the J bend connected to the tailpiece on the sink is a large slip joint nut. There is another nut at the back of the J bend attached to the main drain
Step 6 – Get Ready for the Downpour
Before loosening anything, put a bucket or a dishpan under the p-trap. As soon as you start to loosen the slip joint nuts, the water trapped in the sinks will begin to leak past the o-rings in the slip joints.
Step 7 – Loosen the Nuts
You may be able to loosen the slip joint nuts by hand. If the P-trap has been in place for a long time, use the pliers to carefully loosen the nuts until you can turn them by hand. As soon as the nuts are loose, water will begin to leak past and into your bucket or dishpan.
Work slowly and let the trapped water drain into the dishpan. Don’t take the slip joint nuts completely loose until the water has stopped flowing from around the nuts.
Step 8 – Remove the P-trap
Carefully loosen the slip joint nuts fully and slip the p_trap from the tailpiece on the sink and the main drain pipe. There will be water in the P-trap, so make sure you work over your bucket or dishpan. When the P-trap is completely loose, dump the remaining water into your catch basin.
Step 9 – Clean the P-trap
Use the bottle brush or toilet brush to clean the inside of the P-trap. It is a good idea to run the brush up the tailpiece on the sink and as far as possible into the main drain pipe. You may be surprised at what comes out of the P-trap.
Step 10 – Reassemble the P-Trap
Re-assembling the P-trap is the reverse process of taking it off. Make sure to get the o-rings in the right place and the right direction before tightening the slip-joint nuts. When the P-trap is back in place, run some water into both sides of the sink for leaks.
What if This Doesn’t Solve the Problem?
If the clogging problem persists, you have a bigger problem. The clog is somewhere down the drain line from the P-trap. A clog in the main drain is a situation where a qualified and licensed plumber is needed.
Call your plumber and make an appointment to have your drain lines examined and cleaned.
Do You Need to Hire a Plumber?
Get free, zero-commitment quotes from pro contractors near you.
Keeping Things Flowing Freely
Periodic maintenance is the best method to keep your drains flowing freely. If you experience a clog that affects both sides of a double kitchen sink, try these suggestions. These tips and tricks may help you resolve the problem without resorting to a visit from a plumber.
We hope that this article has helped and gave you some ideas to help with your clogged sink problem. If you do try to tackle the problem yourself, remember to work safely.

Dennis is a retired firefighter with an extensive background in construction, home improvement, and remodeling. He worked in the trades part-time while serving as an active firefighter. On his retirement, he started a remodeling and home repair business, which he ran for several years.
More by Dennis Howard


![The 10 Best Table Saws - [2022 Reviews & Buyer's Guide]](https://cdn-fastly.upgradedhome.com/media/2023/07/31/9070645/the-10-best-table-saws-2022-reviews-buyer-s-guide.jpg?size=350x220)


