


How To Install A Utility Sink Next To A Washing Machine
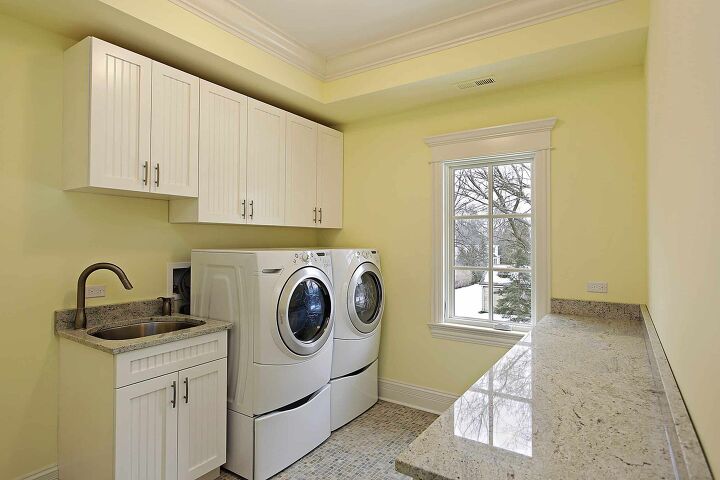
A utility sink can make for a very useful addition to a washroom, basement, or garage. It offers an additional drainage capability, cleaning space so as to not ruin higher-end sinks, and a world of other possibilities.
Turn off the water supply, measure the drain pipe connection, and cut the T-fitting on the pipe. Install a Y-fitting, attach a pipe splitter to the cold and hot water lines, and connect the hoses. Mount the faucet with gaskets and putty, tighten the mounting nuts, and thread the hot and cold water lines.
Do You Need to Hire Sink Installers?
Get free, zero-commitment quotes from pro contractors near you.

Why Install a Utility Sink?
Having a utility sink provides greater convenience to your wash area. Not only can it help to save wasted water, but it can also eventually save you energy and time later on down the line. You’ll also make the most of your space, reducing clutter. In a smaller space, every square foot can make a difference.
Having a utility sink installed can also reduce any potential mess that would have been created otherwise. Instead of dripping everywhere when prepping clothing for the washing machine, you can seamlessly transfer without worrying about a spill.
Required Tools
There are some tools required before you can get started installing your utility sink. You’ll need a PVC y-fitting, a PVC hand saw, some kind of deburring material, a pair of brass pipe splitters, pliers, a wrench, some plumber’s glue, a measuring stick, and some hot and cold flexible tubing.
All of these can be picked up at a local hardware store if none are available on-hand. You’ll also need to purchase the utility tub, but that kind of goes without saying.
Step One: Measure for the Drain Pipe Connection
The first thing you need to do is to turn off the main water supply. Things can get particularly messy if you skip this step. When you’ve turned the water off, start by measuring how far the drain pipe connection on the utility sink will be from the ground.
Find the drain line on the washer; specifically where it moves down into the wall or the flooring. When you have the sink’s drain line measurement, you will want to measure up from the ground and then make your mark on the washer’s drain line.
This spot is where the new Y-fitting will go. The Y-fitting separates the washer’s drain from the utility sink’s drain.
Step Two: Cut the Existing Drain Pipe
The next step is to cut the existing drain pipe. You’ll do this from the mark that you made on the venting pipe itself. This connects above the drain pipe. When doing this, you will also have to cut the horizontal T-fitting. That’s where the water from the washer will wind up turning downward and toward the exit drain pipe.
When the cutting is finished, take your deburring tool and use it to smooth out the insides of the pipe that you just cut. Without proper deburring, those grooves and burrs can prohibit the pipe from properly seating. Ensure that the pipe is completely smoothed out before you attach it in the next step.
Step Three: Attaching the Y-Fitting
Next, you’ll need to attach the PVC Y-fitting to your existing drain pipe. One of the arms of the Y will end up attaching to the horizontal flow where the washer drain currently exits. The top half of the Y-fitting will ultimately attach to the above venting pipe.
The other arm of your Y-fitting will attach to the pipe that runs out of the utility sink drain. Be sure that all of the connections here are tight. Use some sort of plumber’s glue or putty to ensure that there is a secure, waterproof seal.
If water is allowed to leak through, it is not only inefficient, but can lead to water damage until the leak is remedied.
Step Four: Find Your Water Sources
With the drain properly in place, we’re going to need to do something similar to the existing water lines. Start by locating both the cold and hot water pipe connections that are nearest to your washer. These connections run into a single fitting on your water pipe. Disconnect the water pipe here at both the cold and hot hookups.
If you don’t have this fitting and your piping is just one long piece, you’ll have to cut the pipe. Make sure you have a bucket nearby to catch any of the water that may be sitting in the lines.
Make your cut in an area that is somewhere around midway between the utility sink and the washer. You have the option of threading the pipe here, but it isn’t mandatory. You would need a threading tool to complete the threading of the pipe.
Step Five: Add Your Pipe Splitter
With a brass, two-headed pipe splitter, screw the splitter onto the main water pipe. You will want this for both the cold and hot lines. The seal has to be complete so screw it tightly. Now, the splitter will separate the water supply based on hot and cold. One of the lines goes to the washer and the other line goes into the utility sink.
It is imperative that you attach the splitter to both the cold and hot water pipes. When you secure the splitter onto both lines, make sure that you reconnect the washer with your existing piping if you don’t want to purchase new ones. As always, ensure that the connections are secure by using a pair of pliers or a wrench.
Step Six: Connecting the Hoses
One of the final steps is to take the tubing, as long as you need to reach the sink, and connecting it from the pipe splitter into the sink’s cold and hot lines. The red tube should go to the hot connector, the blue to the cold connector for ease of understanding.
When you’re certain the connections are all tightly sealed, you can turn the main water supply back on. Be sure to make sure that the water runs smoothly, looking for leaks along the way. If you do notice issues, turn the water from the mainline off again and tight all of the connections.
Assembling the Utility Sink Faucet
Now that your sink is hooked up, the final step in the whole process is to assemble the sink’s faucet. To begin, shut off your main water supply to avoid flooding. Then, proceed with the following steps:
- Mount the sink faucet using gaskets and/or putty. Your sink should already come with a pre-drilled hole for the faucet. Slide it into the hole from the top. Most faucets also come with nuts and rubber gaskets for securing the faucet head to the sink. However, you may want to go the extra step of using plumber’s putty for a tighter seal.
- Tighten the mounting nuts. The mounting nuts are what will secure your faucet to the sink. With a wrench, work from underneath the sink to ensure that the nights are tight enough. In some cases, tightening the faucet may cause excess sealant or putty to escape out the side. Tackle this while it’s still sticky with a putty knife and a damp towel.
- Thread the hot and cold water lines. Gather the ends of the hot and cold water lines and affix them to the corresponding underside of the faucet handles. These connections can be tightened by hand. However, it’s always best to use a pair of pliers or a wrench to ensure that the seal is complete.
- Turn the water back on and check for leaking. Your faucet is now assembled. All that’s left to do is verify that everything was installed correctly. Turn the main water supply back on and run the faucet to check for leaks. If you discover some, you’ll want to look for any loose connections. Check that the area under the faucet is completely sealed up and all of the connections are tight. You can also use a flashlight to locate gaps much easier.
Do You Need to Hire Sink Installers?
Get free, zero-commitment quotes from pro contractors near you.
How Much Does it Cost to Install the Utility Sink?
The overall costs of installing your utility sink will largely revolve around the sink itself.
A sink made of vinyl or fiberglass can run as cheaply as $50-$100. If you want to get fancy about it and pick up a stainless steel, they can run $175-$500. There are some that come with a wall mounting feature, others that come with cabinets, and a huge array to choose from that will best suit your needs.
The installation is where you can really save on costs. The costs of having a professional plumber do the installation will run in the neighborhood of around $200, though you can certainly find deals here and there. Doing the installation yourself saves on the labor costs, especially if you have experience in doing an installation.
At the end of the day, having a utility sink in your washroom can provide a greater level of convenience and up the cleanliness level. They can be cheap to purchase, free to install, and don’t take much time to properly install.

Ryan Womeldorf has more than a decade of experience writing. He loves to blog about construction, plumbing, and other home topics. Ryan also loves hockey and a lifelong Buffalo sports fan.
More by Ryan Womeldorf


![10 Best Electric Pressure Washers – [2022 Reviews & Guide]](https://cdn-fastly.upgradedhome.com/media/2023/07/31/9070600/10-best-electric-pressure-washers-2022-reviews-guide.jpg?size=350x220)


![10 Best Electric Lawn Mowers - [2022 Reviews & Top Rated Models]](https://cdn-fastly.upgradedhome.com/media/2023/07/31/9070486/10-best-electric-lawn-mowers-2022-reviews-top-rated-models.jpg?size=350x220)


