


How To Add A Light Fixture And Switch To An Existing Circuit

Built-in lighting is excellent; it typically can provide an entire room with light, but what if it’s not enough? You could add plugin lamps, or you could add more built-ins.
These lights make your home more attractive and can raise its resell value. You could also add a separate switch so you could control how much light you want. So, how do you add a light and separate switch to your existing circuit?
You can add a light fixture and switch to an existing circuit if you install an electrical box and attach the new fixture to an existing one with a cable. Match the black and white wires on the cable to the ones on the electrical box, and attach a wire cap to each connection. Install a ground wire, twist the black and white wires into a pigtail, and tighten the ground screw.
In this guide, we will walk you through each step thoroughly so, stay tuned!
Related Content: Can Lights And Outlets Be On The Same Circuit? | How To Add A Neutral Wire to An Existing Light Switch | How To Wire A Light Fixture With Red, Black, And White Wires | Light Switch Not Working After Changing?
Do You Need to Hire an Electrician?
Get free, zero-commitment quotes from pro contractors near you.

Tools Needed
You are going to need some tools to get started. This is not an impossible task for a DIYer by any means. Still, it is going to take some skill with using tools and patience with figuring out wiring.
Here are the tools:
- Wire strippers
- Drywall saw
- Multi-tip screwdriver
- Utility knife
- Voltage tester
- Pliers
- Hammer
- Stud finder
Materials Needed
You will also need the light fixture, switch, and the parts needed to hook it up. In general, you can pick whatever design of light fixture you want; however, make sure that the light fixture matches the fixture strap you will use to mount it.
Here’s a list of materials to help you:
- Electrical switch (consider upgrading to a dimmer since you will be rewiring anyway)
- 2-gang switch box
- Electrical cable
- Fixture strap
- Remodeling junction box (make sure it can support your new fixture)
- Variety of wire nut colors
- Light fixture
- Black 12 gauge THHN solid electrical wire
The Installation Steps
This will be a pretty long series of steps, so just bear with us or check out the video instead:
- Turn off the Circuit breaker: You will need to turn off the power to the existing fixture you’re working with!
- Decide where your light fixture is going: Make sure you place your light fixture between two studs.
- Cut the hole for your junction box: Remodeling junction boxes come with a template to help you cut the right shape in the drywall.
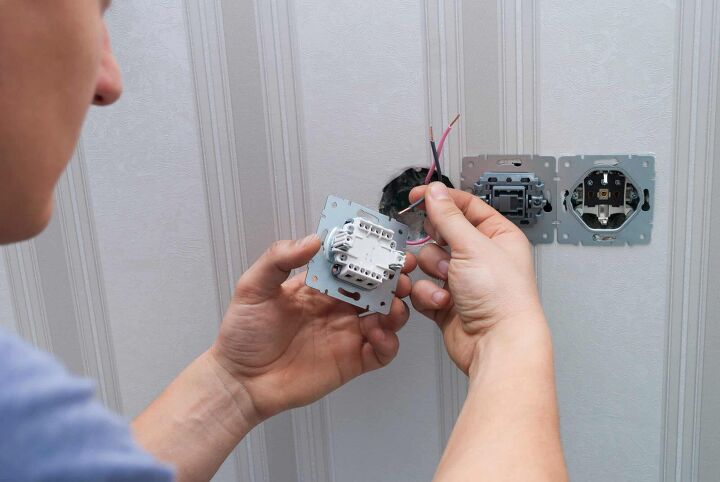
- Remove the Light switch cover: Remove the cover from the existing light switch and use your voltage tester just to double-check that the power is off. The hot wires are generally black.
- Remove the existing switch: There should be 2 screws holding the switch in place. Loosen the screws holding down the wires and slip them out.
- Untwist the wire connectors: The wire connectors that are already used and the ones you will be using are all twist on and can be removed by untwisting.
- Remove the switch box: This may take a little force, if it’s stuck in place, carry a block of wood to the switch box and hit it with your hammer. Then, pull it out. Next, use your drywall saw and the included template to saw out the extra room for your 2-gang switch box.
- Insert the wires: Put the wires through the rear of the junction box and work it through the hole and into the switch box. Then, pull the existing wires into the new switch box.
- Install the boxes: Install the junction box and the switch box into their holes and clamp in place.
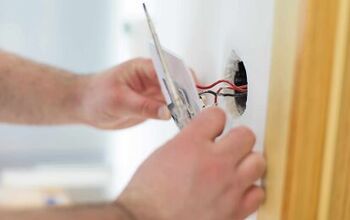
- Prepare the exposed wiring: Remove the exposed sheath from the electrical cable. Then, prepare both wires by stripping 3/4″ of insulation from the wiring.
- Wire the light fixture: Wire the light fixture by matching the colors; use your orange twist on electrical connectors. Match the black wire from your fixture to the black wire from the installed cables. Then, do the same with white to white and copper to copper.
- Attach the light fixture: Screw the light fixture onto the junction box and install any lightbulbs and shades.
- Connect the white and ground wires: Connect all 3 white wires together with a red wire nut. Then, connect all 3 copper wires together with a red wire nut. Next, put all to the back of the junction box.
- Prepare two pieces of wire: Cut 2 approximately 5-6” pieces of wire and strip 3/4” from both sides of each.
- Connect the black wires: Connect the existing black wire that comes from the circuit breakers and the wires we just made to connect the hot circuit with a red wire nut.
- Wire the switches: Connect the black line coming from the original fixture to the original switch, and one of the new black lines from the breakers. Then, connect the black wire from the new fixture and the remaining black wire from the breakers to the new switch.
- Insert the switches: Screw the switches into the gang box top and bottom.
- Attach a cover plate: The original cover plate will not fit the double-wide gang box. So, if it did not come with a cover plate, you will need to purchase one.
- Restore power: After all the previous steps are completed, turn the circuit breakers back on.
Safety Tips
There is nothing more important than safety when working with electricity. Irresponsibility can lead to electrocution or a fire. If you aren’t confident working with electricity, consider paying a professional to do the install.
If you are doing the install here are some things to remember:
- Always double-check the wires. Notably, do not assume turning the breaker off is enough. Chiefly, hot wires from other circuits can route into a junction box.
- If you’re using a 2-prong voltage tester, touch the red prong to the wire you’re testing and the black wire to any metal on the circuit. Then, for a non-contact tester, after hovering near to confirm no voltage, touch the tip of the tester to the wire. Finally, if all is good, you can proceed.
- If you are installing a ceiling fan with the lighting fixture, ensure there are not too many other items on the existing circuit. A standard light does not use many amps, but it is a caution to consider in your choice.
- Choose a junction box that can carry the weight of your fixture. The carrying capacity should be listed on the box. If you are attaching a ceiling fan light you will need to connect it to the ceiling joist as well.
- It is a good idea to have someone help you hold the fixture while you wire it. This way, they can also get help if something unexpected happens.
How Do I Wire A New Light Fixture To An Existing Light And Switch?
This will require similar equipment to wiring a new set of both. However, you won’t need the gang box and switch. It is also a much shorter series of steps, but if you get confused, read the full set of instructions above. It is very similar.
Just follow these instructions:
- Turn the circuit breaker off.
- Put your new cables (the same gauge as the existing ones) through your new junction box and install the box.
- Wire your new fixture to the new cable and install it into the junction box.
- Connect the black circuit wires from the existing fixture, circuit, and the new fixture together with a wire nut. Do the same with the white, and finally the ground. If there is a ground screw on the old fixture wire, leave some of the ground wire exposed after joining to clamp down to the ground screw.
Related Questions
How many lights or outlets can be put on a 15-amp circuit?
There is no rule specifying the number of lights or outlets you can have on a circuit. However, you need to consider the wattage of the lights or what you want to plug into the outlets. Generally, 8 to 10 outlets or lights are on one breaker.
Can I add a light switch from an existing outlet?
Yes, you can add a light switch from an existing outlet, and it’s a pretty easy project to do this. You will need to install the box for the new switch and run a few wires from the outlet to the new box. The wires you nee are red, white, green and a black 12 or 14 gauge wire. Make sure you strip the ends of the new wires.
Can I daisy chain recessed lights?
The daisy chain will connect different light fixtures onto the same circuit. It’s great for recessed lighting, brightening up rooms and connecting some lights to the same switch.
Do You Need to Hire an Electrician?
Get free, zero-commitment quotes from pro contractors near you.
Our Takeaway
While it may seem complicated to add a light and switch the an existing circuit, it’s a pretty straightforward project. However, make sure you kill the power to that particular circuit before you begin this job. You will need to ensure you have the right materials and tools to get the job done, otherwise, the project may be impossible to do. When in doubt, call a professional to do it for you since this is an electrical job. It’s always better to be safe than sorry!
Related Guides
I am a writer who enjoys working on home improvement projects. My husband was in the navy, so we moved frequently. This gave me many opportunities to fix up new places. In my spare time, I enjoy reading mysteries and hiking.
More by Lisa Borga


![10 Best Electric Lawn Mowers - [2022 Reviews & Top Rated Models]](https://cdn-fastly.upgradedhome.com/media/2023/07/31/9070486/10-best-electric-lawn-mowers-2022-reviews-top-rated-models.jpg?size=350x220)


![How To Reset A Whirlpool Cabrio Washer [In 5 Easy Steps!]](https://cdn-fastly.upgradedhome.com/media/2023/07/31/9076531/how-to-reset-a-whirlpool-cabrio-washer-in-5-easy-steps.jpg?size=350x220)


