How To Thin Acrylic Paint (Find Out Now!)

Are you planning on using acrylic paint to refresh the walls in your home? Both acrylic and acrylic latex paint are popular choices for DIY projects. They can be used to paint your walls, ceiling, interior furniture, and so much more.
However, when using acrylic paints, you need to verify that it has the proper viscosity before you begin painting. If you don’t, you could end up with a paint job that is blotchy, ugly, uneven, or all of the above.
Many homeowners make the mistake of opening up their fresh can of paint and immediately applying it to their walls. In order to avoid any potential unevenness or lumpiness with the paint’s application, you need to check its consistency first.
To thin acrylic paint, simply dilute the acrylic paint in water. Begin by placing an amount of acrylic in a container. Progressively incorporate water into the acrylic, the average ratio for thinning acrylic with water is 2-3 ounces of water for 1 gallon of acrylic. The amount of water needed will depend on the consistency desired.
If your acrylic paint is too thick, you must thin it to ensure the best results. Thankfully, thinning acyclic paint is as easy as adding the appropriate amount of water to achieve the proper consistency. Save yourself from any possible troubles by taking the extra time to check and thin your acrylic paint before you rush to grab a brush.
What is Acrylic Paint?
As a homeowner, the three types of paints that you have available to you are: acrylic, latex, and oil-based paints. Acrylic paint is arguably the most popular of the three.
Acrylic paint was first established in the 1950s as a house paint. It was then made commercially available as an artist-grade paint ten years later. This chemical-based paint is constructed of a pigment that is suspended in an acrylic polymer solution and acrylic resin.
One of the major advantages of acrylic paint is the speed at which it dries. Acrylic paint is known for its incredibly fast drying time. Although this can be beneficial when painting a small space, painting larger areas with acrylic paint could prove to be more difficult. Acrylic paints do not mix well with the oil-based variety and will not adhere to a wall that already has oil paint on it.
What Makes Acrylic Paint Different?
Prior to the 19th century, artists would mix their own paints by hand. By doing this, they were able to achieve their desired thickness and color, along with controlling the use of fillers, if any. However, when it comes to acrylic, hand mixing is not usually sensible.
Due to its fast-drying time and other procedural issues, including the requirement to mix several polymers, plasticizers, demoamers, stabilizers, and surfactants. Because of this, artists and painters would purchase their acrylic paint ready to go. This ready-made acrylic paint can be modified by using both water and acrylic mediums.
When compared to oil-based paints, acrylic paint offers a much wider range of mediums. Acrylics can bond to virtually any surface that is wax or oil-free and mediums can be applied to modify the bonding characteristics. You can use acrylic paint on houses, cars, trains, and paper, canvas, and a range of other materials.
Preparing Your Work Area
Prior to working with acrylic or any other type of paint, make sure that you properly prepare your work area. Ventilation is absolutely essential when handling paint because of the potency of paint fumes. Bring your acrylic paint can and supplies to an outdoor space or well-ventilated room.
Open the can of paint on a sturdy work surface. Use special care to ensure that you aren’t bending or distorting the lid. This will prevent you from being able to reseal the paint completely and could affect its quality.
The best tool for opening a paint can is a 3-in-1 painter’s tool. However, if you don’t own one, you can use a flathead screwdriver to gently pry the lid off of the can. Turn the can and move the screwdriver around the lid to break the seal on all sides. Remove the lid and set it aside for later use.
Determine Paint Viscosity
Before you even consider thinning your acrylic paint, you want to ensure that this is the right step to take by testing the viscosity. A paint that is too thin is just as problematic as a too-thick consistency. Thin paint will drip and run during application, possibly damaging your trim in the process.
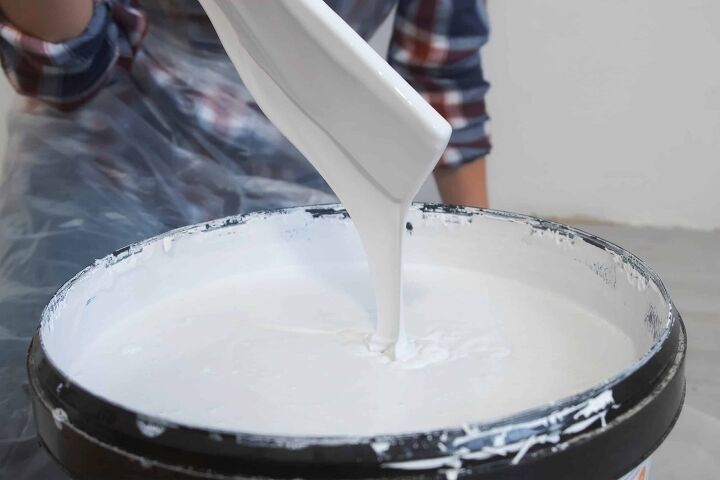
To observe the viscosity, use a paint stick to stir the paint in its container. Stir consistently for at least five minutes and make sure that you are stirring well enough to mix up any particles that may have settled at the bottom of the can. Then, using the paint stick, hold it above the container and watch how the paint runs off of the end of the stick.
Paint that is too thin will be indicative of a drip very similar to water and means that you have a bad batch. If it is too thick, it will be lumpy and drip off in globs, signifying that it needs thinning. Acrylic paint that has the appropriate consistency will be creamy, heavy, and smooth.
Another way that you can determine paint texture is by using a funnel. If the flow is seamless when it escapes the funnel, the viscosity is correct. Regardless, you should always test your acrylic paint on a sample material before beginning your project and applying it directly to your walls.
How to Thin Acrylic Paint
Once you’ve determined that your acrylic paint requires thinning, you can begin the process. Since acrylic paint is water-based, all you need to do to thin it is to add water. Depending on the starting condition, you can add between two and three ounces of water per one gallon of acrylic paint. For a pint-sized can of acrylic paint, add up to two tablespoons of water per pint.
Begin by adding a small amount of water to the paint, mix it together and check the consistency. You can then add more water as needed to achieve the right viscosity. It’s always better to start with small quantities of water since if you add too much, you won’t be able to undo it. Too much water could make the acrylic paint too thin and ruin the entire batch.
As you are adding water, avoid shaking the can to prevent the formation of bubbles in the paint. Stir in a circular motion to fully combine the water and the paint. Follow up by pouring the paint into another container to properly mix and use a brush to test the consistency on a sample piece of material.
The amount of water that you add to the paint will generally depend on the type of paint that you purchase. A high-quality paint typically comes much thicker than a low-quality paint. The thicker the starting consistency, the more water that will be required.
Quick Tip: When you need to thin acrylic paint, you should avoid using paint additives. They are usually not needed and typically have little to no impact on the paint or its application.
Testing the Thinned Acrylic Paint
Before you jump at the opportunity to apply your newly thinned acrylic paint to your wall, you should test it out first. Use a scrap piece of wood as your sample material to test on. Dip the tip of a brush into the paint and apply it evenly on your sample material.
Wait the appropriate amount of time for the first coat to dry before applying a second. Then, check the results after both coats are dry to the touch. If your acrylic paint has the right consistency, it should appear smooth.
If the acrylic paint is still too thick, try adding a half cup of water to the gallon of paint. While you should avoid using a commercial thinning additive, it can be used as a last resort. Thinning additives can be expensive and often don’t provide great results for the price.
Tips for Thinning Acrylic Paint
The following are some general tips to follow when you’re thinning your acrylic paint.
- You should never use any petroleum-based commercial products to thin acrylic paint. Anything that goes by the name “paint thinner” or “mineral spirits” should be avoided, as they most likely involve a petroleum-based solvent.
- Although they tend to produce unpredictable results, you can use a paint additive to potentially eliminate roller or brush marks. Floetrol is a paint additive that can be used on any acrylic or water-based paints. If you are applying acrylic paint with a brush or roller, add eight ounces of Floetrol to the paint.
- When you add water to paint you are diluting it and lighting the color as a result. In order to improve the color quality, additional coats of paint may be required.
Related Questions
What is the difference between acrylic paint and latex paint?
While both acrylic and latex paint are made from acrylic resins, they do have their differences. The primary difference between these two types of paint is their bases that support these resins. Latex paints are water-based, whereas, acrylic paints are chemical-based.Although acrylic paint will typically last much longer than latex, latex is more often used for painting homes. Acrylic paint, on the other hand, is generally used for art projects.
What is acrylic latex paint?
The term “acrylic latex” was adopted as a way to accurately describe the use of plastic resins in the construction of the paint. “Latex” is often used to refer to rubber in one form or another and since many manufacturers use resins that are not actually latex, the industry chose a more correct term. Acrylic latex paint, instead, uses plastic resin that is made of acrylics or polyvinyls.This type of paint is water-based and when it’s 100 percent acrylic latex, it is observed as the best-quality latex paint. Vinyl acrylic latex is another variety that is the most popular form on the market. The binder in vinyl acrylic latex is synthetic polymer or plastic, making it a very economical option.
Do you need to thin latex paint?
When compared to oil-based paints, latex is generally thicker and should be thinned. Latex paint is water-based and can be thinned easily by introducing more water into the mixture. While newly mixed latex paint rarely needs to be thinned for brush or roller applications, thinning latex paint is especially important if you are planning on using a paint spray gun.It will help you to distribute a mist of paint over the surface that is adequately thin enough.
How do you thin oil-based paints?
You should never use water to thin oil-based paints, as it won’t be effective. Instead, oil-based paints should only be thinned or cleaned up with a petroleum or mineral-based thinning product. The ratio of thinner that should be used to thin your oil-based paint will largely depend on the recommendations of the manufacturer.Consult the manufacturer’s manual to determine the proper amount.Generally speaking, a 1:3 ratio seems to be the standard for mixing thinning products with oil-based paints. In other words, to thin your oil-based paint, mix one-part thinner with three parts of the paint.
What is an acrylic medium?
A medium refers to a substance that can be added to paint in order to alter one or more of its properties. When it comes to acrylic mediums, they can be added to the paint to change the texture, increase thickness, or lengthen drying time.
Wrapping It Up
In most cases, acrylic paint can be used directly after being mixed. However, if you’ve determined that the paint is too thick, it will greatly benefit from being thinned. The thickness of your acrylic paint will vary based on the finish, satin, semi-gloss, or flat, along with the quality of the brand purchased.
Overall, the thicker the paint, the more it will be susceptible to collecting dust and debris that can ruin the appearance of your paint job. Save yourself some trouble by taking the extra time to verify the viscosity of your acrylic paint and then adding water to thin it accordingly. The general rule of thumb for thinning acrylic paint is two to three ounces of water per gallon of paint.

Jessica considers herself a home improvement and design enthusiast. She grew up surrounded by constant home improvement projects and owes most of what she knows to helping her dad renovate her childhood home. Being a Los Angeles resident, Jessica spends a lot of her time looking for her next DIY project and sharing her love for home design.
More by Jessica Stone


