How To Reuse Old Plastic Cordless Tool Cases

Reusing old, cordless power tool cases is a sustainable way to reorganize your home. These cases are durable and convenient. They can be easily reused for other tools, appliances, or small bits and pieces. While they’re convenient, there are a few steps to take to make them optimal for reusing.
To reuse old plastic cordless tool cases, you may need to remove the internal molded plastic. From there, you can change the interior to suit its new purpose. Break out your utility knife, grab some small containers or foam, and some sort of adhesive.
We’ve compiled a few ideas to get you inspired for this DIY project. This guide will help walk you through the correct way to prepare your old plastic cordless tool cases so that you can reuse them.
Repurposing A Plastic Cordless Tool Case
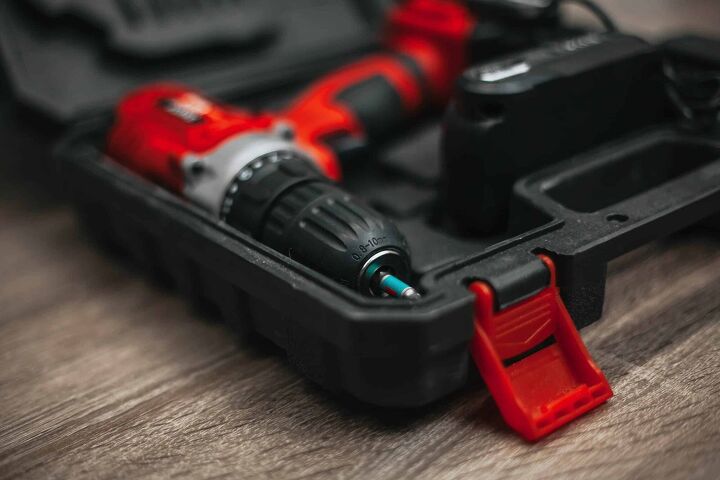
Plastic, cordless tool cases often have an internal molded plastic tray. This tray helps keep the tool and any accessories in place. The hard plastic shell can withstand abuse in the workshop or construction site. When the tool wears out or breaks down, you may wonder what you can do to repurpose these cases.
You likely won’t find a new tool or appliance that would exactly match the shape of the old device. Even a similar tool may not precisely align. Removing this inner shell opens the whole case up for reuse.
Removing The Inner Shell
- Remove the inner shell. To remove the inner shell, first, try pulling the inner shell out of the outer shell. If it’s only stuck together with glue, they should separate with a little effort. The plastic inner shell may be fused with the outer shell. To separate them, grab a utility or craft knife and cut around the edge of the case. The cut might leave a sharp edge around the perimeter of the case.
- Soften the sharp edge. You may be able to use a lighter to soften and melt the sharp edge away. A heat gun might work better if you have one. Some sandpaper can also help to dull the edge or any uneven cuts. If the case is one solid piece of plastic, you’ll have to work a little harder.
- Carve out the interior. To reshape or carve out the interior, try using a chisel or sharp knife. You may have to scrape away a lot of plastic to shape it into your new desired shape.
Add Dividers And Organizers
There are several ways to add organizers to an old plastic tool case. Consider include small storage containers with lids, foam cutouts, or straight dividers. You can glue in small storage containers into the case. Use these containers to store small bits and pieces. Options include small mason jars, food storage containers, magnetic cups, or anything else that might suit your needs.
You can also insert dividers in the case to hold longer items. Consider attaching pencil cases, for example. You could even cut down a piece of plastic from a plastic bucket or use a piece of cardboard. If you put in dividers without a lid, remember to open the case with that side upright, so you don’t spill it!
Use Foam To Hold New Shapes
Foam can be cut into any shape that you need to fit a new tool or appliance.
Trace your outline and trim. Simply lay the foam over the case to trace an outline of your internal shell, then trim down to size. Then, lay your new tool on top of the foam and trace the outline. You can cut the foam straight down or pinch it to cut a depression that fits the tool.
Any time you reuse a plastic tool case, make sure that the case is thick enough for your new intended use. Otherwise, find a use that fits the size and depth of the case!
Ideas For Repurposing Old Plastic Tool Cases
We’ve compiled a list of ideas for repurposing old, plastic, cordless tool cases. Here are our top suggestions:
Store Accessories For Other Tools
One of the best ways to repurpose a tool case is by using it to store accessories for other tools. Take, for example, a handheld rotary tool, such as the Dremel. To use the tool to the fullest, you’ll need several kits of accessories.
Assemble all the small cases for cutting, polishing, cleaning, and grinding. Once you’ve removed the inner shell, arrange the small cases inside. You can use glue to attach them to the case but consider using adhesive velcro instead. Attach one side to the inside of the case and the other side to the back of the accessory case. The more massive tool case will keep your smaller cases together and organized.
Nail And Screw Organizer
Keep all your nails and screws organized in small storage containers inside a repurposed, old tool case. These containers can be glued or velcroed.
For another creative idea, consider using metal storage containers. Glue magnets inside the case, then stick the containers onto the magnets. You can easily take the containers out to pour out bits you need or to pour a handful back in. This idea also works for office supplies, like push pins, staples, paper clips, or similar.
DIY First Aid Kit
First aid kits need to be accessible and portable in a hurry. Instead of buying a new first aid kit from the store when you run out of supplies, create one with an old tool case. Old plastic, cordless tool cases have convenient handles and latches, making them easy to carry.
To assemble your kit, use the storage container methods mentioned earlier or find old pouches you can attach to the inside. Old pocketbooks, makeup cases, or other resealable bags can hold bandaids, medicine, antiseptic or alcohol wipes, tweezers, and q-tips. Make sure to store this case in an easy to reach place!
Camping Kit
Use old plastic tool cases to store camping supplies. Like the first aid kit, the case keeps everything you need accessible. Think of how many times you’ve ended up at the campsite in the dark, unable to find your flashlight, matches, or soap.
For this kit, find everything you might need in a pinch while in the great outdoors. You might need a pocket knife, camp ax, baby wipes, soap, toilet paper, lighters, emergency flashlights, and of course, batteries for the said flashlight.
If you have bulky items that don’t fit in a smaller container, try creating a bigger pouch on one side of the case. You can glue in canvas with a snap or zipper to the perimeter of the case to keep your contents in place.
Kitchen Organizer
Consider repurposing your old, plastic tool cases for creative kitchen storage. You can get creative with kitchen storage, such as in our lazy susan article. If you have an immersion blender with accessories, you can store it all together in the case to keep your kitchen drawers organized.
You could even use it to store spices and herbs or commonly used kitchen utensils. You could even use your case, if it’s large enough, for common grilling tools. Use dividers in the bottom half to store your tongs and spatula, and the top half to velcro in grilling spices and rubs.
Crafting Kit
If you’re into DIY home renovations, then chances are you may also be into DIY crafts. A repurposed tool case could be great if you’re looking for something to organize your products, such as:
- Embroidery thread
- Beads
- Buttons
- Snaps
- Pins
- Needles
- Crochet hooks or knitting needles
- Measuring tape
- Scissors
Of course, there are many other components that you can put into the box. And it doesn’t have to just be with crafting necessarily.
Pill Organizer
Whether you’re on prescription medications, vitamins, or both, this box could be great for organizing your pills. You can have them all in one box so that they don’t get lost and have them organized by cause.
For example, Vitamin B 12, Vitamin D3, and your multivitamin can be together. At the same time, you could separate some others and group them together so that you always know where to look when you need them. Plus, they’ll be out of the public’s display, which is a plus if you’re self-conscious about the supplements or medications that you take.
Reusing Is Key
Remember that reusing what you have is more sustainable than buying something new. Before throwing away those rugged, old, plastic tool cases, turn them into something useful and helpful for you in your home! Use them to separate your threads for crafts or even create a DIY home first aid kit. You could even create a first aid kit for your car as well since it’s a great idea to have one for when you’re on the road.
We hope that you’re inspired by our ideas and rewarded by your creativity. There’s nothing better than making something on your own and being able to tote your work around with you proudly to share with your family and friends!

We are a team of passionate homeowners, home improvement pros, and DIY enthusiasts who enjoy sharing home improvement, housekeeping, decorating, and more with other homeowners! Whether you're looking for a step-by-step guide on fixing an appliance or the cost of installing a fence, we've here to help.
More by Upgraded Home Team


