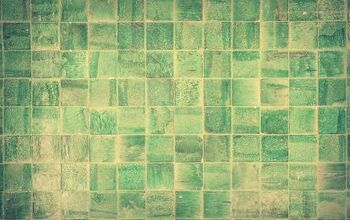
How To Tile A Shower Curb (Step-by-Step Guide)

Shower curbs are an essential part of the bathroom. If you can walk into a bathroom after someone has taken a shower and find it dry, you have the shower curb to thank for that.
This article serves to answer all questions related to tiling your shower curb. Do we leave the concrete slab as it is? Do we tile it? How do we tile it? It’s not all that different from tiling a wall or a niche. You will need to mark, cut, and lay the tiles.
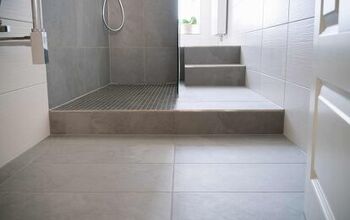
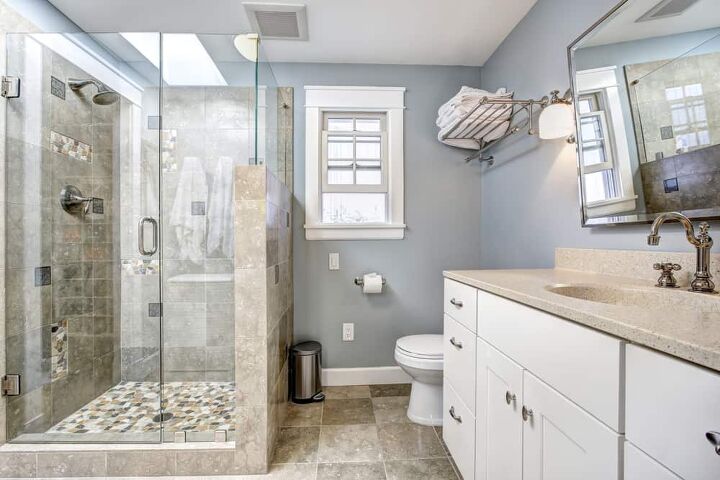
Shower curbs are raised slabs of concrete that act as a border between the shower area and the bathroom floor. They keep the bathroom floor dry and keep the water inside the shower area. Curbs also serve as a base to mount brackets for your shower door; if you have one.
Also, If your bathroom seems to have a rotten smell to it, click here to learn why and how you can combat it.
Do You Need to Hire Tile Installers?
Get free, zero-commitment quotes from pro contractors near you.

Installing a Shower Curb
Preparation
Before you begin the process of tiling your curb, you will need to prepare your area, take measurements and arrange equipment:
- Clean the curb: Check if the curb you are about to tile is dirty, greasy, uneven, or has damaged plaster. If it does, you will need to fix that before tiling.
- Seal the curb:If you have recently plastered your curb, it will need to be dried off completely. Seal the curb with primer.
- Calculate the area of the curb:Measure the height, the width, and the length. It’s a good idea to draw up a sketch with all the dimensions noted down.
- Buy your tiles: Select the style you want, and ask the shopkeeper about its availability with-in your required dimensions. Calculate the number of tiles you will need for the curb, and buy a few more than that number. This is done in case any tiles get damaged while laying.
- Alignment:It’s important to find the best starting point for your first row of tiles; this ensures that all following tiles sit with-in the required pattern formed by the joints between the tiles.
- Placement:It is best to start tiling the curb from the side. Choose the outer side of the curb and start from the edge of the corner.
- Curb Shape:If your curb is L shaped, it is advisable to start from the wall edge and work outwards towards the L bend
Tools You’ll Need
- Trowel
- Thin-set mortar
- Batten
- Triangle ruler
- Angle protractor
- Spacers
- Tile cutter
- Sponge
Step 1: Laying The Tile – Sides
Now that you are prepared, begin the tiling process:
- Lay your tiles on the floor, face down, and apply the thin-set onto the back of each tile before placing it.
- Use a trowel to apply the thin-set mortar onto the tile and coat it evenly on all sides.
- Once spread thoroughly, slide the trowel against the back of the tile at a 45-degree angle to get rid of the excess thin-set.
- Wipe away any thin-set that may spill out of the border or onto the tile’s front and sides.
- Place the batten on the floor to position the tile over.
- Apply thin-set onto the side of the shower curb where you want to place the tile, and even it out with a trowel.
- Lay the tile onto the curb.
- Move the tile from left and right to help spread the thin-set evenly between the tile and curb.
- Verify that the tile is perpendicular to the shower floor, using the triangle ruler.
- Keep laying out the tiles in this manner till you come to the last tile.
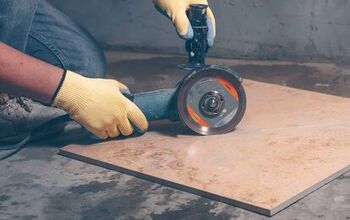
- It is possible that your last tile may be too large for the remaining space. Use a tile cutter or angle grinder to cut the tile to size
- Clean any more excess thin-set that may have spread outside the tiles.
- Remove the batten when you feel the tile has stuck to the curb.
Remember that shower curbs are not level on both sides. The inner side is slightly lower than the outside to allow water to flow back into the shower
- Install the tiles on the inside in the same way, level them, apply thin-set onto them, and lather onto the curb.
- Keep them parallel with the outside tiles and maintain that height difference. The ideal height difference between the outside to the inside is one-eight of an inch.
Step 2: Laying The Tile – Top
Now that you’ve tiled both sides, it is time to tile the top of the shower curb. It depends on whether you want to install a single stretch of tile on the curb or use individual pieces as you did for the sides:
- Make sure the width of the tile fits the curb and is uniform throughout. It should cover the curb as well as the thickness of the side tile. Normally the thickness of the side tiles should be around one-fourth of an inch.
- Clean the concrete with a sponge; remove dust.
- Apply tape on both sides of the curb to avoid any thin-set mortar smearing the side tiles.
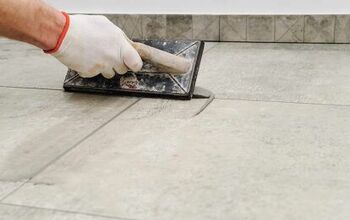
- Start applying the thin-set on the concrete. Lay it on thick using a trowel and then level it by sliding the trowel against it at a 45-degree angle.
- Wipe off excess thin-set that may have spread to the sides.
- Lay the thin-set onto the back of the tiles; spread evenly with a trowel.
- Use the angle calibrator to measure the slope of the tiles.
- Insert spacers between the tiles.
- Once the tile has stuck onto the curb, remove the tape and the spacers and proceed to wipe off any excess thin-set.
- If you want to attach a trim to the curb’s edges, apply adhesive, bind it to the edge of the tiles, and press it firmly.
- Leave the trim overnight to dry.
Pros And Cons Of Shower Curbs
There are a variety of reasons why you should or should not attach a shower curb. Let us consider some of them
Pros
- It keeps the water out. It doesn’t matter how you plan your shower with a curbless shower; water will always seep out.
- A shower curb reduces the chances of slips or falls. A wet floor can be very dangerous and lead to fatal accidents.
- A shower door is much easier to install on a curb. All you need to do is fit the brackets on the curb and attach the door
- The shower curb increases the sense of privacy. Many people prefer their showering space to be in a separate alcove or compartment. A shower curb divides the showering area from the rest of the bathroom space
- You can add luxury features like an alcove or a shower bench or niches in a curbed shower much easier than you can in an open space showering area
Cons
- A shower curb can be dangerous for those with mobility issues or older people. The possibility of slipping over a shower curb is quite high if you do not have a good balance; such falls can be fatal as well.
- A shower curb reduces functionality and makes it difficult to get in and out of showers.
- Curbed showers are difficult to clean. You have to expend extra effort cleaning and wiping the curbs and the inside of the showering floor, as opposed to on an open space bathroom floor.
- Shower curbs look quite old-fashioned and take away from the appeal of the bathroom. These days, there are many stylish curbless shower pans in vogue that provide all the water-retention features of a shower curb.
Do You Need to Hire Tile Installers?
Get free, zero-commitment quotes from pro contractors near you.
Related Questions
Can I Tile My Shower Myself?
Tiling your shower by yourself can be very tough, especially if you are a beginner, and you do not have anybody to assist you. If you can keep the shower pan in place, it is relatively easy.However, if you plan to build a shower pan from scratch, it can be a tough and time-consuming job. You can even use a ready-made fiberglass shower pan. Learn how to keep your textured fiberglass tub and pan clean.
Should You Waterproof Your Shower Walls Before Tiling?
Many people have this misconception that ceramic tiles and grout are waterproof. Let us clarify that by themselves, tiles and grout are not waterproof.Water can seep through the cement grout and into the tile substrate. To keep your tiles from getting damaged, first attach a waterproof membrane under the tile mortar. Apply it as close to the tile surface as it can get.
What Is The Best Material For My Shower Walls?
Acrylic is the most suitable material for shower walls. It is the safest, the easiest to install, most cost-efficient, and does not require high maintenance. It doesn’t take much time to install, meaning you can get your shower ready in two days. It is also highly durable and will last you a long time.
Ian Haynes is a digital marketing specialist and has successfully written hundreds of home improvement guides. Outside of his work, Ian likes fixing old bikes and exploring Brooklyn with his Labrador.
More by Ian Haynes