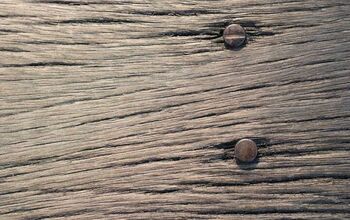
How To Remove Sunken Nails From Wood (3 Ways To Do It!)
Numerous home improvement projects involve working with a hammer and nails. They are among the most ubiquitous tools across worksites and learning how to use them properly is essential.
Removing nails properly is a particular skill you should develop. It will be helpful in situations where you used the wrong-sized nails or if you want to reuse an old item.
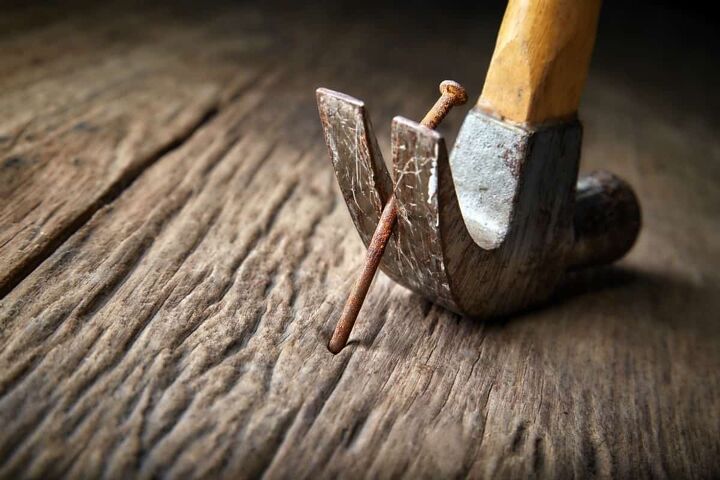
The simplest way to remove a nail from a piece of wood involves using the claw end of the hammer. Stick the claw end of the hammer under the nail head and place a block under the hammer’s handle. Continue moving the hammer from side to side and leverage the object underneath the handle to increase your pulling power.
There are different ways to tackle the problem of old nails stuck in a piece of wood. Find out more about those different methods in this article.
Do You Need Handyman Services?
Get free, zero-commitment quotes from pro contractors near you.

What Can You Do to Prep the Wood for Nail Removal?
Before you work on removing the nail, you can prep the wooden surface for the process.
Take some cloth or an old sponge and cut off a small piece. Soak that piece of cloth or sponge in some water and then place that over the nail. Leave that wet cloth or sponge to soak into the wood for at least an hour. That should help soften up the wood and make it easier for you to extract the nail.
The water could have an effect on the wood finish though. You may want to skip this preparatory step if you want to avoid altering the appearance of the wood.
How to Remove Nails from a Wooden Surface
We’re going to detail a few different ways of removing nails from wood in this article. To start, let’s talk about the simplest method of nail removal.
Step 1: Prepare Your Tools
For a job such as this, you only need to prepare two different tools. First, you obviously need a hammer. Any standard hammer with a claw on one end will suffice.
The other tool you’ll need is a block. The block can be made out of any material as long as it can be utilized as a lever. In addition to helping you pull the nails out better, the block will also protect the finish on the wood.
Step 2: Get the Hammer and Block into Their Proper Positions
Take the claw end of the hammer and squeeze it under the head of the nail you want to remove. Pull it up just a bit if you need to secure the claw’s positioning better.
Now that you know where you’ll be pulling from, slide the block under the spot where the hammer handle is. Try pulling on the hammer a few times to see if the block is working correctly as a lever.
Step 3: Begin Pulling Out the Nail
With everything in the right spot, you can now start pulling on the nail. Move the hammer from side to side in order to loosen up the nail. Remember to lean on the lever you’ve made to pry out the nail faster.
Don’t pull on the nail too forcefully or else you could deal significant damage to the wooden surface. Rely on the lever and the momentum to pull out the nail instead.
If you’re seeing that some parts of the wooden surface are getting scratched up, consider covering them up with some plywood.
How to Remove Nails from a Wooden Surface Using a Cat’s Paw Pry Bar
Some nails may not give way to just a hammer and a lever. If they’re buried deep into the wooden surface, you’ll probably need a stronger tool.
Step 1: Get Your Hands on a Hammer and Cat’s Paw Pry Bar
Once again, you’ll need two tools to get the job done, but you’re swapping out the block for a pry bar. Before we proceed any further though, you should know that a cat’s paw pry bar will damage the wooden surface.
If you’re looking to preserve the quality of the wooden surface, this pry bar is not for you. It will inevitably dig into the wooden surface as it works and cause permanent damage.
On the other hand, pry bars are great for removing bent and galvanized nails. You probably won’t be able to take those out just by using a hammer.
Step 2: Put the Pry Bar in the Right Position
Take your cat’s paw pry bar and place its pointed ends close to the nail you want to remove. Pick up the hammer next and use that to force the pry bar into the wood.
Direct your blows in such a way that the claws of the bar catch the nail. Make sure that the claws have a firm grip on the nail.
Step 3: Pull Out the Nails with the Pry Bar
There’s no special technique you need to use here. Simply grab the pry bar, pull on it, and hope the nail comes out eventually.
How to Remove Headless Nails from a Wooden Surface
Standard nails can be removed by targeting their heads, but what should you do if you’re dealing with headless nails? The approaches and tools mentioned earlier won’t be of much help anymore. You’ll have to employ a different strategy.
Step 1: Find Some Pliers
Since there’s little to no area to grab, the claws on hammers and pry bars are no good on headless nails. You’ll need something smaller that can still maintain a strong grip. Pliers are the tools you’ll need in this scenario.
To be more specific, you’ll want to grab both a pair of needle-nose pliers and diagonal-cutting pliers.
Step 2: Grab Hold of the Nail Using the Needle-Nose Pliers
Position the needle-nose pliers as close as you can to the nail by digging out some of the surrounding wood. Only dig out as much wood as you need to in order to create an opening. After creating that opening, grab the upper tip of the nail with the pliers.
Step 3: Raise the Nail above the Wooden Surface
You can now start pulling the headless nail out of its original position. Use the pliers to pull straight up on the nail. Slightly moving the nail from side to side may also help loosen its grip.
Continue pulling on the nail until a segment of it is above the wooden surface.
Step 4: Use the Diagonal-Cutting Pliers to Remove the Nail
Now that the headless nail has been exposed, you can switch to using the diagonal-cutting pliers. Don’t grab on to the nail too forcefully or else you might end up cutting it. Just grab on to it in such a way that the pliers can move it around.
At this point, you can repeat the same motions you were making with the needle-nosed pliers earlier. Move the nail from side to side, and pull it out from above slowly. Throughout this time, remember to moderate the force you’re applying to avoid cutting the nail.
Once most of the nail has been extracted from the wood, you can just grab it and pull it out.
Do You Need Handyman Services?
Get free, zero-commitment quotes from pro contractors near you.
Related Questions
What Are Other Tools That Can Be Used to Remove Nails?
Removing nails from wood is possible even if you don’t have hammers or pliers available. The tool you’ll use instead is a reciprocating saw.Reciprocating saws are great because they allow you to cut with precision and power. Their blades allow you to get close to the nail while their power makes it possible to cut through the metal.It’s not a good idea to use a reciprocating saw to cut out nails if you’re not familiar with them, however. If you don’t know how to use the saw properly, you can do irreparable damage to the wooden surface.To make cutting through the nails easier, look for the reciprocating saws with 10-teeth-per-inch blades. They are the ones that excel at cutting through nails.
Should You Use a Nail Puller?
The nail puller is a specialized tool tasked with the specific job of removing stubborn nails from wooden objects. According to Wonkee Donkee Tools, the traditional nail pullers feature hinged jaws that can be plunged into the wood. You can bury those jaws into the wood using just the tool itself or by enlisting the help of a hammer.So, should you consider using a nail puller? The truth is that nail pullers aren’t any better at removing nails than hammers, pry bars, and pliers.You also cannot guarantee that the wood will be free of damage even if you use a nail puller. If you already have a hammer or a pry bar at home, there’s no need to get a nail puller.
How Do You Fill in the Nail Holes?
Even though the nail holes are quite small, they can still affect the appearance of the wooden surface. Consider filling them in using some spackle.Use a putty knife to get a small amount of spackle and press it into the nail hole. Smooth out the spackle and allow that to dry for a couple of hours. Once the spackle is dry, sand it down and paint over it so it matches the rest of the surface.
Related Guides

We are a team of passionate homeowners, home improvement pros, and DIY enthusiasts who enjoy sharing home improvement, housekeeping, decorating, and more with other homeowners! Whether you're looking for a step-by-step guide on fixing an appliance or the cost of installing a fence, we've here to help.
More by Upgraded Home Team