How To Remove Channels From Roku (Step-by-Step Guide)
When you stop and think about it, technology is pretty great. A recently as a decade ago, we all had to use traditional cable methods. Now, we can not only watch live television without the need for a cable hookup but can stream on-demand movies, shows, and even sporting events as well.
Press the “Home” button, scroll through the apps with the arrows on your remote, and press * over the app you want to delete. Cycle through the options and choose “Remove” and “Confirm” to delete an app on your Roku. Repeat the process for each app that you want to remove and uninstall.
A Quick Note About Channel Subscriptions
There is one thing to know before you go deleting channels from your Roku account or device. When it comes to subscriptions, simply deleting the channel will not cancel that subscription. Far too often, users delete a channel with a subscription attached and still wind up paying for it because they forgot to unsubscribe.
You will need to cancel the associated subscription first before deleting the channel. Depending on what the subscription is, you may be able to do this through the Roku channel or through the app’s website. Check the app first to see if you have an outstanding subscription.
Step 1: Remove Through the Channel Lineup
The quickest and easiest way to remove a channel is to do so through the channel lineup on your Roku device. The home screen will look a little different depending on what your Roku device is, so it may take some acclimating to become familiar.
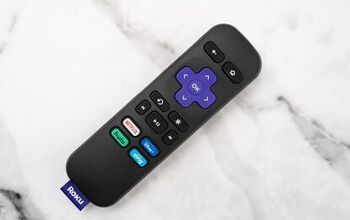
- Go to the home screen. Start at the home screen and find the channel that you want to remove. When you press the star button on the remote, it should open the details of that specific channel.
- Remove channel. When you find the menu for that specific channel, there should be a “remove channel” option listed. Scroll down to it and then press the OK button on your remote.
- Confirm. Finally, you will need to confirm your choice to remove that channel. Do so by highlighting “remove” and then pressing the OK button on your remote.
The channel should then be removed completely from your channel list and your home screen that displays all of your featured channels.
Step 2: Remove Through the Roku Channel Store
If you don’t want to remove it through your channel lineup or don’t know how, there are a couple of other options. You can also remove channels through the Roku Channel Store, which displays all of the channels available to you as well as those you have downloaded.
- Find Streaming Channels. Starting with your menu on the left, scroll until you find the “Streaming Channels” icon. When you have located and selected it, press the OK button on your remote to open up the Channel Store.
- Look for the channel. Within the Streaming Channels list, you will need to find the specific channel in question. It may take a bit of scrolling, but when you find it you can highlight it and press OK in order to open the channel details.
- Remove. Now that you have selected the proper channel, you can select the “remove channel” option from the list. You’ll be prompted by some on-screen dialogue; simply confirm the choice to remove the channel completely.
A quick tip. When using the Streaming Channels option, there is a simple way to designate which channels are installed. You will notice a little checkmark on the bottom right corner of that specific channel tile if it has already been installed.
Video: Here’s How to Remove Channels
Step 3: Use the Roku App
In addition to the methods mentioned above, you can access your Roku channel list through the app. The app is available through both Android and iOS devices for easy accessibility. If you don’t already have it installed on your device, go ahead and do so.
- Launch the app. When you’ve installed the Roku app, locate it and launch to get started.
- Channels menu. At the very bottom of the screen, you will see the “Channels” menu. It is second from the left.
- My channels. After locating and tapping the “Channels” menu, it will open up a new screen. At the top, you will notice “my channels” and “channel store”. Click on the former and it should bring up tiles of the channels that you have installed.
- Press and hold. Locate the channel that you want to remove. Press and hold on the icon to open up the details for that channel. Keep in mind that if you simply tap the icon, it’ll start that channel and then open up the Roku remote within the app.
- Remove. In the channel details screen, you should see a “remove” option. Like the other options, you’ll be prompted to confirm your selection. Confirm and the channel will be removed.
How Do I Hide Channels on Roku?
Maybe you don’t want to entirely remove a channel but find that it is becoming bothersome. So, the best course of action is to hide that channel until you either remove it entirely or want to use it again.
In order to hide items – either news or the Movie/TV store – you will need to access your Roku’s settings menu. From there, select “home screen”. You will notice the “hide” option appear for the news feed and/or the Movie/TV store. The good thing about hiding a feature or channel is that you can always choose to make them visible once again.
How to Add Favorite Channels to Roku
One of the best things about Roku devices is that you can create your own streaming channel section with all of your favorites. No need to have to scroll past the same channels you’ll never watch again. Simply put all of your favorites in one easily accessible spot.
Users now have the ability to curate their own list of favorites. In previous incarnations, Roku would make a list of the most-watched channels you had, which could take some time. Adding favorites to your home screen is thankfully a lot easier than before.
- Launch Roku. To start, launch your Roku device and then navigate to the “view all channels” list; this will show you everything that you currently have installed on the device. Select “guide” at the top for the entire list.
- Find the channels you want. With access to the entire list of channels, you will now need to find the first channel that you want to add to the favorites. When you find it, press OK on your remote to bring up the options panel.
- Favorite channel. With the options list open for that particular channel, you can scroll down to find “favorite channel” and press OK on the remote. Just like that, the channel should be added to the favorites list that comprises your home channel list.
What if There is No “Favorite Channel” Option?
From time to time, you may notice that there is no “favorite channel” option showing up for a certain channel. The most likely explanation is that the “favorite channel” functionality has been disabled on your specific Roku device.
When this is the case, you will need to turn that functionality back on to enable the “favorite channel” feature once again.
Enabling the “Favorite Channel” Option
Thankfully, it is quite easy to enable the “favorite channel” function again. Follow this quick guide and you’ll be able to select your favorite channels once again in short order.
- Open the settings. Start by looking for and selecting your settings option within the Roku device. You can generally find this through the home screen.
- Inputs. Next, select “TV inputs” and find the input where you are currently using your Roku device. This may be slightly different if you have a Roku TV, so you can skip ahead to the next options.
- Settings. No matter how you get there, you will now be able to check the available settings for your Roku. You can then select “favorite channels” from there.
- Enable. When you click on the “favorite channels”, you should see a box next to text reading “enable favorite channels”. Select OK to check the box and you should now be able to select your favorite channels.
For older devices. If you have an older Roku device, you may have to restart the device before those changes are applied. When in doubt, restart your device and look to see if the changes have taken hold. If they haven’t, there could be something defective with your device.
How Much is Roku Streaming TV?
For starters, a Roku streaming player is $29.99. If you don’t have a Roku television, you’ll need to purchase a streaming player first. From there, you can use a variety of available channels depending on their price.
Many Roku channels are free to use though others require a monthly fee. Check with that channel’s website or information to find out the monthly subscription fee before signing up for it.
Related Questions
Do Roku channels cost money?
It does not cost money to install channels and apps on your Roku. You have to pay for subscriptions to streaming services that you can download on Roku, such as Netflix and Hulu. However, there is no additional cost to install apps on your Roku.
How long do Rokus last?
You can expect your Roku stick to last for 4 years, on average. They can last longer, but continual use, damage, and dust can make them go bad in as little as 3 years or less. A Roku TV can last for an average of 7 years.
Related Guides

Ryan Womeldorf has more than a decade of experience writing. He loves to blog about construction, plumbing, and other home topics. Ryan also loves hockey and a lifelong Buffalo sports fan.
More by Ryan Womeldorf