


How To Remove A Pop Socket (Reuse and Swap Tops Too)
Smartphones have been a unique and impactful innovation in their own right. But an underrated money-maker is all the accessories that can be applied to those smartphones. Cases in particular have been a huge money-maker.
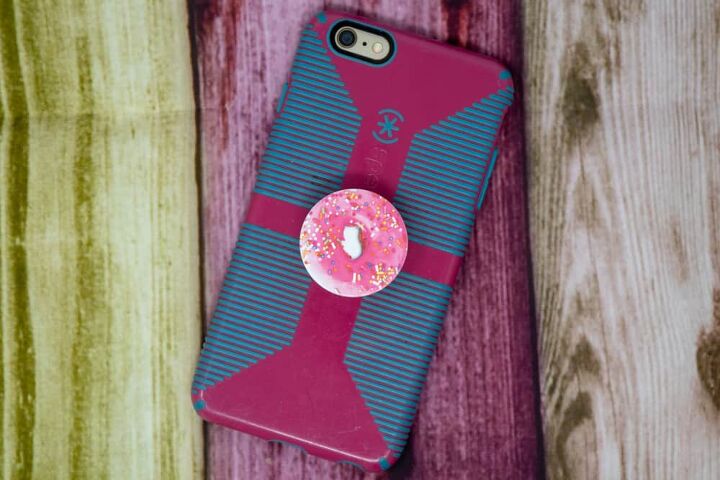
Pop sockets are a hot trend right now and can be used for a variety of things. But what happens when you tire of a current design and want to replace it with another? Removing a pop socket is very simple and can generally be done by hand. In worst-case scenarios, you can use a sharp edge to help pry it loose for cleaning or replacement.
Video: How to Do It
Removing a Pop Socket (Step by Step Directions)
Step 1: Push in the Pop Socket
Before doing anything else, make sure that the pop socket is no longer expanded. Gently push in to completely retract. If it sticks during the pushing process, try to gently wiggle the pop socket a bit before attempting to push it in again.
It is imperative that you do not try to remove a pop socket from your smartphone while it is still fully expanded. Trying to detach while expanded could lead to a potential detachment from the base of the pop socket, ruining it entirely.
Step 2: Use Your Fingernails
With the pop socket fully retracted, we can now move on to the removal process. In most cases, your fingernails should be enough to get the job done as the adhesive on the pop socket isn’t all that strong.
Push your fingernails up against the sides of the base and push until you can feel them starting to slide underneath. You won’t have to push your fingernails underneath very far, just far enough until you can grasp onto the pop socket base. If you don’t notice the base peeling up already, a gentle but firm pull should remove it.
Step 3: Pull Gently
The “gently” cannot be emphasized enough. If the pop socket feels like it is stuck on there pretty well, don’t just torque on it. You could break the base of the pop socket off, ruining it permanently. Start the pulling process gently; you should feel the base starting to come up.
You can also try peeling the base of the pop socket. Start at one side of the base and pull in the direction of the other end. Again, pop socket adhesives aren’t particularly strong, so it shouldn’t take a ton of effort to remove the base.
How Do You Clean a Pop Socket for Future Use?
In some instances, removing the pop socket is done simply for the purposes of cleaning the base and then reapplying it. When that is the case, follow the aforementioned steps for removing the pop socket base from your device.
- Run the base under cold water. It is important that you only do this for a couple of seconds at most. Leaving it under the water for too long could not only make it take longer to dry but can damage the stickiness of the base. We are cleaning here because we want it to re-stick effectively.
- Let it dry. After quickly cleaning the pop socket base, leave it out to dry in the open air. Use a cloth or paper towel placing the sticky side face up. It is important that you don’t let it sit out for more than 15 minutes as that can compromise the stickiness of the base. If it hasn’t dried after 10 minutes, give it a gently wipe with a paper towel.
- Reapply the pop socket. When you are content that the pop socket is dry, stick it to your smartphone or any other flat surface. Pop sockets don’t do well on silicone or leather surfaces, nor do they work well with waterproof surfaces. Windows, mirrors, tablets, and smartphones are the best uses of a pop socket, so keep that in mind.
- Let it sit. Give your pop socket an hour before attempting to expand or close it. This will allow the base to properly adhere.
How Do You Swap Out Pop Socket Tops?
Perhaps you are looking to simply make a swap and not remove the base of your pop socket, only the top. This can be slightly easier than having to remove the base, though it does take a little bit of care and effort to properly implement.
- Close the pop socket. The first thing to do is to close the pop socket so that it is flat. Remember, trying to disconnect when it is fully extended can lead to damage of the top half or even breaking entirely.
- Turn 90 degrees. With the pop socket closed, press down on it and give it a 90-degree twist. The pop socket should pop off easily.
- Swap in a new one. With the old pop socket detached, it is now simply a matter of popping in a new one. You can get creative and swap in seasonal or holiday designs, too.
Can You Replace the Adhesive on a Pop Socket?
From time to time, the adhesive on the base of the pop socket can become dirty or otherwise worn. When that happens, it may not stick effectively and may require replacement or for you to purchase a new pop socket entirely.
Replacing the adhesive surface of the pop socket is relatively easy, though it does take a little bit of care and patience.
- Remove the old adhesive. These are generally 3M adhesives and can be removed fairly easily. Make certain that you get every last bit of adhesive to ensure that the rest of the process goes smoothly.
- Clean the base. Using an alcohol pad, clean the surface of the base until it is completely dry. If you notice any leftover adhesive, remove it and then wipe down using the alcohol wipe again.
- Stick the new adhesive. Peel off the covering on the new adhesive and then carefully stick it to the clean surface of the base. Take your time to ensure that it lines up and provides proper coverage.
- Press down. Press firmly on the base of the pop socket for 12 seconds or so. This will provide a better adhesion to the surface that you intend to stick to.
- Wait. Allow for the base to sit for 24 hours before expanding it. This waiting period will give the new adhesive the time that it needs to adhere properly.
Why Does My New Pop Socket Keep Falling Off?
There may come a time where you purchase a brand-new pop socket only for it to fall off as soon as you try to adhere it. While this does not happen often, the most typical culprit is that the sticky gel has become dirty.
You can quickly and gently rinse off the sticky gel, just be careful to not overdo it as it can compromise the sticking power. Allow it time to air dry but no more than 15 minutes. If, after cleaning, your pop socket still won’t adhere, the sticking power may have been compromised.
Can You Stick a Pop Socket to a Silicone Case?
The grip gel that comes on the pop socket base is designed to be able to adhere to just about any surface. It will not, however, stick to things like silicone, soft phone cases, or any highly textured cases, so keep that in mind before purchasing.
If you don’t intend on swapping out the pop socket or using the case again, you can always superglue the pop socket into place. Superglue will adhere to just about any surface and do so in a way that is not meant to be removed.
Can You Stick a Pop Socket to an OtterBox Case?
There are heavy-duty phone cases out there known as OtterBox cases. These are meant to hold up to just about any regular wear and tear that phone owners may cause to their phones. The downside, at least when it comes to using pop sockets, is that the outer portion of OtterBox cases are made from silicone.
But there is good news. In newer incarnations of the OtterBox, there are pop sockets built into the case. Even better, they are swappable so that you can get any design or aesthetic that you choose.
Can You Fix a Broken Pop Socket?
From time to time, your pop socket may break in some way. Don’t fear, though. You can generally fix broken pop sockets with relative ease. There are a few different ways to do so and it depends on how your pop socket has broken.
- Broken cap. The cap is the piece that sits on top of the base. There are several tabs/slots that lead to the detachment of the cap. When the cap has become damaged, you can simply pop the cap off and replace it with another if you so choose.
- Loose Funnel. The funnel is the tube that connects the cap of the pop socket to the base. Sometimes, it can come loose and simply needs to be tightened. Take the cap off and test the funnel, rotating it gently. When it locks into place, you will hear a clicking sound.
- Loose base. When the base is loose, it simply means that the adhesive is dirty. Rinse it off using the steps outlined above and replace the base.
Related Guides

Ryan Womeldorf has more than a decade of experience writing. He loves to blog about construction, plumbing, and other home topics. Ryan also loves hockey and a lifelong Buffalo sports fan.
More by Ryan Womeldorf


![The 10 Best Table Saws - [2022 Reviews & Buyer's Guide]](https://cdn-fastly.upgradedhome.com/media/2023/07/31/9070645/the-10-best-table-saws-2022-reviews-buyer-s-guide.jpg?size=350x220)

![Finishing Basement Without Permit [Is It Really Illegal?]](https://cdn-fastly.upgradedhome.com/media/2023/07/31/9070078/finishing-basement-without-permit-is-it-really-illegal.jpg?size=350x220)


![Cost To Drill A Well [Pricing Per Foot & Cost By State]](https://cdn-fastly.upgradedhome.com/media/2023/07/31/9074980/cost-to-drill-a-well-pricing-per-foot-cost-by-state.jpg?size=350x220)


![Standard Dining Room Table Dimensions [for 4, 6, 8, 10 and 12 People]](https://cdn-fastly.upgradedhome.com/media/2023/07/31/9074335/standard-dining-room-table-dimensions-for-4-6-8-10-and-12-people.jpg?size=350x220)


