


How To Organize Under The Kitchen Sink
Does the cabinet under your kitchen sink make you cringe whenever you open it? Is it crammed with random food containers, dish towels, and cleaning supplies? It can be challenging to organize under the kitchen sink, thanks to obstacles like pipes and your garbage disposal.
Take everything out of the cabinet under the sink and toss things you don’t need. Avoid storing chemicals, harsh cleaning supplies, and other potentially dangerous items beneath the sink. Use special organizers designed to work around plumbing and maximize your vertical space. Utilize the inside of the cabinet doors as extra storage, and consider adding some lighting.
Cleaning out below the kitchen sink and organizing things is a worthwhile project you can complete in about an hour. You’ll find items faster, it will look better, and you won’t worry about children or pets getting a hold of something dangerous. Follow these handy tips for reimaging the area under the kitchen sink and turning it into an organized space.
1. Clean Out Under The Sink
Start with a clean slate. Take everything out from under the kitchen sink and wipe down the bottom of the cabinet and any shelves. Look through the items and toss anything broken, including rogue food container lids with no matching bottoms.
Think about what you need to keep on hand under the sink. Examples include spare dish towels, paper towels, dish soap, etc. You might also keep storage bags, aluminum foil, and similar items here.
2. Measure And Line The Cabinet And Shelves
Measure the bottom of your cabinet and any shelving, and use shelf liner to cover these areas. It gives your cabinet a nice look and makes everything feel fresher. The liner also protects your cabinet from potential damage (for example, if your dish soap springs a leak).
3. Maximize Vertical Space
The space under your kitchen sink doesn’t typically have much room, so maximizing your vertical space is essential. Choose storage options that make this possible, like clear stacking drawers or stackable, slide-out baskets.
Don’t forget about the side walls of the cabinet. Install basic cup hooks to hang a scrubber brush, rag, and other essentials. Use your measurements from the previous step to ensure you choose storage solutions that fit your cabinet.
4. Use The Back and Inside Of Cabinet Doors
The back and inside of your cabinet doors are an excellent place to keep frequently used items within easy reach. It also provides you with extra storage space and helps keep things neat and polished.
There are numerous organizing solutions available for cabinet doors. Some install directly onto the door using screws, and others go over the door.
Try a double-sided organizer that fits over the top of the cabinet door. One side holds a paper towel roll, baking pans, or bottles, and the other keeps your dish towel ready. Organize pot lids with a clever rack that frees up the inside of your cabinet for other items.
On the other door, hang a shallow set of shelves for things like sponges, a spare dish rag, rubber gloves, and sink filters. Storing smaller items on the doors keeps them visible and less likely to get lost at the back of the cabinet.
5. Use Under-The-Sink Organizing Kits
Plumbing is one of the main challenges when organizing under the kitchen sink. Sometimes, it’s difficult to position various storage solutions because of the pipe arrangement. If this is the case for you, get a double-decker, sliding under-the-sink organizer.
These specially designed storage items work around pipes and offer flexibility to fit a variety of plumbing setups. Find one that includes separate panels that allow you to arrange the shelving exactly how you need it. Depending on your available space, you might be able to use this organizer along with other solutions.
6. Re-Purpose Other Items For Organizing Under The Kitchen Sink
Just because you’re organizing under the kitchen sink doesn’t mean you can only use storage solutions for that space. Often, organizational items used in other spaces are the perfect solution for your project.
For example, stow spare rolls of garbage bags or water bottles in a vertical wine bottle rack. Plate risers can work great to separate food storage containers. A pegboard system for tools works just as well on the back of a cabinet door for kitchen cleaning utensils.
The takeaway is to not force your under-the-sink organization to fit within preset storage ideas. It’s important to consider what you need to store, think outside the box, and create a space that works well for you.
7. Keep Items You Use Often Front and Center
The sign of a successful organizing project is that it stays that way and functions well. Therefore, as you decide what to store under your sink and how to store it, think about how often you use various items. The things you use the most should be front and center so you can quickly put your hands on them.
Likewise, keep the items you don’t access as often (dish soap refills or spare sponges) toward the back of the cabinet. To reach items in the back, use lazy Susans to bring things to the forefront with a quick spin. If storing bottles on lazy Susans, look for styles with raised sides to avoid toppling products.
8. Add Lighting
The area under your kitchen sink is usually relatively dark, making it hard to locate items at the back of the cabinet. Don’t worry; I’m not saying you should hire an electrician to install fancy lighting. Tons of battery-operated lighting options are available that can increase the functionality of your space.
It might seem like an extraneous step, but you’d be surprised what a difference a little light can make when you can’t find the soap refill. Instead of reaching for a flashlight or your phone, the light’s already there for you.
Look for LED lights that mount to the inside of the door or the side wall of the cabinet. You can install some with screws, or others feature adhesive strips. Some styles are motion-activated, going on whenever you open the cabinet door. Other models simply switch on as needed, or you use a remote to operate them.
9. Use A Tension Rod For Spray Bottles
If you store kitchen cleaning supplies below your sink, spray bottles can take up a lot of space. One way to maximize the vertical height in your cabinet is to place a tension rod across the space. Hang the sprayers over the rod to suspend the bottles and free up the cabinet’s surface area.
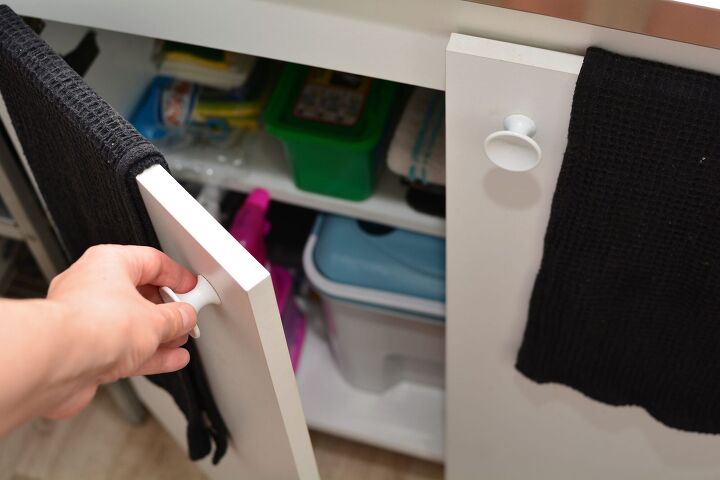
If you have young children in the home, keep child locks on your cabinet if storing cleaning products. Check out the next step for more information.
10. Don’t Store Certain Items Under The Kitchen Sink
If you have young children or pets in the home, you should avoid storing certain items under the sink. You don’t want things like drain cleaner, harsh chemicals, sharp objects, or toxic items within easy reach of young hands or furry friends.
Either find alternative storage space for these items or install safety locks on your cabinets. Even if you don’t have children or pets in the home, consider any visitors that come to your house. It’s always best to keep potentially dangerous items higher up or behind locked doors.
Everything Under The Kitchen Sink
Organizing your kitchen is one of the top ways to reduce stress and gain time and energy. If you’re ready to tackle the jumbled mess below your kitchen sink, remove everything from the cabinet to start fresh.
Decide what you want to keep beneath the sink, and choose storage items to maximize the vertical space. Under-the-sink organizers are great for working around bothersome plumbing obstacles.
Organize your items in a way that makes them easier to access. Keep things you use a lot toward the front and on the backs of the cabinet doors. It’s all about creating a space that works efficiently, looks tidy, and simplifies life.
Related Guides:

Stacy Randall is a wife, mother, and freelance writer from NOLA that has always had a love for DIY projects, home organization, and making spaces beautiful. Together with her husband, she has been spending the last several years lovingly renovating her grandparent's former home, making it their own and learning a lot about life along the way.
More by Stacy Randall


![Cost To Drill A Well [Pricing Per Foot & Cost By State]](https://cdn-fastly.upgradedhome.com/media/2023/07/31/9074980/cost-to-drill-a-well-pricing-per-foot-cost-by-state.jpg?size=350x220)