How To Keep Pressure Treated Wood From Warping

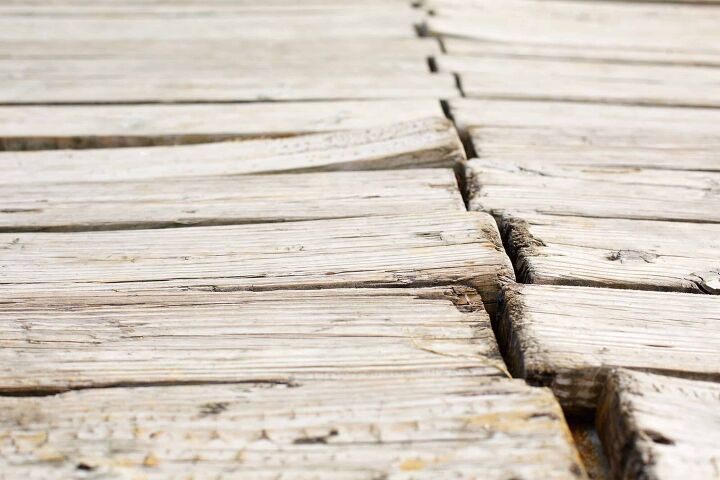
Without proper sealing, pressure-treated wood can warp out of shape. With proper sealing, pressure-treated wood can last you for years to come. So to preserve this rot-resistant wood and keep your deck beautiful, below are some tips on keeping your pressure-treated wood from warping.
To keep pressure-treated wood from warping you will need to apply a stain. The stain will protect against water so the wood will not expand. Before you stain, ensure the wood is dry. Place a couple of drops of water on the wood, if the wood absorbs the water, it’s ready to be stained.
Below, we are going to delve into some details behind keeping your wood from warping. We will also get into some additional information on keeping your wood high-quality.
Do You Need Exterior Home Paint or Stain Services?
Get free, zero-commitment quotes from pro contractors near you.

A Step-By-Step Process To Stain Your Wood And Prevent Warping
- Get your supplies
- Cover your wood
- Wait until the wood is dry
- Test the wood for moisture
- Apply a coat of pre-stain
- Apply an even coat of stain
- Finish the wood
Step One: Make Sure You Have The Right Supplies
The first step to any successful deck seal is ensuring you have the right supplies. Check out our suggested supplies below:
- Wood stain
- Unfinished deck
- Wood conditioner
- Brush
- Wood finish
- Rags
Step Two: Cover Your Wood
The first step in ensuring that your wood will be ready for staining will be covering it. Given that it can take several months for your wood to dry covering it with a tarp or awning is necessary.
When your deck gets water on it, the water will extend the several months drying processes. It will also cause the wood to expand and contract again, which will potentially cause significant warping.
Given that we can’t control the weather, it is pretty likely to rain over three months. As a result, protect your investment by putting it in a secure location.
Step Three: Wait Until The Wood Is Dry
Once the wood is dry, you can finally start the process of applying the stain. However, never assume that it is dry. You will need to run a moisture test beforehand. A moisture test is limited to spilling a couple of drops of water on your unfinished deck. If the wood absorbs the water, that means that the deck is dry enough to stain.
If the water droplets hang out on the surface of the wood, you are going to need to wait for another period to get it out. You can’t “squeeze” the water out of wood. It is always a matter of waiting.
Before you start staining, be sure that today’s conditions are dry enough for you to apply the stain. You cannot do this in the rain. Also, given that it is a deck, you can’t do it inside.
Step Four: Pre-Stain The Wood
Wood conditioner, also known as pre-stain, is the first coat of anything you need to place on your wood.
Using your rags, be sure that your wood is clean before applying pre-stain. You can take the time to test your pre-stain by applying it to a small portion of your wood. If the wood absorbs the pre-stain, you can move to the next step.
Wait up to twenty minutes for the pre-stain to dry. If there is any excess pre-stain, be sure to remove it with a rag. Leaving it on can cause unusual patterns in your deck, taking away from a good appearance.
Step Five: Apply Stain
Once you have covered the entire surface of the wood in pre-stain, you can move on to the actual stain. When pre-stain is applied correctly, it makes the actual stain easier to absorb for the wood.
You will want to brush in the direction of the grain, ensuring that you leave little residue. It would be best if you also worked in small sections to handle the work slowly. When applying stain, it is essential not to rush. It would be best if you focused on painting towards the grain consistently. Failure to follow this will result in unusual lines.
After you finish, wait as long as possible for your stain to dry. If you know tomorrow is dry, you may come back to complete this project tomorrow. Remove any excess stain before moving on to the last step.
Step Six: Finish Your Wood
The final coat in your process should be wood finish. It is an extra layer of protection for your wood. When you apply these three things, be sure that they all have the same base. Do not mix water-based stain with an oil-based finish.
Apply an even coat of wood finishing to the surface. Work slow and paint with the grain to ensure a precise finish.
Some people would state that you may not need three coats of stain. However, a more detailed approach leads to greater longevity in wood. While you can overkill when it comes to staining, three coats are a pretty healthy amount.
Do You Need Exterior Home Paint or Stain Services?
Get free, zero-commitment quotes from pro contractors near you.

Related Questions
Does Sealing Wood Prevent Warping?
When you seal your wood with the above process, it prevents any moisture from getting into it. Because of this, you should seal your wood follow the above or a similar approach.You will want to coat every inch of the wood with the stain. If you miss a spot, there is a high chance that the wood will warp.People commonly try and cut corners by not finishing the ends or the bottom. But the tips of wood tend to shrink faster than the rest of the board, which will cause them to warp at a much faster rate.
How To Straighten Warped Pressure-Treated Lumber
If you have already gone too far and the wood warps, the best solution you have is to apply more moisture. While that might seem counterintuitive, bringing the wood to that state allows you to get it back where it belongs.For extreme warping cases, you can combine moisture and pressure. You may have to force the wood to return back to its position physically. With decks, that can be incredibly difficult. You may try the heat of sunlight alongside physical pressure instead.
What Is The Fastest Way To Dry Pressure Treated Wood?
If your deck has yet to be assembled, you can potentially dry it in a large kiln oven. However, this is impossible if your deck is already together.In this case, you may want to use large heat lamps, but be careful with rushing your wood. Drying your wood too fast can be just as bad as allowing your wood to get wet. Excessive heat and moisture are both ways you can force warping.
What Type Of Wood Won’t Warp?
Redwood is a type of wood that has a chemical inside of it that protects against rot. They are also one of the straightest woods available, making them incredibly easy when following the grain.Redwood is not entirely moisture resistant. Even the most sturdy type of wood can warp under the right pressure. You should always avoid letting your wood get wet, regardless of the kind of wood.

I'm a guy who becomes the expert of whatever I stumble upon, writing-wise. I've written tons about cool home products, home improvement, and smart technology in the home. I'm also the proud father of a kiddo born on new years, making my holidays very busy.
More by Eli Smith





![How Much Weight Can a 4×4 Support Horizontally? [It Depends!]](https://cdn-fastly.upgradedhome.com/media/2023/07/31/9070333/how-much-weight-can-a-44-support-horizontally-it-depends.jpg?size=350x220)
