How To Insulate Walls Without Removing Drywall
Tearing apart your drywall to insulate your walls is nothing but a hassle. You have to move everything out of that room, and sometimes you will have to move your whole family out of the house. This costs lots of money and time. But is there a way around this? Can you insulate your walls without tearing down your drywall?
You can insulate your walls without tearing apart drywall by using spray foam. Check for studs, pipes, and wires beforehand, then drill the holes in your wall. Follow the spray foam instructions and spray it into your wall. Make sure you are wearing protective equipment and have proper ventilation!
If this whole process seems overwhelming, don’t worry! We will provide you with step-by-step instructions so that you can do this successfully!
How Can You Insulate Your Walls Without Tearing Out Drywall?
You may want to do the task yourself, whether your goal is to insulate your walls using cavity-fill insulation to lower your energy expenses or you simply want to insulate a room without removing the drywall from your walls.
Below, we have included the step-by-step instructions to ensure that you can do this without paying the high price of hiring a professional.
Step 1: Find Your Wall Studs
You need to locate the studs in your walls before you can start drilling holes and inserting spray foam insulation materials. To fill each part of your walls with insulation, you will need to drill holes among each pair of studs in subsequent steps.
Find wall studs that extend from the floor to the ceiling using a stud finder. Use a pencil or chalk to indicate the location of each wall stud. In most homes, wall studs are spaced 16 to 24 inches apart.
Look for horizontal “fire breaks” between the studs of the wall. You must inject insulation above and below any horizontal fire breaks; therefore, mark their locations.
Checking your sidewalls for horizontal studs that span the vertical studs is crucial. If you locate any of them, plainly note them with a pencil.
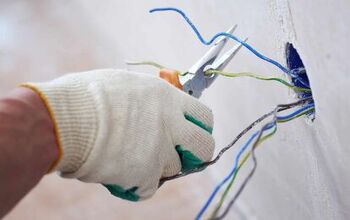
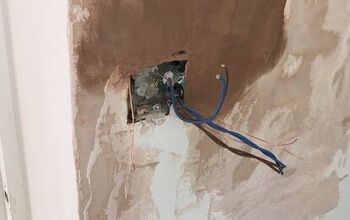
Step 2: Find Your Electrical Wires
It’s time to search for any plumbing pipes and live electric cables after you’ve located the wall studs.
Electrical wiring pathways must be located and marked. In this manner, drilling into wires is prevented, which could be dangerous.
Make use of a stud finder that can identify active electrical cables. To avoid drilling into live wires, locate and indicate the pathways of any wires in the sidewalls you wish to insulate.
Step 3: Look For Your Plumbing Pipes
In order to avoid piercing into a pipe that is filled with water later, scan the wall for plumbing lines.
You may use specialist instructions to discover these plumbing lines, especially if you have plastic water pipes.
Trace the route of any pipelines after using the stud finder tips to find them. By doing this, you can avoid digging into your plumbing and avoid having a damaged pipe flood your walls with water.
Step 4: Start Drilling The Holes
Once the studs, wires, and piping lines have been marked, you are prepared to drill the holes required to inject foam insulation into your walls.
This will require a 3-inch (75 mm) drill bit. Drill a hole in every stud in the wall. Make the hole 20 cm (8 inches) below the ceiling. Drill a single hole in the middle of each pair of wall studs.
Drill extra holes 8 inches under each horizontal fire break if your wall has them. Be careful not to drill into the plumbing or electrical wiring as you work.
This will enable you to insulate every area of your wall using foam. This stops air leaks and guarantees energy-efficient walls on the inside and outside.
Step 5: Prepare Your Space To Use The Spray Foam
Studying the operating instructions for your kit is crucial before you start insulating your walls. Here are some of the things you need to do before using the spray foam:
- Keep pets and people out of the space
- Open the windows for ventilation
- Turn off your heaters and air conditioners so the poisonous vapors don’t blow around.
- Wear goggles, breathing protection such as a mask, long sleeves, slacks, and work boots
- Avoid smoking
- Do not light any lighters or ignite any vapes
With regard to these recommendations, abide by all safety rules that are unique to your preferred insulating product.
Step 6: Apply The Spray Foam
Start off by placing the foam sprayer’s nozzle into the drywall’s hole. Lower the nozzle at an angle to stop the foam from shooting out of the hole all around the sprayer.
It is a great idea to partially seal the hole with a towel. Pull the trigger on the nozzle when you’re ready to start injecting insulating foam into your wall. Put a rag around the nozzle with the free hand to stop the foam from shooting back into the space.
Pull the sprayer’s trigger to spray foam between the wall studs. Withdraw the nozzle and continue to the next hole as soon as you encounter resistance as the foam fills the wall cavity.
As the foam grows inside the wall and fills the space between the studs, continue spraying filler into the wall until you encounter resistance.
Next, take the nozzle off, go on to the next hole, and repeat. The foam will quickly fill the area by expanding, but it will take it an hour to harden.
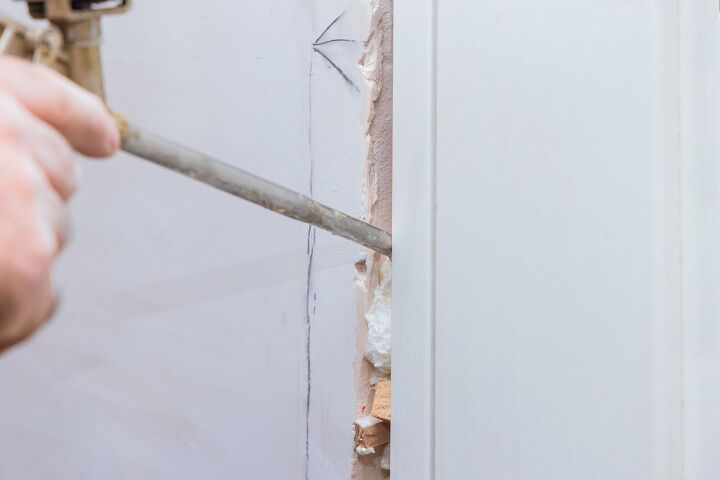
Step 7: Patch Your Drywall
After the foam insulation has dried, you can start patching the drywall holes you drilled. Use installation and repair mesh to ease the process of patching. As an alternative, you can buy a drywall repair kit made especially for patching holes with a diameter of 3-5 inches (7.5-13 cm).
Allow the insulating foam to cure completely for at least an hour. Utilize a drywall repair kit to fill up the holes that were drilled in your drywall. To create a smooth finish, apply seam sealer over the repair cloth.
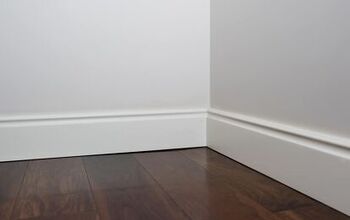
Step 8: Paint Your Interior Walls
Before repainting the wall, many coats of joint compound are necessary. Apply extra joint and finishing compound layers to smooth out drywall repairs. Patches of drywall should be entirely concealed by repainting the wall.
Can You Fill Your Walls With Expanding Foam Insulation?
You can insulate walls using cavity-fill foam insulation without taking down the drywall. You can hire a professional or perform the task yourself to pump foam insulation inside wall cavities without disturbing the drywall.
An increasingly common and effective insulating option is expanding foam. Incorporating foam insulation into buildings without removing the drywall is a specialty of some contractors.
You’ll be able to do the tasks required for this work if you’ve used an electric drill, stud finder, and other standard home renovation instruments.
Is Cavity-Fill Foam Insulation Good?
One of the most incredible types of insulation is closed-cell spray foam. Depending on its R-value — insulation is rated — it essentially gauges its ability to hold onto hot or cooled air.
The quality of the insulation improves with increasing R-value. The R-Value calculates how efficient an insulation system is. A particular type of insulation is more effective with a higher R-value.
Your energy expenditures may be reduced if you select cavity-fill insulating over other varieties. Expandable foam insulation is a fantastic option for homeowners because of its incredibly high R-value.
You can insulate walls without tearing up your drywall, and you’ll receive better insulation as a result. Your home will trap more cold air even during the hot summer months and more warm air throughout the winter.
Can You Insulate Walls Without Removing Drywall?
Using spray foam, you can insulate your walls without removing your drywall. You just need to take the time to follow the instructions in this article to ensure your property does not get damaged and no one gets hurt.
Spray foam, when released, has toxic fumes. You should ventilate the space and ensure you are wearing a mask, goggles, long sleeves, pants, and work boots.
Keep your family and young children out of the room you are working on. Furthermore, take care to make sure your pets don’t come in either, as this can be potentially fatal.

Heather is a passionate writer who loves anything DIY. Growing up, she learned everything from home repairs to design, and wants to share her tips with you. When she's not writing, she's usually hiking or searching for her next DIY project.
More by Heather Robbins