How To Clean Walls Without Removing Paint
It’s something we all have dreamed about; perfectly painted walls. Maybe even a gorgeous mural to really make the dining room stand out. But what do you do when it comes to washing them? Don’t worry! We will tell you how to clean them without removing any of the paint.
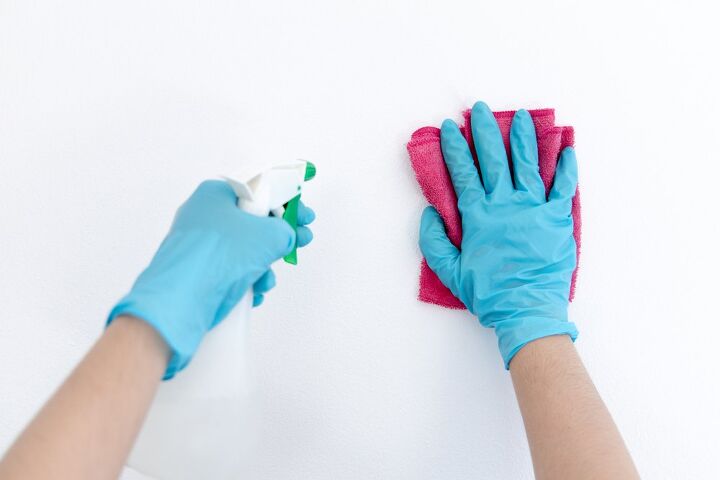
To clean your walls without moving paint, dust them first with a dry cloth. Then, using a clean sponge, wipe them down with your soap and water or distilled white vinegar and water. Next, blot your walls dry and ensure your wall is completely dry.
Below, we will describe how to clean your interior and exterior walls, no matter if it’s covered in latex paint, oil paint, or primary paint. This will let you know the best cleaning method for your walls! Let’s get started.
How Do You Clean Walls Without Removing Paint?
Cleaning walls is easy; however, doing so without removing and dulling down the paint is tricky! Below, we’ve included a step-by-step guide so that you can keep your walls in tip-top shape without ruining your paint job.
Step 1: Dust Your Walls
Washing a wall before even dusting it will become a huge problem. When dust is mixed with water, it adheres to the paintwork. If you would like your walls to appear brand new, this is something you want to avoid!
You don’t want to use any type of cloth, as microfiber is the best to do the job. You can also use a microfiber mop, however, make sure that the cloth is thoroughly dry. The fibers will catch onto the dust, allowing you to easily wipe it from your walls.
Once you’ve finished, gently clean the wall surfaces with a wet cloth. Here, you should try to be as precise as you can. It’s possible that there is dirt there that you’re unable to see.
After dusting, you should notice a difference in the way your wall shines. And, when able to wipe the dirt from your wall, it should look almost brand new!
Step 2: Create The Cleaning Mixture For Your Walls
Grab a bowl, and add some warm water and dish soap to it to get started. You shouldn’t use excessive amounts of the cleaning agent because you don’t want the mixture to get overly soapy.
Next, use roughly 1⁄2 a teaspoon to two quarts of water. Now, you can determine if the water is excessively bubbling. If that’s the case, dilute it with extra water. You want it semi-sudsy but not overflowing with bubbles.
Use a sponge that has no rough edges to wash the marks away on your walls. When you are cleaning, these could leave marks or even scratch the paintwork. Pick an excellent soft sponge instead, all the way across.
You will require a different basin with cold water in it. When you’re finished with the walls, you’ll use this to wash off any extra cleaning solution.
Step 3: Wash Your Walls
After getting the solution to the perfect soapiness, submerge the sponge in warm water and be sure to stir it around to fully soap up the cleaning solution. Firmly squeeze it to wring out any extra liquid.
If the paintwork is not waterproof and the sponge is excessively moist, this will cause your paint to deteriorate as you clean. Therefore, squeeze it firmly before you begin.
Work your way up the wall, starting at the base. Even while it would seem counterintuitive, that strategy might be the most straightforward. You won’t get any unsightly streak marks because any liquid will be caught when you move the sponge.
If you come across any hard spots, try to dab them away instead of scrubbing. The scrubbing action will cause the paint to begin lifting from your wall.
Step 3: Rinse The Wall
The last thing you want to do is over-soak painted walls with soap. That is a severe mistake.
In light of this, when you have thoroughly cleaned the area, rinse the sponge. Then take care to remove any extra liquid by squeezing it firmly.
You will want to wipe over the area you just cleaned, but do it with the sponge you just cleaned. Wipe carefully, using down strokes. Make sure you rinse your sponge with cold water every so often to keep the sponge as clean as possible.
Step 4: Dry
Using a clean, dry cloth, being dabbing your wall. Blotting the area is the final step in the cleaning procedure. You might discover that a cotton or even a microfiber cloth works best for the task.
When you are finished, make absolutely sure that the wall is completely dry. Leaving any damp spots on the wall can cause your paint to shift slowly and look warped from certain angles.
Common Mistakes To Avoid When Washing Painted Walls
Now that you are aware of the fundamentals of wall cleaning without damaging the paint let’s look at some mistakes to avoid doing.
There are lots of dumb errors you may make in this situation. Here are some things you should avoid before grabbing your cleaning supplies:
- Never leave water marks on your wall
- Do not scrub the walls
- Keep the sponge free of extra water at all times
- Make sure you do not use extra soap
- Do not use any cleaning agents that contain bleach
Gentle cleaning of the walls is meant to keep from damaging your paint. If you leave extra water on your wall, scrub it, use a dirty sponge, use too much soap or use bleach, you are sure to damage your wall.
How Do You Clean Interior Walls Coated In Latex Paint?
Wall cleaning mainly relies on whether the paint is oil-based or latex. Follow these instructions to safely clean interior walls painted with latex.
For this, you will only need sponges, dish soap, and also some white distilled vinegar placed in a bucket.
Step 1: Create the Mixture
Add three to four teaspoons of dish soap to a bucket that is just half full of water. You can also do this using white distilled vinegar or soap and vinegar. It depends on what you are trying to achieve.
It should not be overly sudsy as this can cause the paint to begin peeling away from the walls. If you choose to use the vinegar, this will ultimately help peel away any dirt.
Step 2: Clean The Walls
Soak your sponge in the mixture, and be sure to thoroughly wring it out. You don’t want lines of water dripping down your wall, especially if you are using vinegar, as this will eat away at the paint over time.
Ensure you clean your sponge after washing every two to three feet of space. If you wash your walls with a dirty sponge, this will cause a lot of discoloration.
Also, check that you are not using a soaking wet sponge near light switches, phone connections, or electrical outlets, as this can cause an electric shock.
You can turn the power off at the breaker to that room just to be sure you’re safe. However, you will need to wash the wall during the day or have adequate backup lighting.
You should never use chemicals on walls that are painted with latex-based paint. The chemicals are too harsh and will cause the paint to pull away from the wall.
Step 3: Dry The Walls
During the drying phase, you do not want to rub the latex, especially when it is wet. Simply dab the wall with a clean towel until it is mostly dry.
Then, plug in a box fan and point it at the wall. This will help dry the wall adequately and will help make sure there is no wetness left on the walls.
How Do You Clean Oil-Based Painted Interior Walls?
Because oil-based paints are a little more durable, you can safely use a moderate degreaser to remove grease in addition to vinegar and water or even mild detergents,.
Tools You Will Need:
- Bucket
- Water
- Dish soap
- Mild degreaser
- Distilled white vinegar
- Sponge
You will simply follow the instructions above for the walls painted with latex-based paint to clean these types of walls. Afterward, you will use the degreaser.
To safely use the degreaser to remove any grease or accumulation on the kitchen walls, refer to the directions on the degreaser’s container.
Never wash walls painted using oil-based paints with a Teflon pad, any harsh chemicals, or a scrubbing sponge. Basically, follow the same guiding principles.
How Do You Wash Exterior Walls That Are Painted?
Washing exterior walls is a bit different as you don’t need to be nearly as careful since exterior paint can withstand much more than interior.
Here are a few things that you will need:
- Water
- Garden hose
- Scrubbing brush with soft bristles
- Garden sprayer with a pump
- Bleach
- Jomax
- Pressure washer (optional)
Step 1: Mist Your Walls With The Cleaners
You will first need to use the hose and get your walls nice and wet. Then, lightly mist the walls with a solution of 1/2 cup Jomax, 1 cup bleach, and as much water as the container holds using a pumping garden sprayer.
After giving the mixture 15 minutes to work, scrub the area with a gentle brush. This will get rid of dirt, mold, and mildew.
Step 2: Rinse Your Walls
A garden hose might not extend high enough to thoroughly rinse the walls when cleansing a two-story home. A pressure washer may be used in that situation, but only if it has a 25-degree head and no pressure is applied.
If this did not clean your walls, you can soak them again for up to 30 minutes in the chemicals and try washing them off purely with a high-pressured pressure washer. This should knock any dirt loose so that your walls are nice and clean!

Heather is a passionate writer who loves anything DIY. Growing up, she learned everything from home repairs to design, and wants to share her tips with you. When she's not writing, she's usually hiking or searching for her next DIY project.
More by Heather Robbins