How To Install Slip Joint Washers In Plumbing (Quickly & Easily!)


Plumbing rough-ins, repairs, and installations can be intimidating even to experienced builder-owners. There is a lot that goes wrong if you don’t ensure a proper seal to prevent flooding with components like slip joint washers. With that said, how do you install slip joint washers to keep your PVC pipes from leaking water?
First, cut the length of the PVC pipe to the proper length that you need for your plumbing rough-in. Slide a slip nut up the tail end of the PVC pipe and make sure that it’s completely even. Now, connect the slip joint washer and slide the thick end up to the bottom of the slip, then slide the threaded fitting up the pipe, and tighten the washer with your fingers.
Turn your water supply off before you install slip joint washers and turn it back on to check it afterward. If your pipe continues to leak, remove, and reinstall the slip joint washers and tighten them even more. Follow along as we explore the steps you need to take to install slip joint washers.
Do You Need to Hire a Plumber?
Get free, zero-commitment quotes from pro contractors near you.

What Do Slip Joint Washers Do?
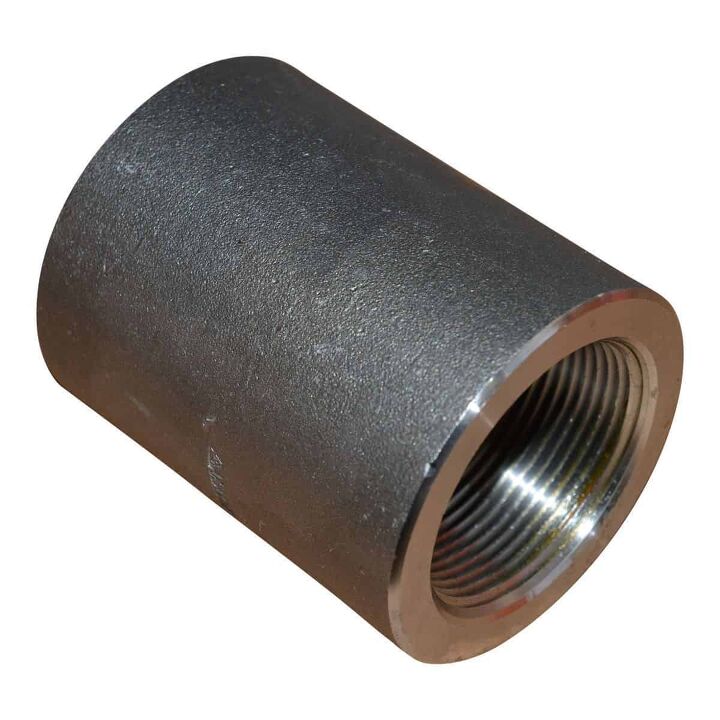
Slip joints and slip joint washers help prevent your pipes from leaking water when in use. They connect to a threaded fitting that forms a seal tight enough to stop water from spilling out where joints meet. The slip nut itself is usually made out of a metal, such as chrome, but sometimes they are made of PVC.
Either way, slip nuts connect to a washer that you can tighten by hand to ensure a strong connection. You attach a threaded fitting to the slip nut’s flared end, and it fits perfectly if they are the correct measurement. The washer is there to screw in over the threaded fitting so that water cannot escape the pipe when it runs.
It’s important that you always tighten slip nuts, slip joint washers, and threaded fittings completely during installation. Otherwise, you run the risk of water escaping through one or more of these components and creating a mess. Always shut the water off before you begin work on any sort of plumbing job around the house.
Slip Joint Washer Installation
It is easy to install slip joint washers if you follow the steps and take your time. The process is the same whether you’re installing a new pipe or replacing the slip joints on an existing pipe. However, you will have to cut a PVC pipe to the proper measurement if you are installing a brand new pipe in the basin or under your sink.
You can also purchase pre-cut lengths of PVC, just make sure that they’re the exact length that you need. This job is simple and only requires a few simple tools and items to complete, such as:
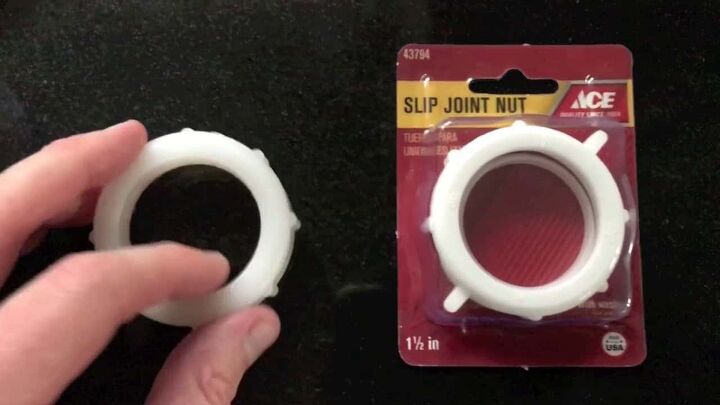
- Slip joint nut
- Slip joint washer
- Threaded fit
- PVC pipe
- Hacksaw
- Clean rag
The hacksaw is only necessary if you have to cut the PVC length to match your plumbing rough-in. Otherwise, you simply need to purchase the slip joint nut, slip joint washer, and threaded fitting for this project. All of these items will cost you less than $30, and it is a quick and easy installation that takes under an hour.
1. Cut the Pipe
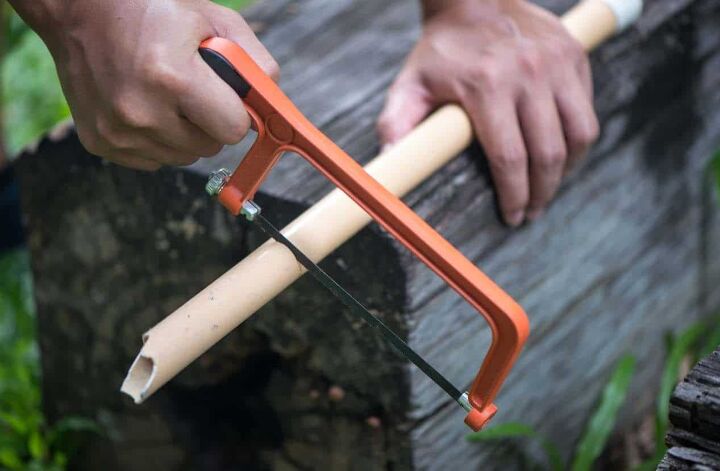
Look at the basin or area under the sink where you want to install the pipe. Measure the length of PVC to perfectly match the space where you plan to install it. You can use a hacksaw to cut the PVC pipe because they aren’t dense.
Carefully cut the PVC pipe and try to make your cut completely even so that it fits perfectly. Wipe the pipe down with a rag to clean any debris or PVC shavings that appear. You only need to perform this step if you haven’t already installed the PVC pipe, so don’t worry about it if so.
2. Attach Slip Nut
Now, you can attach the slip nut to the pipe with your hand and slide it up. Make sure that the slip nut is made of the same material as the pipe, such as PVC or chrome, for the proper fit. Be careful if you are replacing an old pipe with a new one as it can be messy.
Turn off the water if you are replacing an old pipe with a new one before you attach the slip nut. Make sure that you have a bucket in place to catch the water that may trickle from the fixture. Otherwise, simply make sure that you attach the slip nut on the tailpiece end of the pipe and slide it up carefully.
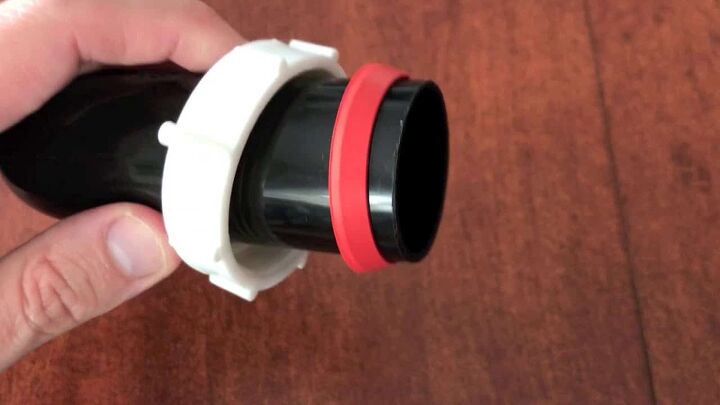
3. Slide Slip Joint Washer
You need to secure your slip nut in place so that it won’t slide down and make a loose connection. To do that, you must attach a slip-joint washer to the pipe and slide it up the same way. Position the slip joint washer so that the thick end of it is facing the bottom of the slip nut so that it stops it from moving.
Leave two inches of space between the end of the pipe and the slip joint washer because you’ll need it for the next step. Purchase a different size slip joint washer if it doesn’t match your pipe fitting because this component is crucial.
4. Connect Threaded Fitting
Now, it’s time to connect the threaded fitting to the slip joint washer and pipe. Position the threaded fitting so that the end with the threads is facing the flared end of the slip joint washer. Not all slip joint washers have an end with a flared surface, and that is perfectly fine.
If there is no flared end, you need to push the threaded fitting up to the thinner end of the slip joint washer. Push the threaded fitting towards the slip joint washer and pull the washer down into the threaded fitting. Pull the two pieces together so that you ensure a tight fit and seal that won’t come loose.
Now, carefully pull the slip joint nut down over the thick end of the washer so that it seals. Use your fingers to tighten the slip joint nut, washer, and threaded fitting until they are all tight.
5. Test the Connection
Turn the water back on once the slip joint nut, washer, and threaded fitting are all tight. Run the water to see if any water leaks from the pipe fittings. Quickly shut the water back off if you spot leaks in your pipe where you installed the slip joint washers.
In most cases, the water will still leak if you didn’t tighten the slip joint washers enough. Inspect the newly installed slip-joint washer to see if there is room to tighten them more. Otherwise, loosen the washer, then remove the threaded joint and slip the nut.
Attach the slip joint nut and washer again and try to get them closer together this time. Use more care when you attach the threaded fitting so that they perfectly fit this time. Tighten the threaded fitting, turn the water back on and check to see if it leaks water again.
Related Questions
Which way do slip joint washers go?
Slip joint washers go on the pipe so that their thick end is facing towards the slip nut. Otherwise, you won’t be able to tighten the washer properly to make a tight seal. This means that water can spill and leak out of the pipe unless you install them with the thick end of the washer facing the bottom of the slip nut.
How do you stop a slip joint from leaking?
You can stop a slip joint from leaking if you tighten up the nut, washer, and threaded fitting. Otherwise, you can apply a layer of pipe joint compound to strengthen the seal. Check the pipe, slip joint nut, and threaded fitting for signs of rust and corrosion to prevent leaks.
Do You Need to Hire a Plumber?
Get free, zero-commitment quotes from pro contractors near you.
What Did We Learn?
You need to cut a length of PVC with a hacksaw to match the rest of your pipes under the sink. Clean the PVC pipe with a dry rag afterward so that no debris gets in the way. Next, you need to slip a slip joint nut up the PVC pipe and make sure that it is even.
Slide the slip joint washer up the PVC pipe until it meets the slip joint nut at the top. Make sure that the thick end of the washer faces the bottom of the slip joint nut. Then, you need to slide the threaded fitting up the PVC pipe so that the threads face the flared end of the washer.
Pull the slip nut down into the washer and tighten the washer with your fingers. Push the threaded fitting into the flared end of the washer and tighten that as well. Turn your water supply back on and check to make sure that water doesn’t leak out of your slip-joint washer and threaded fitting.
More Related Guides
Nick Durante is a professional writer with a primary focus on home improvement. When he is not writing about home improvement or taking on projects around the house, he likes to read and create art. He is always looking towards the newest trends in home improvement.
More by Nick Durante