How To Install a B Vent Through A Roof (Do This!)

If you install a new room heater, water heater, or other gas-fired appliances, you will need to install a new vent pipe through the roof. Installing a b vent involves making penetrations through the ceiling, the rood decking, and the roofing material. A step-by-step guide on how to install b vent through a roof can make this a chore a homeowner can undertake.
Installing b vent through the roof involves several steps. Different manufacturers will have different methods and it is always best to follow the directions that come with your b vent. Local codes and ordinances may also bear on how the installation is performed. Check with your local building officials before starting any b vent installation.
Do You Need Ducts or Vents Installation or Replacement?
Get free, zero-commitment quotes from pro contractors near you.

Installing a B Vent
The steps to installing b vent are not complicated or difficult. However, since b vent carries hot combustion gases from your home, correct installation is a must. Failure to properly install the b vent can be a fire and health hazard for you and your family.
Step 1 – Read the Directions
Your b vent will include installation instructions. You must follow these exactly. Failing to install the b vent according to the manufacturer’s standards will void the b vent’s warranty. You could also endanger your home and your family.
Before you start is also a good time to check with your local building officials and inspectors. In some jurisdictions, the installation of b vent requires a licensed plumber or HVAC technician. At the very least, having a professionally trained inspector look over your work is a good idea.
Step 2 – Locate the B Vent Route
Plan the route the b vent will take from the appliance to the roof. Most manufacturers and building codes require that you locate the b vent roof opening as close to the appliance as possible. A straight vertical run is the best option. Avoid any bends or slants in the vent pipe.
If you must route the b vent around obstacles, follow the manufacturer’s recommendations on the types of connectors and the installation of any elbows or unions in the pipe.
Some manufacturers accept the use of special types of flexible vent pipe with their systems. Only use flexible pipe when the manufacturer specifies the type of flexible vent pipe to use.
Step 3 Check the Clearances
B vent safely carries hot exhaust gases outside and away from your home. Both building codes and manufacturers set minimum clearances for b vent pipe and combustible materials like the wood framing of your home. You must observe these clearance requirements for a safe installation.
Failure to maintain proper clearances can be a fire hazard. If your local jurisdiction requires that you have an inspection performed on a new vent pipe installation, the inspector will check the clearances.
Step 4 – Locate the Roof Opening
With everything located and all clearances checked, locate the point where you intend to make the roof opening. Mark the center of the hole and use a small drill bit to drill through the roof decking and the roofing material.
Step 5 – Up on the Roof Top
Go up on the roof and locate the hole you drilled in the roof. It may help to push a pencil or straw through the hole. You must remove the roofing material around the area of the roof penetration. You should remove enough roofing material to have at least one foot of visible decking on each side of the opening.
Step 6 – Open the Roof
With the roofing removed from your work area, mark the hole’s location and edges required for the b vent to exit the roof. You must make this hole the correct size to meet the clearance requirements.
Step 7 – Install the Support Bracket
Your b vent system should include a bracket that holds the b vent in place in the opening through the roof. This bracket should be adjustable to accommodate the slope on your roof to keep the b vent vertical.
Step 8 – Make the B Vent Connections
Time to go back to the attic and make all the b vent connections from your appliance to the roof penetration. Follow the manufacturer’s directions, especially if you must use elbows or flex pipe to route the vent around obstructions. We suggest that you use high-temperature aluminized vert tape to seal all the joints.
Step 8 – Install the Flashing
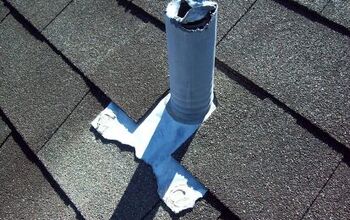
The b vent pipe kit should include a roof flashing that slips down over the vent pipe. This flashing may have a rain collar that fits around the top of the flashing to keep water from entering around the vent pipe. Replace the roofing materials so that the flashing lays over the roofing material below the vent pipe and decking above the vent pipe.
The roofing material will then lay on top of the flashing above the vent pipe. Use roofing cement or asphalt under the roof flashing and on top to seal the roofing material tightly to the vent pipe flashing.
Step 9 – Make the Vent the Right Height
Local ordinances or building codes may have specific heights for the b vent’s termination above the roof or the closest ridgeline. Consult with your local building officials to determine how tall your b vent pipe must be above your roof.
If there are no building codes or ordnance, follow the manufacturer’s recommendations in the installation guide.
Step 10 – Add the Weather Cap to the Vent Pipe
You should never leave a b vent pipe unterminated on your roof. Most b vent pipe kits come with a weather cap to finish your installation. The weather cap allows the free flow of combustion gases. This weather cap has a screen to prevent insects and bugs from entering the vent cap and setting up housekeeping.
Cautions We Have to Make
B vent systems remove the toxic and dangerous gases produced when hydrocarbon gas burns. The by-products of burning hydrocarbon gases are:
- Carbon dioxide
- Carbon monoxide
- Water vapor
- Heat
All of these can pose problems if the b vent doesn’t perform its job properly.
Carbon Dioxide
Carbon dioxide is a colorless, odorless, and potentially deadly gas that can enter your home if the b vent isn’t operating correctly. A buildup of carbon dioxide can induce headaches, dizziness, breathing problems, and, in extreme cases, asphyxia and convulsions.
Carbon Monoxide
Unlike carbon dioxide, which displaces the air in the room leading to asphyxiation, carbon monoxide displaces the oxygen in your bloodstream. A lack of oxygen in the bloodstream causes your heart to work harder as your body tries to get the oxygen it needs. Eventually, carbon monoxide poisoning will lead to unconsciousness and death.
Water Vapor
Water vapor is not a danger or problem for you or your family directly. The problem is water vapor remaining in your appliance instead of being vented properly outside. The water vapor causes rust in your appliance leading to premature failure.
Heat
B vent installed incorrectly and without the proper clearances can lead to fires. A hot vent pipe to close to unprotected materials can eventually decompose that material to the point of a fire. This action is called pyrolysis. The process of pyrolysis can lower the temperature that wood and other organic materials ignite.
Call A Professional When in Doubt
If you have any doubt or question about your ability to install a b vent in your home properly, call a professional. Plumbers and HVAC technicians are licensed and trained to make b vent installation. Incorrect installation of a b vent can be tragic. Don’t risk a tragedy to save a few dollars.
Do You Need Ducts or Vents Installation or Replacement?
Get free, zero-commitment quotes from pro contractors near you.

If You Decide to Continue
If you are comfortable installing a b vent through your roof, please follow the manufacturer’s directions closely. If possible, consult with the local building officials and ask them to follow up and inspect your work. The advice of a professional should always be welcome.
Remember that the steps we have outlined in this article are general in nature. The directions that came with your b vent kit may differ. You must always defer to the manufacturer’s instructions and requirements.
We hope that the guidelines in this article help you make the best decision possible about installing a b vent through the roof of your home.

Dennis is a retired firefighter with an extensive background in construction, home improvement, and remodeling. He worked in the trades part-time while serving as an active firefighter. On his retirement, he started a remodeling and home repair business, which he ran for several years.
More by Dennis Howard


