How To Hold Down A Canopy Tent On Concrete (Do This!)
Having an outdoor gathering is commonplace in the spring and summer. After all, there is nothing quite like enjoying food, friends, and family with the sun shining overhead. Even if there is no rain in the forecast, it still helps to have some kind of overhead covering.
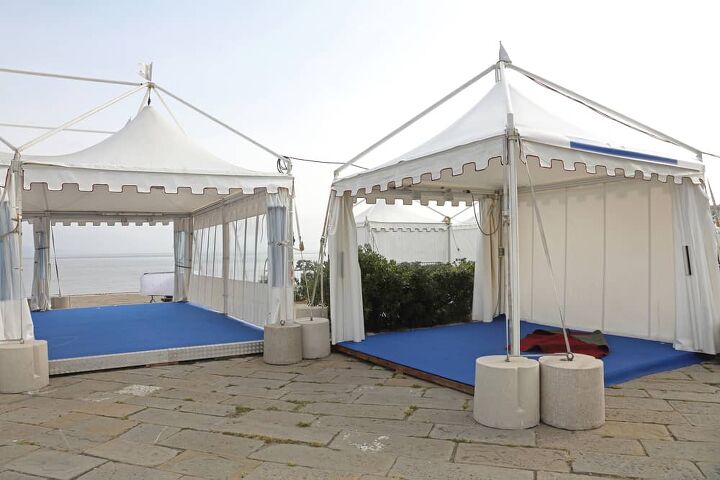
Canopy tents are a quick and easy way to provide that overhead covering. Since they are somewhat light, though, you have to secure them properly to keep them from blowing away. Thankfully, there are more than a few options. Canopy anchors and weights, cinder blocks, and even buckets filled with water or sand can get the job done.
Do You Need Handyman Services?
Get free, zero-commitment quotes from pro contractors near you.

Why Do I Need to Anchor My Canopy?
Canopies make for a straightforward, simple way to provide a covering for outdoor gatherings. Simply extend the legs and lock them into place. Before you know it, you have a bit of shade or even protection from a sudden rainstorm.
That said, they are lightweight can easily blow over if not properly secured. A good gust of wind can be enough to lift the canopy right off the ground, taking it several feet away at least. For that reason, you need to weigh the canopy down through one means or another.
The problem here is slightly different than when placing the canopy on grass. You can stake them down on the grass however concrete presents slightly different challenges. Here is how to hold your canopy tent down on concrete.
How to Hold Down a Canopy Tent on Concrete
Thankfully, there are more than a few methods that will work when securing your canopy tent. Some are quicker and easier than others, but you can find a method that will work regardless of your budget or DIY skill level.
Step 1: Tent Weight Bags
If you want a completely simple fix without having to get your engineering mind on, this is it. Tent weight bags are specifically manufactured for this purpose. They may require that you fill them with sand or water, but that is the extent of it.
Keep in mind that these can cost a bit more than a homemade solution. That said, you don’t have to worry about weight bags failing like a homemade solution would. Just check your tent’s weight requirement beforehand to see what kind of weight they need to have when full. Most of them either fit directly onto the legs of the canopy or attach using a rope or elastic cord.
Step 2: Cinder Blocks
Don’t feel like shelling out for the tent weight bags? There are plenty of DIY options available as well. For one, cinder blocks make for a cheap, effective tent weight. The average cinder block weighs about 28 pounds and can be quite useful for just this purpose.
Besides the cinder blocks, you will need some rope or bungee cord. Simply tie the rope to the block and then knot it at the top corner of the tent’s frame. If you do opt to tie to the leg, make sure that you also attach the rope to the frame for even weight distribution.
Just be aware that some public events may not allow for cinder blocks in this instance. They present a tripping hazard, so consider covering them with a sheet or an old towel. That can soften the blow of bumping into or tripping over them.
Step 3: Exercise Weights
Another great idea in a pinch can be some exercise weights if you have them laying around. This is a bit trickier than using something like cinder blocks but can be relatively quick and easy. You have to stack a few on top of one another, running your rope through the holes in the middle.
Tie a knot around the weights to secure them together, then tie a second knot at the top part of the tent frame. As is the case with the cinder blocks, check with local ordinances if you are hosting a public event. Weights may not be allowed depending on which municipality you are in.
Step 4: Fill Up a Bucket with Sand or Water
Continuing in the DIY theme, there is nothing wrong with filling up a bucket using water, sand, or even concrete. When you have a public event with tents, for instance, there are specific weight requirements for each tent leg. Depending on your budget, tent weights can add up quickly.
The highest requirement for each leg is typically around the 40-pound mark. Depending on what filler you use, you may require different amounts. If you are just going with water, you will need to get a bucket big enough to support that weight.
For sand, you need about 3.2 gallons worth of sand. Gravel or concrete, you may need a full 5-gallon bucket to get the job done. Don’t just grab a bucket and fill it; you may not have enough weight for what you need.
Step 5: Fill Up a Bucket with Concrete
If you are looking for something a little sturdier, concrete never disappoints. You can mix some water and dry cement together to create the perfect tent weight. This might take a little longer than some of the other options, but it is safe and will ensure that you meet the weight requirements.
Just keep in mind that the buckets are done when you’re finished with the event. There is no salvaging them and they will need to be tossed out. Still, they make for great weights whenever you need them. If you think that you will make relatively frequent use of tents, they may be worth keeping around.
When you have the bucket full, just attach it to the tent frame. You can use either bungee cords or ropes, attached to the handle of the bucket. Secure at each corner and your tent won’t be going anywhere anytime soon.
Take a look at the difference between wood and concrete foundation.
Do You Need Handyman Services?
Get free, zero-commitment quotes from pro contractors near you.
Making PVC Tent Weights
Depending on how adventurous you are feeling, you can concoct a PVC pipe weight. It is not as simple as some of the other methods and it requires a lot more material to get the job done. Still, they are small enough that you could keep them in storage without much obstruction.
You will need quite a few things to make this happen. A drill, some nuts and bolts, PVC primer, PVC piping, and fasts-drying cement are just a few things needed. Read on to see how you can make heavy, portable PVC piping tent weights. When finished, they should weigh about 40 pounds each and be about 2 feet in length.
Step 1: Drill and Attach Eyebolts
Start by taking your PVC piping and drilling into the caps. You should mark with a permanent market at the center and then drill down using a 5/8-inch bit. Make sure that you wear eye protection whenever using power tools.
With the holes in place, you can attach the eyebolts. These are bolts that have a hook at the end of them. Twist a nut on either side of the cap to ensure that the eyebolt secures properly to the PVC piping cap.
Finally, glue those caps onto the length of PVC piping. You will want to use some kind of super glue with a primer to ensure that they adhere properly. You don’t want the caps coming off at any point.
Step 2: Mix Concrete and Fill the Pipes
In a 5 gallon bucket, mix up some concrete. You can do this with a bag of dry concrete and a little bit of water. Follow the directions accordingly as they may be different depending on the manufacturer. Do not let the concrete dry.
Depending on what type of dry cement that you use, you might not have much time to work with. Pour the concrete into each pipe until it is full, almost to the top. Then stand each pipe up against a wall so that the concrete can properly dry. You might want to mix your cement in two batches so that you don’t have to rush through the filling process. Maybe having a friend help could be beneficial.
Step 3: Glue on the Bottom Cap
Before you glue your caps on, make sure to drill a very small hole into them. This will allow air to flow out of the cap as the glue dries. When you have attached the cap, you should have one long piece of pipe with two caps connected.
All you have to do now is tie each of them to one of the legs of your canopy tent while using the eyebolts to connect them to the corners of the frame. Whenever you need it, you now have four very capable, easy-to-use canopy tent weights.
Though these take a little more time and ingenuity to use, there are major benefits. For one, you can use them anytime. Filling a bucket requires work each time whereas having these pipes made is a one-time endeavor. Secondly, there is no guessing about your weights. You know what they weigh and that they meet any standard. Lastly, they just look nicer. No blocks sticking out, no buckets, either.
Related Articles

Ryan Womeldorf has more than a decade of experience writing. He loves to blog about construction, plumbing, and other home topics. Ryan also loves hockey and a lifelong Buffalo sports fan.
More by Ryan Womeldorf


![The 10 Best Table Saws - [2022 Reviews & Buyer's Guide]](https://cdn-fastly.upgradedhome.com/media/2023/07/31/9070645/the-10-best-table-saws-2022-reviews-buyer-s-guide.jpg?size=350x220)