How To Drain A Keurig Coffee Maker (3 Simple Methods!)
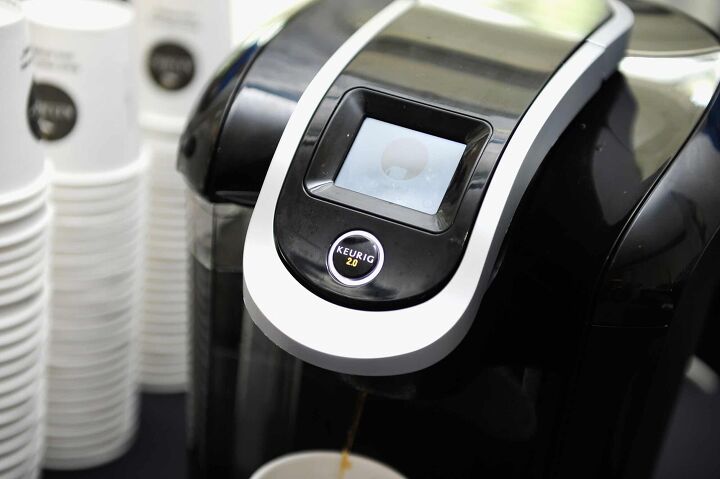
If you own a Keurig coffee maker, you likely enjoy its ability to quickly provide you with a cup of coffee first thing in the morning. This convenience is why many so many people have Keurigs in their homes, as opposed to conventional coffee makers. Your Keurig’s fast delivery of warm water is due to the fact that it stores approximately a cup of water within the housing.
This water should be drained every so often, even if you only enjoy the occasional cup of coffee. Also, draining your Keurig’s water reservoir is crucial if you need to store the unit for an extended period of time. Since the appliance does not come equipped with a drain plug, the process for removing the water isn’t as obvious as one might think.
The procedure for draining the water from a Keurig will typically depend on the model that you own. However, the two most relevant ways are to turn the machine to “brew” and let it drain on its own or disassemble the coffee maker with the help of the manual. Let’s explore how to successfully drain your Keurig based on some of the most popular models.
Simple Method to Drain a Keurig
Even if the external reservoir on your Keurig is empty, there is a way to trick the machine into brewing a cup of hot water. This will effectively remove any water that is being stored inside of the brewer. Regardless of the model your Keurig is, you should attempt this method first before you consider disassembling your coffee maker.
- Adjust the float in the external reservoir. First, pour the water out of the external reservoir and locate the float. It looks like a metal disk and will be located on one side near the base of the reservoir. Reach in and slide the disk into its track, giving it a small push. This should make the float stay in place and the machine will now function as if the reservoir is full.
- Press “Brew.” Put the reservoir back in place, place a cup underneath the spout and press the Brew button. For this step, it’s best to leave a coffee cartridge out and just brew hot water.
- Wait for the PRIME message. As the machine is brewing, examine the LED display. Once the brewing has completed, it should prompt you to add water. If this is the only message displayed, remove the reservoir again, adjust the float, and repeat the brewing process. After this round, the message on the display should read “PRIME.” This means that the internal reservoir is empty.
While this method is very easy and does not require the use of tools, it may not work for all Keurig models. If you are unsuccessful, proceed to the following procedures for disassembling the unit to drain it.
How to Drain a Keurig 1.0 Coffee Maker
In order to drain a Keurig 1.0 brewer by disassembling it, you’ll need a flat head screwdriver, a pair of needle-nose pliers, and a plastic straw. Once you gather all your materials, follow the steps outlined below.
Step One: Detach the Top Portion of the Brewer
To gain access to the brewer’s water tank, you need to go in through the top. Instead of accessing it from the bottom, you can get to it directly by removing the top of the pod compartment. Lift the handle on the compartment and locate the two screws that are holding it in place.
Use your flat head screwdriver to remove both screws. This will allow you to separate and removed the top portion of the machine. Then, gently pull the loosened top of the machine forward to slide it off. This will expose the internal water tank of the Keurig.
Step Two: Disconnect the Silicone Tubes
Once you’ve gained access to the water tank, locate the two tubes that are connected to the top. You’ll find one tube connected to the L-shaped opening on the back-right, and the other connected to the opening on the top of the internal water tank.
These silicone tubes will likely have zip ties fastening them to the metal water filter accessories. To remove these tubes, you need to loosen the zip ties holding them in place. This can be done one of two ways:
- Snip the zip ties off with a pair of pliers. This should only be done if you have extra zip ties to reattach after you drain the tank.
- Use needle-nose pliers to wiggle the zip ties free of the metal attachment.
With the zip ties out of the way, you should now be able to detach the silicone tubes.
Step Three: Pour Out the Water
With the tubes disconnect, you can now invert the brewer to allow the water to flow out of the L-shaped opening. This may be a slow process, as water cannot flow freely without the use of air to displace the water. If you’d like to help speed things up a bit, use a thin straw.
Place the plastic straw over the opening where the silicone tube was once attached to the top of the tank. This should help improve the airflow into the water tank, allowing the water to drain quicker. Continue draining until you have no more water remaining in the tank.
Step Four: Reassemble Your Keurig 1.0
Once the draining has finished, reconnect the silicon tubes. If you wiggled the zip ties off, simply place them pack into the appropriate position. If, instead, you snipped them off, attach new zip ties to fasted the tubes in place.
Then, reassemble the top portion that was slid off and replace the two screws that were removed. That’s all there is to it and you’ve successfully drained your Keurig 1.0 coffee maker!
How to Drain a Keurig 2.0 Coffee Maker
Although Keurig asserts that the internal reservoir on a Keurig 2.0 brewer cannot be drained, there is a way to do it by disassembling the device. The materials you’ll need are a pair of needle-nose pliers, Philips head screwdriver, and plastic syringe. Once you’ve gathered the necessary supplies, follow the steps outlined below to drain your Keurig 2.0.
Step One: Detach Chrome Ring
In order to remove the top of the brewer, which you’ll do in step four, you need to detach the chrome ring located behind the pod assembly. Lift the handle on the pod assembly to expose the ring. It is secured with five snaps and can be easily removed by pushing in and up with a small amount of force.
Step Two: Remove the Bottom, Front and Top of the Brewer
In order to remove the front of your Keurig 2.0, you first need to detach the screws on the base. Use your Phillips head screwdriver to unscrew the six, or however many your unit has, screws from the bottom.
With your coffee machine inverted, slide off the tall silver piece on the front cover and then remove the entire front of the machine. These pieces are secured with hooks that will need to be pushed laterally to remove and may require significant force.
To detach the top of the brewer, turn the machine on the reservoir side and locate the two screws on top. Use your Phillips head screwdriver to remove them. With these screws detached, the only thing left holding the exterior machine together is a series of plastic snaps. Using a flat, spatula-like device work your way around the top of the Keurig to dislodge the entire top piece of the machine.
Finally, remove the exterior wrapper from the outside of your Keurig 2.0. This should expose all of the machine’s internal components.
Step Three: Unclip and Drain the Water Intake Assembly
With access to the brewer’s inner components, you can start by removing the water intake assembly. This can be done by disconnecting the two tubes that are affixed to it, which are held in place by plastic barbs. Once removed, press the middle of the black intake assembly to drain.
Give the assembly a good shake to displace as much water as possible. Once complete, set this piece aside for later use.
Step Four: Free the Internal Filter and Water Tank Assembly
To free the internal filter, you’ll need to locate two screws that hold the water tank, pump, internal filter apparatus together. The first screw is located at the base of the motherboard. Use your Phillips head screwdriver to unscrew it.
To find the second screw, rotate the Keurig around and look for a white plastic washer. Use your screwdriver to remove it. Then, gently slide the entire assembly outwards to detach it. Use special care during this step to not damage any of the wires inside.
Step Five: Detach the Components and Drain
With all of the internal mechanisms freed from the Keurig base, it’s time to slowly start detaching each one. Separate the internal filter from the pump assembly first by firmly separating the silicone tube. This will cause water to start to drain out.
To drain the water in the tank, remove the tube attached to the top. This will allow the air inside to displace the water draining out of the bottom. All that’s last to drain is the brewer. Detach the tube that connects the water tank to the pump assembly. This should cause water to immediately start flowing out. As an option, you can use your syringe to removing any of the remaining water inside of the pump assembly.
Step Six: Reassembly Your Keurig 2.0
With all the components appropriately drained, you can now carefully reassemble the unit in the same order you took it apart. Congratulations, you have successfully drained your Keurig 2.0 coffee maker!
Related Guide

Jessica considers herself a home improvement and design enthusiast. She grew up surrounded by constant home improvement projects and owes most of what she knows to helping her dad renovate her childhood home. Being a Los Angeles resident, Jessica spends a lot of her time looking for her next DIY project and sharing her love for home design.
More by Jessica Stone


![10 Most Dangerous Neighborhoods in Baltimore [Updated]](https://cdn-fastly.upgradedhome.com/media/2023/07/31/9075655/10-most-dangerous-neighborhoods-in-baltimore-updated.jpg?size=350x220)