


How to Cut Studs For Roof Pitch: Measurements & Tools Needed
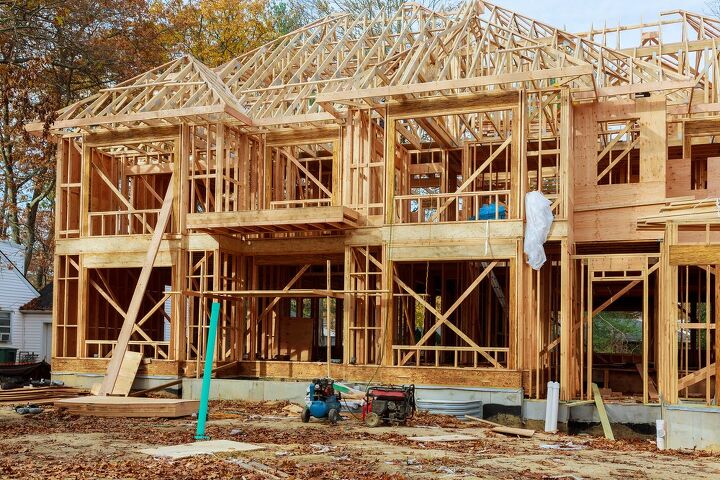
For the do-it-yourselfers out there, building a new roof can be a way to save thousands upon thousands of dollars. Whether it is for your home or a new structure going up, a roof can be an expensive proposition.
But there is more to it than cutting and constructing. There is also the matter of roof pitch. So, when it comes to cutting studs (also known as joists or rafters) for your roof, you have to calculate pitch. When you know the pitch, you can cut the proper length and angle for your joist to build the roof.
First and foremost, though, we need to know how to measure the pitch of a roof.
Do You Need to Hire an Architect or a Builder?
Get free, zero-commitment quotes from pro contractors near you.

The Importance of Knowing Your Pitch
Even if you aren’t building a new roof from scratch, knowing your roof pitch comes in handy. If you are installing a skylight, making an addition, or simply cutting new rake boards, you should know the pitch of the roof.
In order to determine the pitch of your roof, you will need a few things. You’ll need a tape measurer, an 18-inch level (a 24-inch level will work as well), and a pencil. Even if you don’t have these things readily available, you can pick them up for relatively cheap from a local hardware store.
Set Your Saw to The Correct Angle Before Cutting
| Pitch | Angle |
| 2/12 | 9.4 |
| 3/12 | 14.0 |
| 4/12 | 18.4 |
| 5/12 | 22.6 |
| 6/12 | 26.5 |
| 7/12 | 30.2 |
| 8/12 | 33.6 |
| 9/12 | 36.8 |
| 10/12 | 39.8 |
| 11/12 | 42.2 |
| 12/12 | 45.0 |
| 13/12 | 47.2 |
| 14/12 | 49.3 |
| 15/12 | 51.3 |
| 16/12 | 53.1 |
| 17/12 | 54.7 |
Determining the Pitch of the Roof
Start off by measuring 12 inches from one end of your level. Mark that spot. In an existing structure, go into the attic and place the end of your level against the bottom of one of the rafters. Make sure that it is completely level.
Next, take a vertical measurement from that 12-inch mark on your level, going straight to the underside portion of the rafter. That measurement is meant to illustrate how many inches that the roof rises per in 12 inches.
For example: a roof that rises 7 inches for each foot of that roof would have a pitch that is 7/12. Without knowing your pitch, you won’t be able to get very far.
What You Need to Start Cutting
Before you get going on making the cuts for your studs, there are a few tools that you should have on hand. In addition to your tape measurer, you will need a framing square and a saw of some sort. Cordless power saws allow for quicker, more accurate cuts without the hassle of having to run extension cords everywhere.
It is also important to note one thing. While it may not be terribly difficult to cut your studs, it is of the utmost importance that they be square and level. Everything needs to sit together in an accurate way to assure the best fit.
Roof Span and Ridge Beam
To begin, you need to measure what is known as your roof span. This is the width between the outside surface of each of the outside walls. It is important that your measurements be as precise as they possibly can, down to even 1/16 of an inch. Measure multiple times to verify accuracy.
Next, it is time to subtract the width that the ridge beam will take up. The ridge beam is the long, vertical plywood where all of your studs will connect at the very peak of the room. For instance, if you are using a 2×4, your measurement will actually about 1.5 inches. Subtract this out of the total measurement of your building for your adjusted width and make sure to jot it down.
Dividing the Adjusted Measurement
Now that you have your “adjusted” measurement, there is one more thing to keep in mind: each rafter will actually only cover half of the width of the building minus your ridge beam. So, that being said, it is time to divide your adjusted measurement by 2.
So, let’s say you have a 72-inch roof after taking out the width of the ridge beam. Halving that would put you at 36 inches. This final measurement is what is referred to as the run of that building. Make sure that you write down the run measurement alongside your span and adjusted measurement.
Calculate the Length of the Studs
In addition to everything above, you would also apply your roof pitch to get the final measurement that you need. Now, it’s time to find out what the length of each of your studs/rafters/joists will be. Having a roofing calculator can make all of this easier. There are free calculators online, so it will likely be easier to just use one of those.
Lastly, you need to know the rise of your roof. This is the vertical measurement that will tell you how tall the roof is when it is at its highest point above the walls. This is the height of your ridge beam and it will be in your calculator as well.
Plumb Cuts
The plumb cut will be the point where your stud connects to the ridge beam. It is helpful to have stair gauges so that you can measure the first half of your pitch on the vertical part and the second half of the pitch on the horizontal part of your framing square. This will give the square the proper angle.
You can choose which end of your rafter/stud that you want to be the top; this is where you will make your plumb cut. Using stair gauges will give you a correct angle on your pencil mark, providing a more accurate cut.
This is where having a hand or circular saw comes in handy. Use it to cut along the line that you have just created; follow the line precisely or your plumb cut will be uneven. Use a clamp to keep it secured to a workbench for stability and a better cut.
Tail or Seat Cuts
The tail or seat cut is the other end of your stud, the one that will secure to the exterior wall. Naturally, it will be at the opposite end of the stud where you made the plumb cut. Here, you will make your diagonal measurement minus whatever overhang you want.
Measuring the diagonal is meant to give your tail cuts an accurate location. Again, you will use your framing square and (if you have them) stair gauges to make your measurements and to trace out your lines.
Do You Need to Hire an Architect or a Builder?
Get free, zero-commitment quotes from pro contractors near you.
Determine the Depth of Your Cut
For this cut, you will also need to know the depth of your cut. This is the width of your exterior wall. A good standard is about 4 inches or so, just for reference. This could differ, though, so you may need to slide the framing square in order to lengthen or shorten the length of your cut as it needs to be adjusted.
You would also measure any potential overhang here. This is how far off of the roof that you want the rafter/stud to hang. Know this measurement before you make your cuts so that you don’t have uneven overhang in certain spots.
Lastly, all you need to do is saw your pencil tracings. Be as precise as you can since you’re not slicing through the board all the way. The size of the structure will determine how many you will need to cut.

We are a team of passionate homeowners, home improvement pros, and DIY enthusiasts who enjoy sharing home improvement, housekeeping, decorating, and more with other homeowners! Whether you're looking for a step-by-step guide on fixing an appliance or the cost of installing a fence, we've here to help.
More by Upgraded Home Team


![The 5 Best Angle Grinders – [2022 Reviews & Buyer's Guide]](https://cdn-fastly.upgradedhome.com/media/2023/07/31/9071326/the-5-best-angle-grinders-2022-reviews-buyer-s-guide.jpg?size=350x220)


