How To Clean A Brita Pitcher (Step-by-Step Guide)

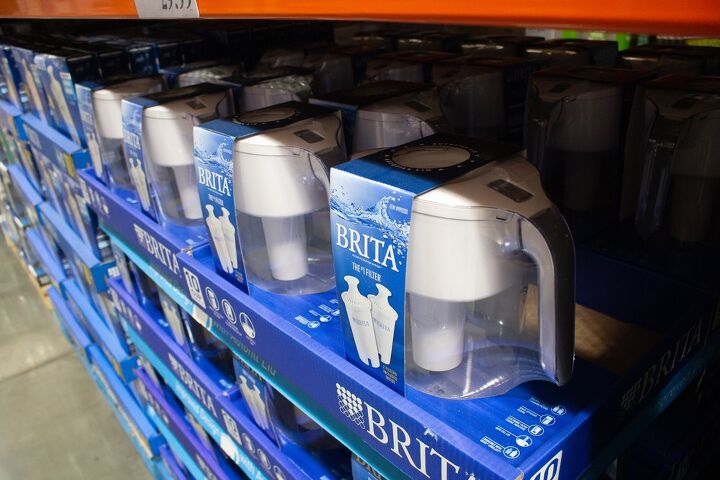
Brita has been one of the most popular go-to’s for people who want to enjoy the taste of crisp, clean filtered water. The most common Brita device to get that delicious crispness is the Brita pitcher, a pitcher that comes with a built-in filter that you can replace. Of course, getting clean water isn’t going to happen if you don’t clean your pitcher.
Aside from regular handwashing with dish soap and water, you will occasionally need to perform a deep clean of your Brita pitcher. This involves taking apart the pitcher, washing each part individually, wiping down any mildew-affected areas with a vinegar-soaked sponge, and replacing the filter.
Though this is a tool that is designed to be a water purification tool, the fact is that not cleaning your pitcher can lead to serious health problems. To keep your water safe and tasting great, read up on this guide to sanitizing your pitcher.
Need a Water Treatment and Purification System Installed or Replaced?
Get free, zero-commitment quotes from pro contractors near you.

How To Clean a Brita Pitcher
It is necessary to clean your Brita pitcher to keep it fresh and prevent mold or mildew. Luckily, it is an easy process that doesn’t take long and is worth the time. Let’s take a look at the simple steps that it takes to clean a Brita pitcher.
1. Disassemble Pitcher
Make sure that there is no water in your Brita pitcher and disassemble it. Remove the lid from the reservoir and remove the filter. Filters last for an average of 4 months, and you should throw them away if it is 4-6 months old.
2. Wash Lid & Reservoir
Run the lid and reservoir under water. Wash each part separately with dish soap and rinse it away with water. Mix 1 cup of water and 1 teaspoon of white vinegar and scrub tough residue or mildew on the lid and reservoir.
3. Dry Them
Dry the lid and reservoir either by hand or with a drying rack. Make sure to be thorough and use a dry rag if you dry the pitcher by hand. Otherwise, place the lid and reservoir in a drying rack for 1-2 hours or more until they are completely dry.
4. Install New Filter
Run cold water through your new Brita filter for 15 seconds and place it in the pitcher. Lock the filter in place to make sure that it is secure. Many new Brita filters don’t require that you prime them with cold water, so check to see what your model requires.
Now, all that you have to do is put your Brita pitcher back together completely. Check for signs of remaining mildew, and clean the reservoir or lid again if necessary.
How Often Do You Need To Clean A Brita Pitcher?
If you’re the proud owner of a Brita pitcher, you already know that these filtered pitchers are fairly easy to care for. They don’t need daily cleans like kettles do. However, you should still clean them whenever you finish off a pitcher full of water. Once to twice a month, it’s best to give them a more thorough cleaning.
How Often Do You Need To Replace A Brita Pitcher Filter?
You need to replace your Brita pitcher’s filter every 4 months on average. Brita filters can last 2-6 months, and factors such as mineral content and water usage affect its lifespan. Many homeowners go through 40 gallons of water in 2 months or even less, and that means you’ll have to replace it 6 times per year or more.
How Much Does A Brita Filter Cost?
The price you’ll pay for a Brita filter depends on the model and the store you buy it from. A typical store will carry a single Brita filter for $7 to $10. Two packs and three packs will range between $14 to $22. With Brita filters, it makes sense to buy in bulk, especially if you intend on using your pitcher for years.
How To Give A Brita Pitcher A Deep Clean
Though a regular cleaning should be able to keep most of the mildew and mold at bay, you still will need to give your pitcher a deep cleaning once in a while. Here’s how to make the most of your cleaning session:
- Disassemble your Brita pitcher. To start giving your pitcher a full cleaning, you’re going to have to give it a cleaning piece by piece. Inspect each piece to see if you have visible mildew. Set your filter aside.
- Scrub your reservoir and lid with dish soap and water. This is a fairly run-of-the-mill part of the cleaning process and should remove most “gunk.”
- If you have any mildew, mix a teaspoon of vinegar with a cup of water. Dip a non-abrasive sponge in the solution and use that to get rid of the mildew. Rinse off with extra water.
- After everything has been given a full cleaning, set them upside-down on a drying rack or a dish towel. Do not put them right side up, since this could end up clogging the filter.
- Grab a new filter if you need one, and prepare it. Older Brita models require you to pre-soak your filter or have the filter run through water for 10 seconds. Newer ones don’t need a pre-soak but will still need to be taken out of the package.
- Once the pitcher is dried, replace your filter. If you’re not due for a new filter, then just stick the old one back in.
By the way, if you don’t have a Brita pitcher and still need to clean it, you can still use this method. It even works on ZeroWater filters.
Can You Put Your Brita Pitcher In The Dishwasher?
Brita products are not dishwasher-safe in the least bit. Because Brita pitchers are designed for the refrigerator and use temperature-sensitive filters, they never were made to be able to withstand the high heat and impact of dishwashers. Placing your pitcher in the dishwasher could easily break it. And the filter? Don’t even think about it.
Even if it’s a pain to do so, you need to hand wash your Brita pitcher. It’s the only way to make sure that they are kept intact. If you have a more advanced Brita filter, hand washing is also going to be the only way to ensure that your sensors and indicators will remain functional after cleaning.
How Do You Clean A Brita Pitcher’s Chrome Lid?
If you have the chrome-style pitcher, chances are that you’ve noticed a little buildup or residue on your chrome lid. It can be a vibe-killer, especially if you love seeing that shiny reflection in your Instagram photos. Thankfully, getting this back to ship-shape is a breeze. Just follow these steps below:
- Mix a teaspoon of vinegar and a cup of water together. Yep, this is the same mixture that works to kill off mildew in the main step. It works well as a polish for chrome, too. If your chrome lid has a thick layer of grime on it, increase the amount of vinegar you pour.
- Use a non-abrasive brush to slowly buff and polish the lid. To get the best possible results, rub the lid in small circles to avoid streaking.
- Let the pitcher lid air-dry. There’s no need to apply chrome polish or anything like that. The vinegar will evaporate, leaving a fresh, shiny lid without a single fingerprint.
My Brita Pitcher Cracked During Cleaning?
Let’s say that you were cleaning or just trying to replace the filter on your pitcher, only to have it crack mid-way. Though it’s quite rare, it can happen, especially if you had to scrape off some food that spilled on the pitcher itself. There’s some good news for people who just had their pitcher crack in their hands.
Brita stands by their products pretty well. They offer a 30-day no-questions money-back guarantee on all their products. As far as pitchers go, they give a 1-year warranty against cracks and breaks. To get a replacement, just call their customer service line and ask for some help.
Need a Water Treatment and Purification System Installed or Replaced?
Get free, zero-commitment quotes from pro contractors near you.

Related Questions
Are Brita products recyclable?
Contrary to popular belief, Brita products (including the pitchers) are fully recyclable. Brita even has a specialized program partnership with TerraCycle to make the recycling process free and easy for users to do. This cuts down waste immensely. To recycle your stuff, all you need to do is go to the Brita Recycling Page and follow the instructions there.
How long can I store water in my Brita pitcher?
You can store your water in a Brita pitcher for around a week or slightly more as long as it’s in a refrigerator, away from the light. Bright light (such as sunlight) will encourage mold growth as well as algae growth.
How long do Brita filters last, if they aren’t being used?
If you’re not actively using the filters you own, they can remain fresh indefinitely. So if you found a Brita filter at the back of your closet, don’t despair. You can still use it if it has not touched water yet.
Is Pur or Brita the better water filter?
Studies suggest that Pur will be able to remove more sediments and substances than a typical Brita filter would. However, having a Brita is more affordable and the brand is more widespread. Having any filter is better than having no filter at all, so if you can’t afford a Pur, getting a Brita is still totally awesome.
Do you need to refrigerate Brita water?
While you do not have to refrigerate your Brita water, the manufacturer makes a point of recommending it. Having cold water is more refreshing, and keeping it in the fridge will help reduce the chances of bacteria growth. Most people who have a Brita filter keep their water in the fridge for both convenience purposes as well as the overall better quality of the water they get.
Related Guides

Ossiana Tepfenhart is an expert writer, focusing on interior design and general home tips. Writing is her life, and it's what she does best. Her interests include art and real estate investments.
More by Ossiana Tepfenhart


