


How to Carry 4×8 Sheets of Drywall
There are times where “do-it-yourself” takes on just that mean: all you have is yourself. While it may be nice to have a helping hand, especially on big projects, that helping hand isn’t always available. That is why it is important to know how to handle the larger items you may come across.
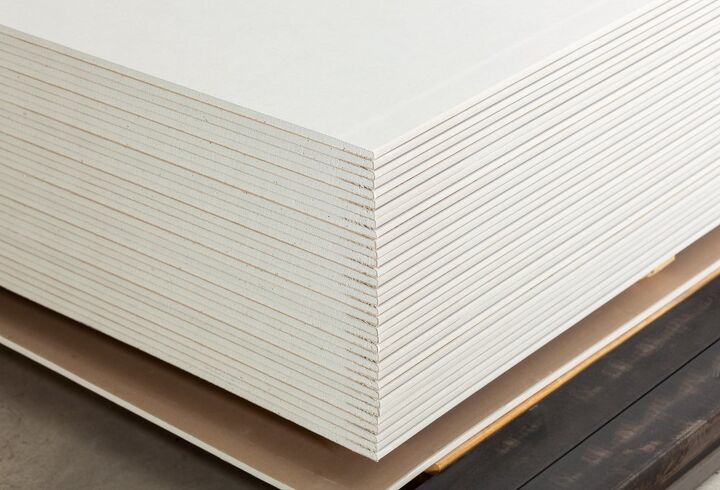
One of those items are 4×8 sheets of drywall. Handling it on your own can be done but it can also lead to injury if done carelessly. Using a panel lifter is the easiest way to transport those sheets from one spot to the next.
But 4×8 sheets of drywall aren’t the only heavy things that you will lift. Here’s a helpful guide for how to lift the heavier things in your next do-it-yourself project.
Do You Need to Hire Drywall Installers?
Get free, zero-commitment quotes from pro contractors near you.

Use a Panel Lifter for 4×8 Sheets of Drywall
Sheets of drywall can round around 80 or so pounds. For some, that may not seem like a big deal. But consider how wide and awkward carrying something that big can be. Coupled together with the weight, it is all too easy to wind up dropping it. At best, you could wind up damaging the drywall. At worst, you could break a toe or foot.
That is why it is important to find a safer, more effective way of moving those sheets from spot to spot. Besides, even just moving them can be taxing and you need that energy for other parts of the project, right?
What Does a Panel Lifter Cost?
A panel lifter will help to take the strain off of your upper body and arms. Not only that, it will make navigating tight corners and spots a bit easier as well. The best part is that panel lifters will run you under $10 in total.
How Do You Use a Panel Lifter?
All you have to do is hook your panel lifter at the center point of the bottom part of the sheet, tip it up, and lift. Make sure to leave your other arm fully extended to keep the sheet balanced. You will be amazed at just how easy it can be to move a sheet of dry wall all on your own.
It’s important to use your other arm to balance the drywall as close to horizontally as you can get it. This will allow you to move it throughout a flat area; it won’t work going up and down stairs. That you will need help to achieve safely.
Hanging Drywall on Your Own
Hanging drywall, the top course at least, can be very challenging if you are taking on the task alone. If at all possible, it is recommended that you have a partner nearby to help you. That said, it isn’t always possible to get the help that we need.
So, if you’re left alone to hang drywall, create a bracket. You can make one between one and two feet from the ends of the sheet. All you need is some 16d nails to do the job. Sink them into your studs, around 48 ½ inches down from the ceiling. Make sure that they go about an inch deep as well.
From here, hoist your drywall sheet up, resting the bottom edge of the sheet on your nails. You can then push the sheet up using just one hand, tacking it into place while using the other. All you need to have is a couple of drywall nails that have been pre-started.
Other DIY Tips to Make the Job Easier
Now that we know how to move 4×8 sheets of drywall in a more secure manner, there are a few other tips that can make your next project just a little easier. After all, it is about working smarter, not harder when you are left on your own.
It is always recommended that you get help wherever possible to ensure that the job is done safely and properly. That said, we don’t always have help available. When working solo, it is important to do things as safely as possible to avoid damaging the project or hurting yourself along the way. Here are a few situations where a little help can make going solo possible.
Using a Clamp for Long Boards
Just like 4×8 sheets of drywall, handling long boards can be far tougher than you may have realized. After all, even if it is light in weight, it can be easy to mishandle long boards due to the awkwardness of their size.
The first way to handle long boards is by using a clamp. You stick the clamp wherever you choose in order to support the loan boards in place. Then you just nail a block right below the work; you can even hammer in some nails to give the bottom corners of the plywood a place to sit while you place the plywood and fasten it.
Use Nails on Long Boards
Another trick for properly handling long boards on your own is to use a few nails and a level, both things most handymen have on them. Nails are great because they leave small holes that can be easily fixed, so the “extra” work is not that much extra.
After all, putting a few extra nails in is a lot better than the alternative: a cabinet falling down while you’re trying to fasten it. That is a mess that no handyman wants to deal with as it can cost a lot more than cleanup time.
Fastening on Your Own
If you have to fasten a big board or piece of plywood on your own, there is an easy way to go about it. Start your nails or screws before you fully hoist the load. Trying to hold a board or sheet in the proper place can be difficult enough but trying to start a screw or nail can be nearly impossible.
When you hang plywood, drywall, or a rim joist, make sure that you mark your framing locations, then tack some fasteners in the material. Make sure you do this before you start hoisting. Doing it this way means that you can hold the material steady with one hand, using the other to successfully drive in the fasteners. Not to mention the fact that it keeps your fingers from an accidental whacking.
Do You Need to Hire Drywall Installers?
Get free, zero-commitment quotes from pro contractors near you.
Hanging Heavy Doors
A common problem for even the most amateur of handymen is having to deal with a heavy door. This could be because it got knocked off kilter or that you need to replace a joint. Whatever the case, lifting the door, maneuvering it, and doing what you need to can be incredibly difficult.
If you have a heavy door to lift, try using a lever and a fulcrum. This will help to ease any of that awkwardness that you can experience hanging a door on your own.
Getting the door back on the hinges can be easy, too. Use a 1×4 fulcrumed on a block of wood, around ¾ inch or so. You would like the top of the hinges up, slip in your pin at the top hinge, and then line the others up and drop your pins. All without the heavy awkwardness of trying to lift the door on your own.

We are a team of passionate homeowners, home improvement pros, and DIY enthusiasts who enjoy sharing home improvement, housekeeping, decorating, and more with other homeowners! Whether you're looking for a step-by-step guide on fixing an appliance or the cost of installing a fence, we've here to help.
More by Upgraded Home Team


![The 5 Best Angle Grinders – [2022 Reviews & Buyer's Guide]](https://cdn-fastly.upgradedhome.com/media/2023/07/31/9071326/the-5-best-angle-grinders-2022-reviews-buyer-s-guide.jpg?size=350x220)


