How Long Can You Leave A Tarp On A Roof? (Find Out Now!)
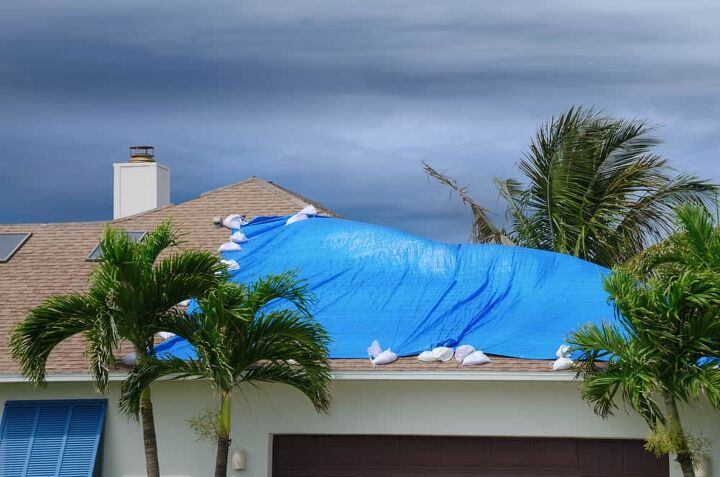
A tree has fallen onto your roof or there are leaks from long-term roof disrepair. You know you need to replace your roof but can’t do it just yet. The quickest fix is to add a tarp. A tarp is a large sheet of strong, water-resistant or waterproof material that’s typically made of canvas or polyester and is coated with polyurethane or made of plastics such as polyethylene.
When installed correctly, roof tarps can protect your home for up to 90 days. How long will depend on how you installed the tarp and which material you or your contractor used. If you expect your project to last more than three months, consider installing a long-term tarp, which could last between one to two years.
Do You Need Roofing, Siding, or Gutter Installers?
Get free, zero-commitment quotes from pro contractors near you.

Getting Started
When choosing the best tarp for your roof, you’ll want to consider a number of factors: what the purpose will be, what type of damage you’re looking to repair, and in what kind of environment do you live. For example, if you live in Florida, you need a cover that’s able to hold up to hard and sudden rainstorms.
In addition, you must ensure that the size is appropriate for your project. Make sure to measure the area of the roof you’re looking to cover before you head out to the store to get what you need.
What Type of Tarps are Best for Roofs?
Vinyl tarps provide a longer service life and better protection against harsh elements and rough wear. The heavy-duty vinyl variety can last up to 10 times longer than standard poly tarps.
It’s important to consider the following:
- Weight: The heavier the tarp, the more appropriate it is for roofing projects.
- Waterproof: It may seem obvious, but when you’re fixing a roof that’s been damaged by heavy storms, you’ll want to look for a tarp that’s waterproof. Not all tarps can keep rainwater out of your home. For example, the lighter tarps used for camping are meant to keep you dry but will probably not hold up to a driving rain. In this case, look for a poly tarp that’s meant to slick off pouring rain and keep water from reaching the wooden supports of your roof.
- Mold Prevention: The heavy-duty poly tarp is mildew-resistant. By installing a tarp like this, you’ll be keeping out mildew which leads to mold, ensuring the safety not only of your home but of the people who live inside of it.
How to Install Your Tarp
Here’s what you’ll need to successfully install your tarp.
Materials:
- Wood screws
- 3 ¼-inch roofing nails
- Wood decking
- Tarp (of course)
Tools:
- Extension ladder
- Work gloves
- Tape measure
- Angle broom
- Safety glasses
- Screw gun
Now you’re ready to start the project.
Step 1: Position the Tarp
Ensure your tarp is properly positioned and weighted down with wooden planks before securing it to your roof. The tarp must be fully sandwiched, so it won’t come loose in inclement weather conditions.
- Start by partially unrolling your tarp to fully cover the damaged area from the roof’s eaves to the peak. Make sure to leave an additional 4 feet of material on every side.
- Create your anchor board by rolling the tarp’s peak-end with a 2 x 4-inch board and nailing the tarp to your board with 3 ¼-inch nails. The board must be 2 feet longer than the tarp’s width and should sit against the roof to avoid the collection of rainwater, snow, or debris. Affix this board to your roof using a screw as a temporary anchor.
- Interpose the tarp by nailing a second 2 x 4 board to the first. This step ensures the tarp remains tight and fully protective.
- Repeat the two steps above three times.
- Finally, position the sandwiched tarp across the ridge and down the roof’s side, while making sure it runs along the eaves’ line.
Step 2: Firmly Secure the Tarp in Place
Fully secure your roof tarp to prevent flapping. This will prevent water and debris from entering the damaged area.
- Screw through the rolled 2 x 4 boards using your screw gun. The screws must pass securely into the roof.
- Secure the tarp’s remaining sides with additional 2 x 4 boards using your screw gun and screws. These boards do not need to be rolled in the tarp.
- All of the edges of your tarp have to be secured. If this is not done properly, your tarp won’t effectively prevent further damage to your home.
Remember that roof tarping is a temporary solution to protect your home from further damage. Once your tarp is up, make sure to get your roof inspected and repaired to avoid any additional damage
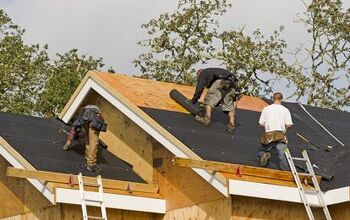
Do It Yourself Vs. Hiring a Professional
Installing Yourself
Do it yourself tarping might be a cheaper option but it’s not the safest choice. Even the most physically fit people could face a variety of problems they didn’t foresee. At the very least, make sure you have all the tools, self-protection gear, and materials you will need before starting on the tarping project.
Getting a breakdown of the overall costs for tarping depends on many factors. For example, if you go to a nearby Walmart, a 20×20 roofing tarp will cost you between $20 and $80. Then factor in the cost of tools and supplies
Other factors that may influence pricing include:
- The size and quality of the tarp to be used.
- The roof pitch
- The extent of the roof’s damage
- Number of slopes to be tarped
- Amount of “2×4”’s or 1″x’s needed
Call a Roofing Pro
Calling a professional to install your roof tarp is never a bad idea, especially if you don’t feel confident in doing the project yourself. A DIY job may not be sufficient depending on the extent of the damage.
Professionals are trained to install properly the first time as well as in how to save your home from any additional damage. They have all of the tools necessary in case of unforeseen situations that might arise. They can also assess the damage to your property on the spot.
In addition, professional roofers can inspect your roof and give you a damage estimate immediately. Having that estimate upfront will better prepare you to deal with your insurance company. The more prepared you are, the quicker your repairs can happen.
On average, hiring a contractor to perform your tarp installation will cost you between $200 and $500. On top of having to pay for the tarp itself, you also have to factor in the cost of labor, “emergency” premium charges, and the strips of wood that will secure the tarp to the roof.
Do You Need Roofing, Siding, or Gutter Installers?
Get free, zero-commitment quotes from pro contractors near you.
Related Questions
Does insurance cover my roof tarping?
It really depends on if you’re doing it yourself or hiring someone. Insurance can pay up to $1,000 for emergency tarping performed by a licensed contractor.
Can you add a tarp without using nails?
Yes, just follow these simple steps: Find the source of the leak. Measure the dimensions of the material to be used. Pick up a self-adhesive tarp and install it.
What’s the difference between waterproof and water-resistant?
Tarps that are “waterproof” offer full protection from water and moisture. Water-resistant tarps only repel water for a limited amount of time but don’t guarantee protection from harsh weather or stormy conditions.

We are a team of passionate homeowners, home improvement pros, and DIY enthusiasts who enjoy sharing home improvement, housekeeping, decorating, and more with other homeowners! Whether you're looking for a step-by-step guide on fixing an appliance or the cost of installing a fence, we've here to help.
More by Upgraded Home Team