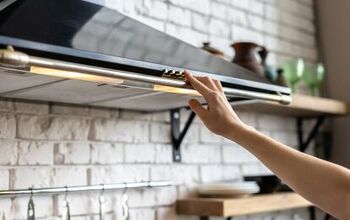
Can You Vent A Dryer Through The Roof? (Find Out Now!)
Nowadays, it’s hard to find a home that doesn’t have some kind of washer-dryer combination. Dryers in particular are incredibly useful, but in order for a dryer to work properly, there must be proper ventilation. In this article, the ins and outs of roof ventilation will be explained, and some common misconceptions will be dispelled as well.
Yes, a dryer can be vented through a roof. Venting through a roof is beneficial for a few key reasons, though there are some downsides associated with this kind of venting as well. Venting through a roof is ideal for homeowners who can’t vent through any exterior walls. The closer a dryer is to the roof, the easier venting will be.
Do You Need Ducts or Vents Installation or Replacement?
Get free, zero-commitment quotes from pro contractors near you.

Roof Venting Background
First, it should be pointed out that there are builders, contractors, home inspectors, and dryer vent cleaning technicians out there who disapprove of roof ventilation, but this will be discussed later and in detail. But in general, houses that have slab foundations utilize roof venting, and despite how many tradesmen say this isn’t good, it seems like roof ventilation is quickly becoming a modern construction standard.
The International Residential Code states that a venting duct should be no more than 35 feet long. A dryer vent duct will start at the dryer and end at either the wall or the roof. The Code also says that ductwork should be as straight as possible from beginning to end, as turns and bends can interrupt airflow and become areas where lint builds up.
What Necessitates Venting Through the Roof
Back in the day, most homeowners just wanted their dryers to vent efficiently, but these days the majority of homeowners are concerned with aesthetic qualities as well, which means that ductwork manufacturers now have to make products that are efficient and reliable while also being visually attractive. Here are some scenarios which often necessitate venting a dryer through a roof.
Neighbors Are Close By
If your property is in close proximity to others, then roof ventilation will in all likelihood be better than venting through the wall. This is because wall ventilation, in this instance, could cause your dryer to vent directly into your neighbor’s property, to the point where they may even smell the fumes inside there home.
If you’re living in a townhome, where the buildings are often adjoined, then it’s quite likely wall ventilation will not even be possible. Therefore, venting the dryer through the roof will be the only feasible option in this instance.
No Other Access to the Exterior
If there’s no other way to reach the home’s exterior, then venting through the roof will be necessary. Say, for example, you have a laundry room that’s in the interior part of your home. If it’s more than 35 feet away from all exterior walls, then venting through the roof will be best. This is because most homes have the space for vertical ductwork construction, and in a lot of cases the ductwork will be out of sight and out of mind.
Wall Venting Is Visually Unattractive
If venting through the wall causes your home to be visually unattractive, then venting through the roof will be a better option. Roof ventilation is not uncommon; after all, a chimney is a ventilation device, and these are found on virtually all homes. If things can be situated so that your chimney and dryer vent are in close proximity, then you won’t have to worry as much about dryer ventilation causing your home to be an eyesore.
Minimal Ductwork Required
If you’re trying to ensure that your ductwork is as minimally invasive as possible, then you should have your dryer close to a roof so there’s no need for elaborate ductwork. If your washer and dryer are not in your basement but on an upper floor, then venting through the roof will be easier.
However, having a washer and dryer on upper levels of a home could present some other challenges, and one should keep these possible challenges in mind before they pursue this kind of dryer ventilation.
Prevent Rodent Infestation
Small rodents and reptiles can come into your home via the ductwork if the exit vent is too close to the ground. All it takes is one rodent knowing they can access your ductwork and eventually you’ll have a full-scale infestation on your hands.
But an infestation isn’t the only problem that can result from rodents getting into your ductwork. When rodents do manage to get inside, they often get trapped, and eventually they die because of lack of food and hydration. You’ll know something has died in your vents if you begin to notice the repulsive smell of decomposition.
Birds & Other Animals
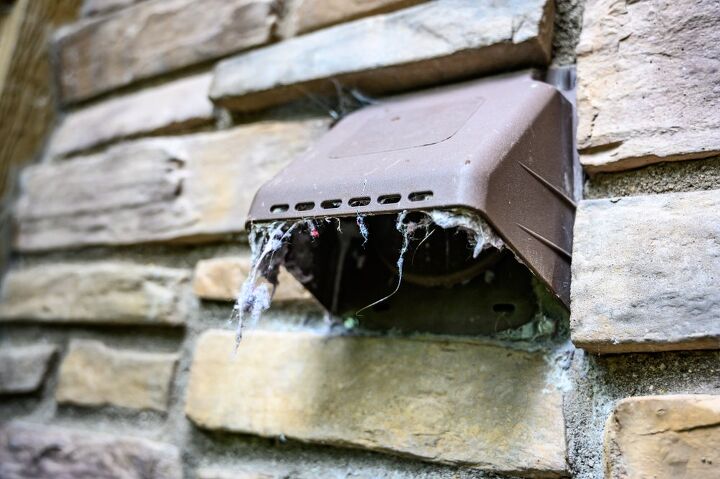
Birds have also been known to use ductwork for nest-building. If a bird decides to make your ductwork its home, then such will clog your vent and restrict airflow. When airflow is restricted, your clothes won’t dry properly and there’s also a significant risk of a fire starting.
If you live in a part of the country that has particularly cold winters, then it’s during this season when the rodent problem will rear its ugly head. This isn’t the case, however, for those who choose to vent a dryer through the roof, as the rodents and animals discussed above typically don’t access ductwork at such a height. Furthermore, you can install some sort of screen to ensure that squirrels, birds, and other high-climbing animals can’t access your dryer vent.
Preventing Damage
If your dryer is located in the basement, and it’s in close proximity to a playroom or another space that your children use often, then you might want to consider venting through the roof instead, as this way you won’t have to worry about your children damaging the ductwork.
Children can also come into contact with the dryer vent outside (if it’s at a reachable position). And if children can access it, this means that animals can as well. Ductwork damage can be costly to repair, and in some cases an entire system replacement is necessary when a significant section of the system has been damaged.
For this reason, if you have young children and/or large dogs running around your home, then it’s best to vent your dryer through your roof. This way you can ensure that the ductwork is away from humans and animals that might damage it, both inside and outside.
Preventing Emission Recirculation
Today’s laundry products contain fragrances, chemicals, and a range of organic compounds, and that’s why you might experience headaches, trouble breathing, or an increased heart rate when you’re exposed to the fumes of laundry products for too long. With your dryer venting from the roof, you and your family will be safely out of range, so nobody will have to worry about health consequences being a byproduct of dryer venting.
One specific problem with venting a dryer through an exterior wall has to do with recirculation. If your dryer is venting to an area outside that has little circulation, then there’s a good chance the fumes will recirculate back into your home, either through an open window or another means of entrance. Dryer fumes recirculation is especially prevalent in urban areas, as buildings are compact and air circulation is weak.
Ensuring Roof Venting Is up to Code
As was mentioned earlier, the International Residential Code endorses roof venting, which isn’t that much of a surprise considering it’s been found to be an effective way of eliminating moisture that’s the result of clothes-drying. But just because roof dryer venting is endorsed doesn’t mean you can set up any kind of dryer vent installation and call it adequate.
Your system will need to be in line with local building codes, and you’ll also want to have certified dryer exhaust technicians oversee the installation. These experts will also make sure your system is maintainable, and this is important as a dryer vent system can last a couple decades if it’s taken care of well.
Building Code
The International Residential Code and International Mechanical Code both state that a dryer vent must terminate moist air by forcing it out of the building’s exterior. It’s not specified where the vapor should exit the building, but it’s clear that a roof meets the standard set by both codes.
Additionally, there should be no screen on the vent, as this can restrict airflow and lead to problems like lint buildup, corrosion, and even fires. A dryer vent system will need a backdraft damper as well to ensure better airflow. Dryer vents can’t exhaust fumes under soffits, and there may be other local codes that you must follow in order to vent your dryer through your roof.
If you hire local contractors, surely they will be able to construct ductwork that’s in line with local code and internationally accepted standards. This way, you won’t have to worry about your system being in violation of building regulations, which by extension means you won’t have to worry about your system posing a threat to you or your property.
Certified Dryer Vent Exhaust Technicians
More and more certified dryer exhaust technicians are coming around to the idea of venting a dryer through a roof, and there’s nothing in the Chimney Safety Institute of America (CSIA) literature which ranks one venting location as superior to another. What’s stressed is using short, rigid runs while keeping bends and elbows to a minimum.
There have, however, been changes to the standards recently, so you’ll want to hire a professional who’s up-to-date when you need ductwork installation.
If setting up a roof-exiting dryer vent system is impossible in your home or business, then a certified dryer exhaust technician will tell you this so you don’t undertake an expensive installation that goes nowhere. You should get a handful of opinions before you hire a company to execute dryer vent installation, as this way you’ll know exactly what your situation is before you start tearing up your home or business.
Manufacturer’s Recommendations
You should consult your dryer’s manual before you attempt to install elaborate ductwork. The manual should include useful instructions and recommendations for venting, though specific reference to the roof may be absent. If you’re not pursuing a DIY dryer vent system installation, and most homeowners don’t have the tools and know-how necessary to execute this, then knowing these specifics isn’t all that important.
What’s important is that you ensure you hire a team that knows your dryer and its ventilation requirements. This team should also be endorsed by the CSIA, an industry association that was referenced earlier. Technicians that are licensed by this association are always up-to-date with changes in their industry.
How to Install a Roof-Accessible Dryer Vent System
First things first: you should not pursue a DIY dryer vent installation if you do not possess the tools, know-how, and experience required. The vast majority of homeowners nowadays don’t possess any of these requirements, and that’s why professional dryer vent exhaust technicians are out there.
Even if you’re not installing a system on your own, it’s still beneficial to know how the installation process works. That’s why you should read through the section below, where the dryer vent installation process is briefly explained. Keep in mind that this is just a general outline of a dryer vent system installation, and that the team you hire may do things differently. Let the experts you hire guide the way, as they’ll know what’s best for your property.
Step One: Taking Measurements
To begin, start at your dryer and then walk to the spot under the roof where the dryer vent will exit. Now, using a tape measure, measure the distance between these two spots. If the distance is below 35 feet, then you shouldn’t have any problems setting up and using the ductwork. But if the 35-foot limit is exceeded, then you’ll need to find a different location for the vent to exit the roof.
Step Two: Drawing & Making the Hole
The next step is drawing an outline on the spot where the dryer vent will exit the roof. Once an adequate outline has been traced, a hole must be drilled through this; then the rest of the outline can be cut out. A reciprocating saw should be used to make the hole.
Step Three: Cutting and Trimming Shingles
Next, from the roof, the shingles must be cut and trimmed so the hole below is not obstructed. The edges don’t have to be perfect, bu they should be as close to the outline as possible, as this will ensure less sealant is required and therefore reduce the risk of leaks springing.
Step Four: Installing the Vent Cap
Now it’s time to install the vent cap. First, the pipe must be put through the hole. Once it’s through, it should be attached to either the siding or the roof deck. The pipe should then extend down so it’s accessible from inside the building.
11/4″ nails are sometimes required to keep the vent cap in place. Galvanized roofing nails could also be used if the vent cap is being attached to the roof deck.
Step Five: Seal the Hole With Tar
When all the above components are correctly in place, you should then seal the hole you created earlier with a reliable sealant, such as tar or something more roof-specific. Don’t seal the hole when it’s hot outside, as sealant usually doesn’t harden correctly when it’s exposed to high temperatures and humidity.
If there are cracks or gaps in the seal, then you can expect leaks eventually, and these may create hard-to-reach problems given the location. Only stop sealing once it’s 100% clear that there are no gaps and cracks in the seal.
Step Five: Putting a Hole in the Attic Floor
Once the exterior components have been secured, the next step is drilling a hole in the attic floor, as through this hole the pipe passes on its way to the dryer below. You may need to cut a hole through multiple floors to accommodate the pipe, or it may be in a location that requires only one cut before the dryer’s location is reached.
The tracing procedure addressed above should be followed every time a hole needs to be cut in the floor/ceiling. Taking precise measurements here is essential, as all the holes must line up perfectly to ensure the pipe’s path to the dryer is not obstructed.
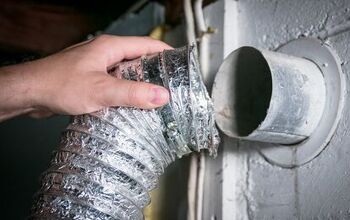
Step Six: Connecting the Dryer to the Pipe
At this point, a four-inch metal duct elbow must be attached to the back of the dryer, and it can be secured using a duct clamp. The elbow must be facing upward, as it has to connect to the 4 inch metal duct pipe.
Ensuring that the duct elbow is firmly attached to the dryer is important, as this is the first component that moisture, lint, and compounds will come into contact with when they exit the dryer. Therefore, if there’s any sort of looseness here, then it’s likely insulation won’t be good and you could even have fumes and particles leaking out of the dryer.
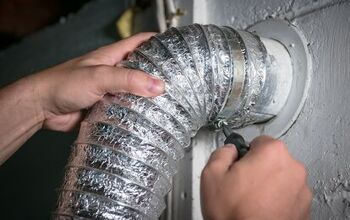
Step Seven: Reinforcing the Joints With Metal Foil Tape
Once the ductwork has been set up and secured, you should go around and seal every joint with metal foil tape. This is done to ensure good insulation and prevent fumes from exiting at some point during the ventilation process. This tape can be purchased at a local hardware store or bought online; it’s not that expensive.
Do You Need Ducts or Vents Installation or Replacement?
Get free, zero-commitment quotes from pro contractors near you.
Why Roof Dryer Venting Is Sometimes Discouraged
While venting through a roof is becoming more widely accepted, there are some downsides associated with doing this, and these should be considered before you pursue venting in this way. In some cases venting through a roof isn’t even possible, but in the cases where you can (but don’t have to), some of the known downsides may discourage you from venting in this way.
Water damage, improper moisture drainage, and frequent roof dryer vent cleaning are three of the main factors that discourage individuals from venting through a roof, and each of these factors will be briefly discussed below.
Water Damage
Say a bad storm comes through and batters your home with rain. If your dryer’s roof vent is not installed correctly, then the roof may take on more damage than it would’ve had the vent been absent. This is especially true if you did not seal the vent cap well or if the pipe is not properly secured in place.
You’ll know that the roof is damaged, from the outside, when you see water only trickling down off its sides. Damage will be more obvious on the inside, as you’ll see damp water stains on the ceilings, indicating there’s a leak above.
When water gets in the nooks and crannies directly under the roof, removing it can be challenging. And if it’s not addressed properly, it can lead to wood rot and other structural problems.
Moisture Buildup
Hot air rises, and that’s why it can be easily transported through a venting system and out of a home. Furthermore, a dryer doesn’t just exhaust moisture, as with this there’s often lint and other particles. But when a dryer finishes a cycle, these last plumes are not able to get out of the system, and that’s because there’s nothing propelling them up.
When this remaining moisture settles in the ductwork, it can create corrosion, clogs, and other barriers to airflow. Remember that lint goes up too, and when wet lint collects in ductwork, too hot a temperature could ignite this buildup and cause a dryer fire. Sometimes it’s hard to detect buildup, which is one reason why routine dryer vent cleaning and maintenance are so important.
Routine Dryer Vent Cleaning
Venting a dryer through the roof will necessitate routine dryer vent cleaning and maintenance, and this can be more costly and time-consuming then wall ventilation. A dryer that’s vented through a wall, especially if it’s near the ground, is easier to deal with; some homeowners can even clean these on their own. To avoid any hassles, get assistance from expert dryer vent cleaners.

Matt loves everything DIY. He has been learning and practicing different trades since he was a kid, and he's often the first one called when a friend or family member needs a helping hand at home. Matt loves to work with wood and stone, and landscaping is by far his most favorite pastime.
More by Matthew Mountain