


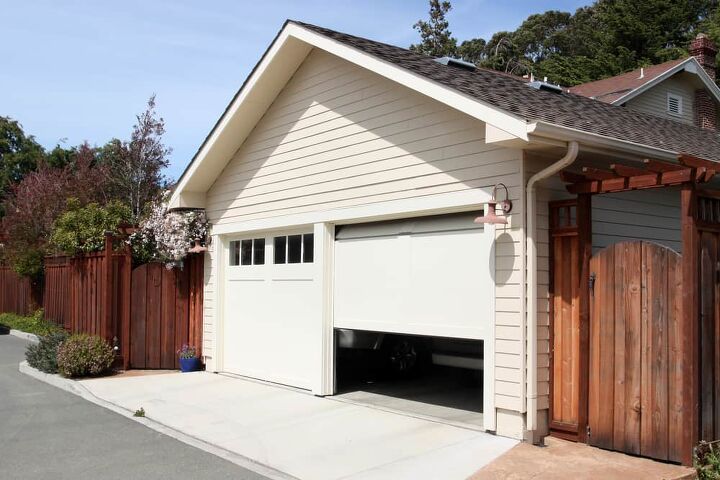
Garage Door Won't Close In Sunlight? (We Have A Fix)
Garage doors are a convenient way to enter and exit your home. The sensors work to lift and lower the garage door. However, they also work as a protective mechanism to prevent injury to things under the garage door.
If your garage door doesn’t close in the sunlight, you should install a sun shield. The sun shield will allow the garage door sensors to align while keeping the sun out of the way.
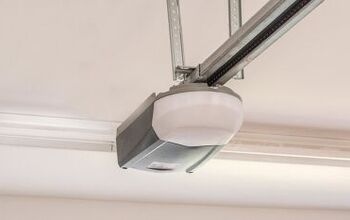
How Garage Door Sensors Work
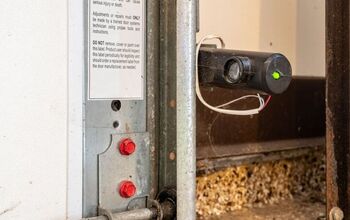
Typically, a garage door sensor includes a photo-eye sensor. The purpose of the photo-eye sensor is to determine if anything is blocking the garage door’s path. These sensors can detect objects as well as people.
The sensors work when an infrared light runs between the two photo eyes. If the path of the light is blocked, the sensor won’t work, and the garage door won’t close. When the path is clear, the infrared light can run between the two eyes lifting and lowering the garage.
Do You Need a Garage Door Opener Repair or Adjustment?
Get free, zero-commitment quotes from pro contractors near you.

Why Sunlight Affects Garage Door Sensors
Sunlight can affect the functionality of garage door sensors. Because garage door sensors use infrared light and the sun carries infrared light, the two can clash. Not surprisingly, the sun’s infrared light is more powerful than that of the garage door sensors.
If sunlight shines on the garage door sensor, the infrared light won’t run between the two photo eye sensors. The sensors cannot signal to one another to close the garage, so it will stay open.
Three Ways to Block the Sun from Shining on the Sensors
If you notice that your garage door struggles to close on sunny days, the sunlight is probably blinding the sensors. You can move your sensors out of the sunlight, but this can be a hassle. This is especially true because the sun changes angles and directions throughout the day.
Instead of maneuvering your sensors, try these solutions to block the sun so that your garage will close automatically.
1. Use a Cardboard Tube
You can use a household item like a paper towel or toilet paper cardboard tube to block the sun.
Tools You Need for the Job:
- Cardboard tube
- Knife or scissors
- Duct tape
Step 1: Cut the Cardboard Tube
Cut the cardboard tube so that it is two to four inches long. Trim the cardboard tube down until it’s slightly longer than the sensor. If the tube is too long, it could block the sensor completely.
Step 2: Slide the Cardboard Tube Over the Electric Eye
Slide the cardboard tube over the electric eye so that it is centered. Make sure that the tube has no bends. If it does, straighten it out so that it doesn’t block the sensor.
Step 3: Attach the Cardboard Tube to the Back of the Sensor
Using duct tape, secure the cardboard tube in place to the back of the sensor. The tube will keep the sunlight from blinding the sensor; however, leave room in front for the sensor to work.
2. Use Some PVC Pipe
Another option to block the sunlight from blinding your garage door sensors is PVC pipe. This is a good alternative to cardboard tubes as they won’t become soggy if you live in a wet climate.
Tools You Need for the Job:
- PVC pipe
- Hacksaw
- Pencil
- Power drill
- Size 11 drill bit
- Zip ties
Step 1: Cut the PVC Pipe
Cut a one inch wide PVC pipe to about two inches long. To do this, mark the pipe’s length with a pencil, then use a hacksaw to cut the excess off. The PVC pipe should just barely stick out over the sensor so that it doesn’t block it.
Step 2: Drill Holes Around the Edge of the PVC Pipe
Using a power drill and size 11 drill bit, drill two to four holes around the edge of one side of the PVC pipe. The holes only need to be wide enough to fit a zip tie. The zip ties will connect the pipe to the sensor, so it’s essential to use the size 11 drill bit.
Step 3: Slide the PVC Pipe Over the Sensor
Slide the PVC pipe over the sensor and center it so it doesn’t block it. To be sure that the pipe isn’t blocking the sensor, look for the green light. If the sensors are misaligned, the light will flash red.
Step 4: Attach the PVC Pipe to the Sensor
Attach the PVC pipe to the sensor with the zip ties. Slide a zip tie into one of the holes on the pipe, then connect it around the back of the sensor. Use one to three more zip ties to secure the PVC pipe on the sensor tightly.
3. Use a Sun Shield
If you would prefer to buy something to block the light from the sensors, sun shields are a good option. They are small black boxes made of cardboard that you can find at most hardware stores.
They have an inconspicuous look because they look like the sensors. Sun shields work with specific makes and models of sensors, so check your user manual before purchasing.
Tools You Need for the Job:
- Sun shield
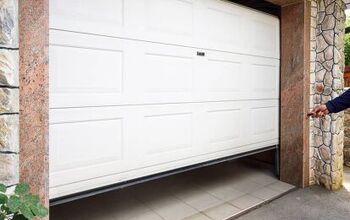
Step 1: Unscrew the Wing Nut from the Garage Door Sensor
You can find the wing nut outside the garage door sensor, and you can turn it by hand. Turn it clockwise until the wing nut comes off entirely.
Note: Set it in a safe spot so that you don’t lose track of it.
Step 2: Fold the Sun Shield Into a Box Around the Sensor
Remove the sun shield from the packaging and follow the instructions. Slide the shorter flap onto the sensor’s right side, then fold the long flap over the sensor.
It should create a small box. Line up the hole of the sun shield so that the bolt is sticking out of the sensor.
Step 3: Slide the Shield in Place and Reattach the Wing Nut
Slide the shield into place and make sure the sensor can still peek through the hole in the sun shield. You will know it is in place when you see a small, hollow box on one end of the garage door sensor. Turn the wing nut clockwise to keep the sun shield in place.
Step 4: Adjust the Sensors Until the Green Light Shows
If your sensors are not aligned, they will not work. Adjust the sensors up and down slightly until the green light shines. This will indicate that the sensors are aligned.
How to Bypass Garage Door Sensors
In the worst-case scenario, if you cannot close your garage, you can bypass the sensors.
Follow the steps below to bypass the sensors.
Tools You Need for the Job:
- Microfiber cloth
- Screwdriver
- Measuring tape
- Hammer
- Two pieces of two by four timber the same height as the position of your door above the ground
- A helping hand
Step 1: Clean the Area
Before you begin disabling your sensors, you should clean the area to see if that solves the issue. Make sure that nothing is blocking the door from opening and closing. Remove any clutter that could be blocking the sensors and then try to see if the door will close.
If it doesn’t, use a microfiber cloth to clean the lenses of the sensors. There could be dirt or dust preventing them from working properly. If the garage door still doesn’t close, move on to the next step.
Note: Be sure to use a microfiber cloth as it will not scratch the lens, unlike cotton or wool.
Step 2: Check the Sensors for Proper Positioning
Check that the sensors are correctly positioned. If they are misaligned, they won’t work.
Using your fingers, tighten the wing nuts on the sensors as tight as they can go. This will ensure that they are in the right position on the brackets. Also, verify that you have secured the brackets to the garage door; if they aren’t, tighten them with a screwdriver.
Step 3: Check the Wiring
If there is loose or damaged wiring, it could cause the sensors not to work correctly. Check for any damaged wires coming from the sensors. If you find any, turn off the power to the garage to prevent injury.
Contact an electrician if you do find damaged wiring. If there is no damage and the door still isn’t working, move onto the next step to bypass the sensors.
Step 4: Attempt to Close the Garage Door
If you can, it is best to disengage the sensors when the garage door is down. If the garage door is open, the door could fall when you switch to manual mode. If it’s open and it won’t close, move onto the next step. If you have managed to close the door, proceed to step 6.
Step 5: Prop the Garage Door Open
If the door is open, measure the distance between the garage door and the ground. Then cut the two pieces of two by four timber to that measurement. Position the wood vertically on either side of the door. Use the hammer to put them into place so you can tightly position them in the gap.
Step 6: Put the Garage Door Into Manual Mode
To put the garage door into manual mode, look for the manual release cord. This is going to separate the trolley that opens and closes the door from the automatic system. The manual release cord will be next to the motor, and it is usually red.
Pull down the cord. This should give you the ability to open and close the door by hand. If the door is stuck open, ask someone to hold it while you remove the timber. When you remove the wood, the door’s weight will be entirely on the other person, so communication is vital. Together, gently lower the door.
Step 7: Manually Open the Garage Door
Once the door is closed and in manual mode, you can open it again by pulling down on the red cord. Pull it in the motor’s opposite direction to prevent the cord from becoming trapped by the mechanism. You may need someone to help you with this depending on the weight of the door.
If you want to switch back to automatic mode, open the door while pulling the cord towards the door. The trolley will connect back to the automatic system, and you should be able to use the button again.
Do You Need a Garage Door Opener Repair or Adjustment?
Get free, zero-commitment quotes from pro contractors near you.
Related Questions
How often should I service the garage door?
You should service a garage door at least once a year if there are no issues. Having it serviced regularly will prolong the life of your garage door. Annual maintenance will include lubricating the door, tightening bolts and screws, and adjusting spring tension.In addition to annual maintenance, you can also do monthly checks to prevent issues. To conduct your monthly assessment, determine if you can open the door manually from the outside. You can also check for unusual noises and ensure that the garage door closes completely without issue.
What is the average cost to replace a garage door sensor?
The battery life of a garage door sensor is typically three to five years. If the garage door sensor reports a low battery, you can change it yourself relatively inexpensively for about $5.However, if you need to replace the sensors completely, they will cost $85 to $95 plus the professional labor costs. The total cost will be around $170.

Stacy Randall is a wife, mother, and freelance writer from NOLA that has always had a love for DIY projects, home organization, and making spaces beautiful. Together with her husband, she has been spending the last several years lovingly renovating her grandparent's former home, making it their own and learning a lot about life along the way.
More by Stacy Randall


![12 Washing Machine Brands to Avoid [with Recall Data]](https://cdn-fastly.upgradedhome.com/media/2023/07/31/9075781/12-washing-machine-brands-to-avoid-with-recall-data.jpg?size=350x220)


